How to draw a Lion
How to draw a Lion
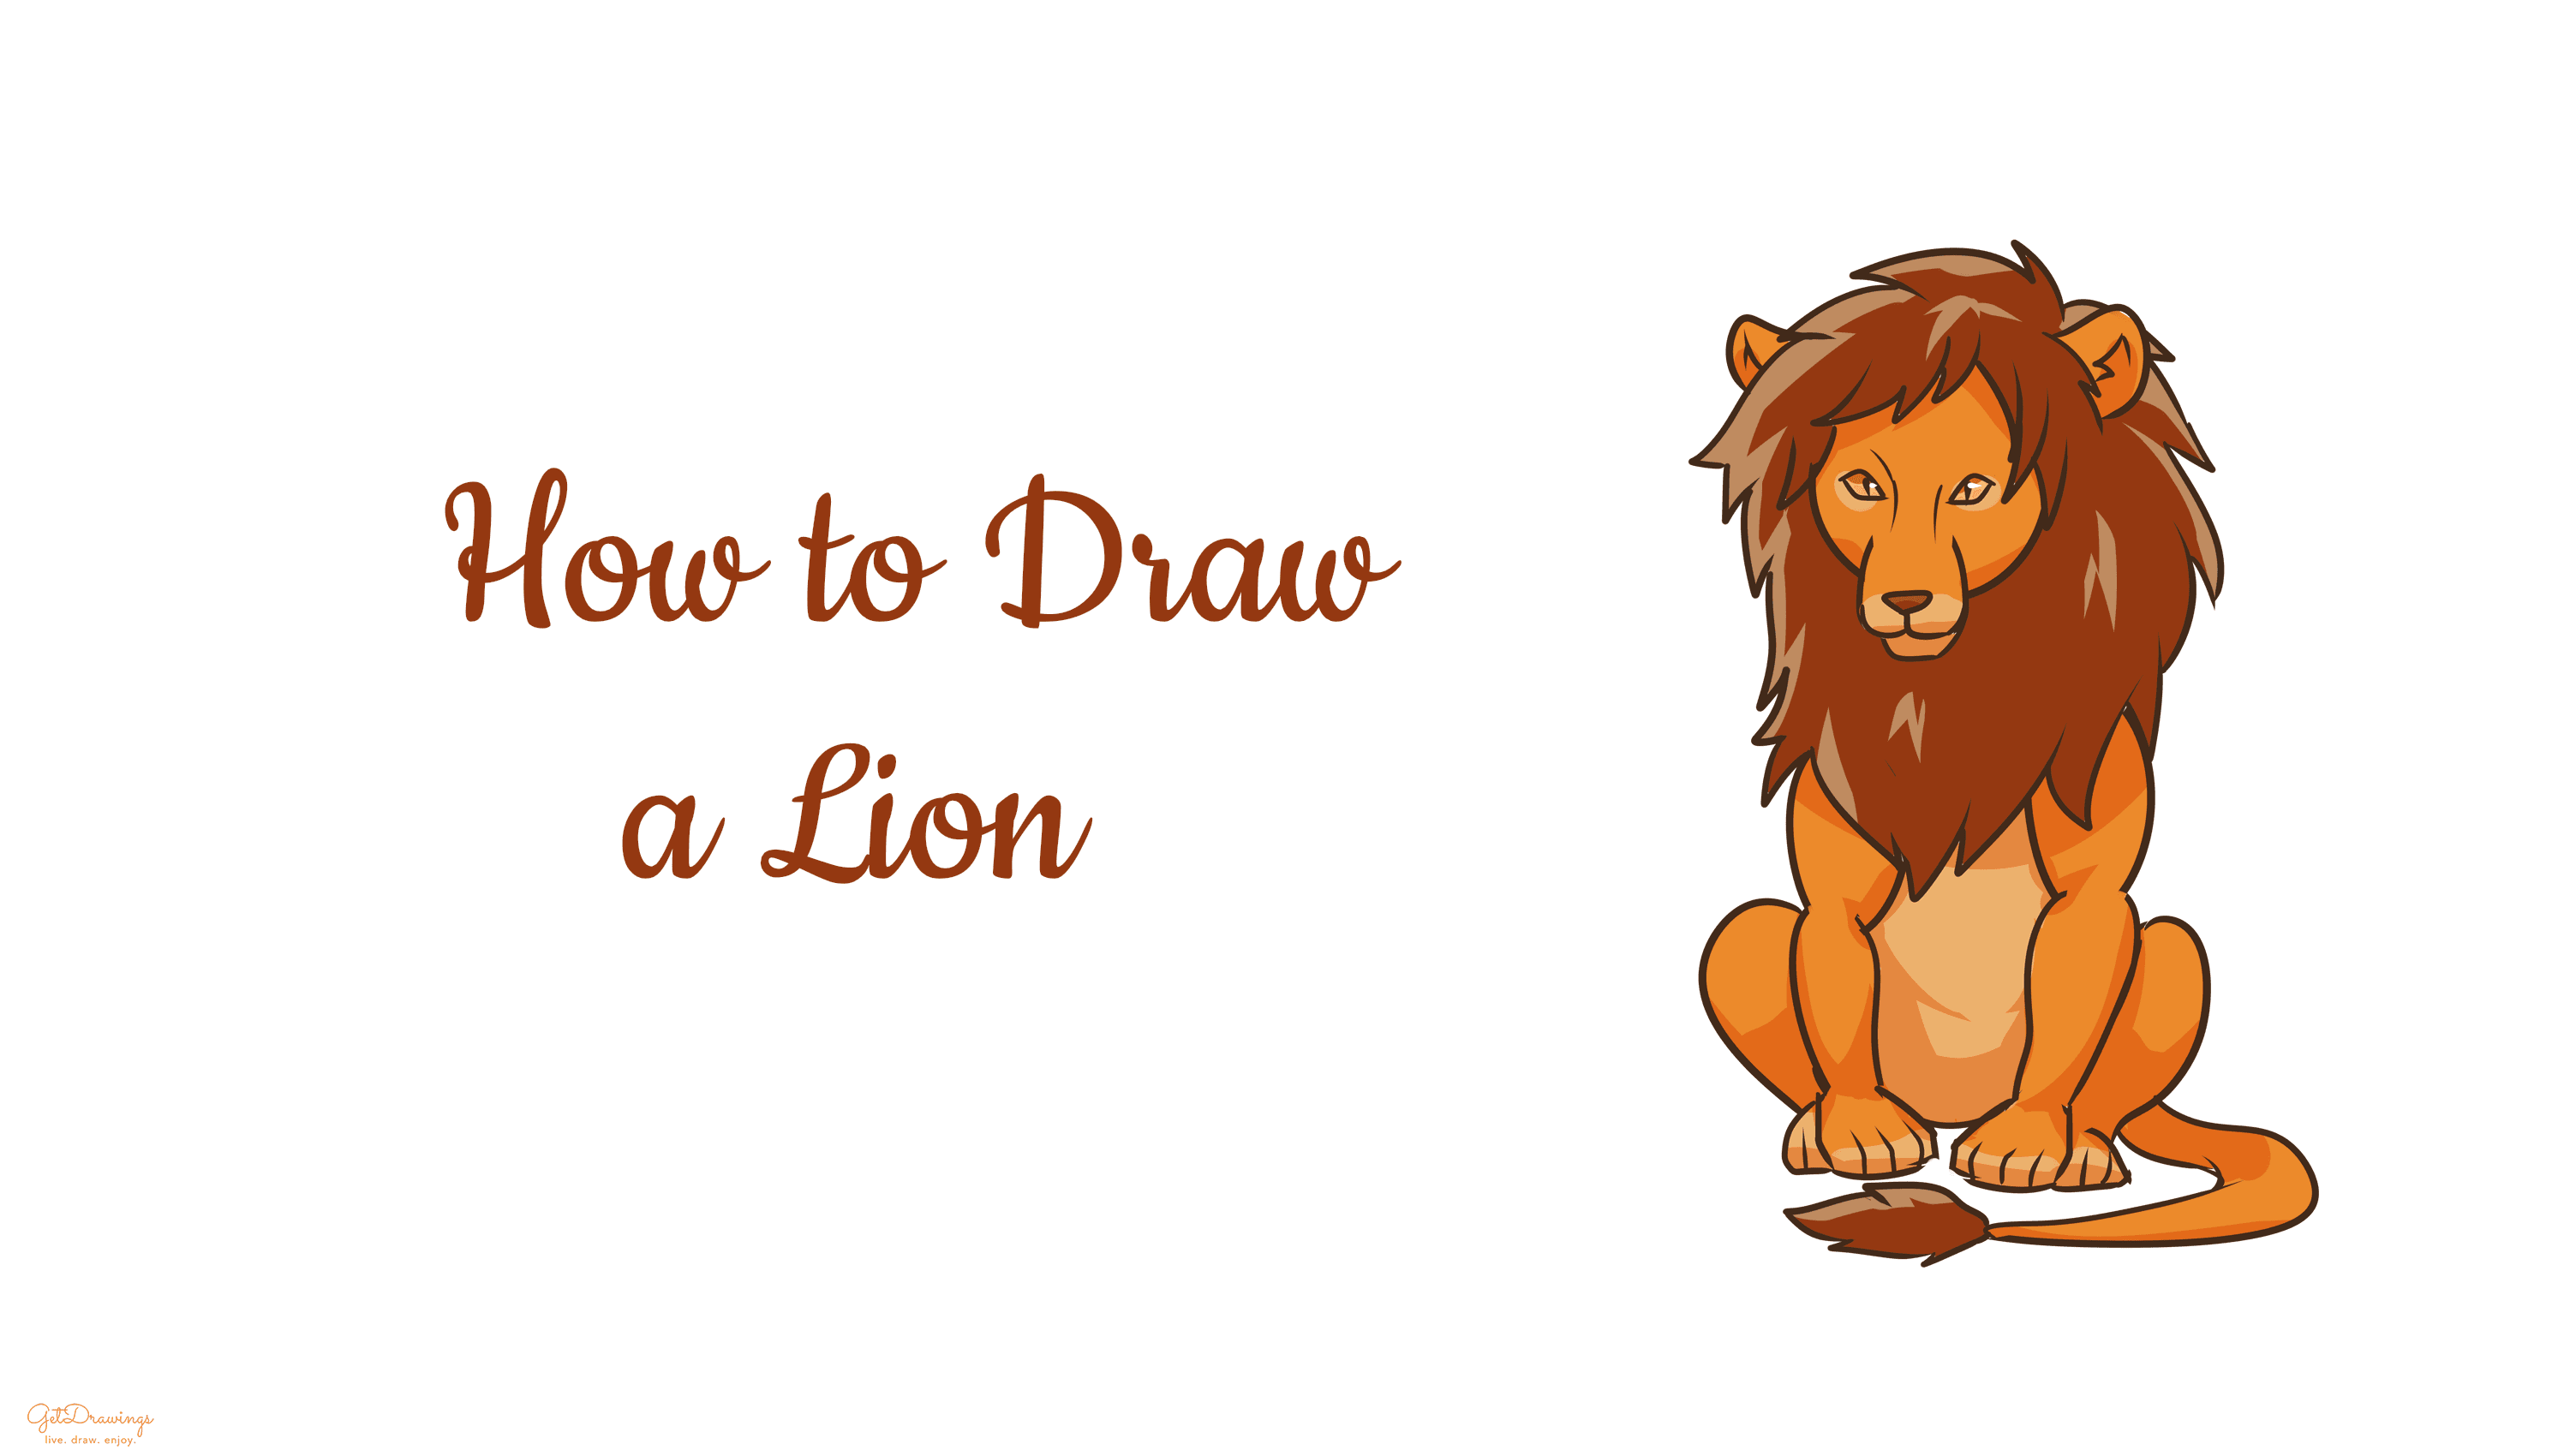
Do you know an animation by Disney named Lion King? It mostly consists of lion and any other animal related to the story. Lion in the story was depicted as King of the Jungle. They typically inhabit grasslands and savannas. Being a carnivore mammal, they’re also the most widely recognized animal symbols in human culture. If you want to know how the lion would look like and how to draw them, you can follow these steps and prepare several things beforehand. You’ll need paper, a pencil and an eraser. Now you’re ready to draw!
Steps:
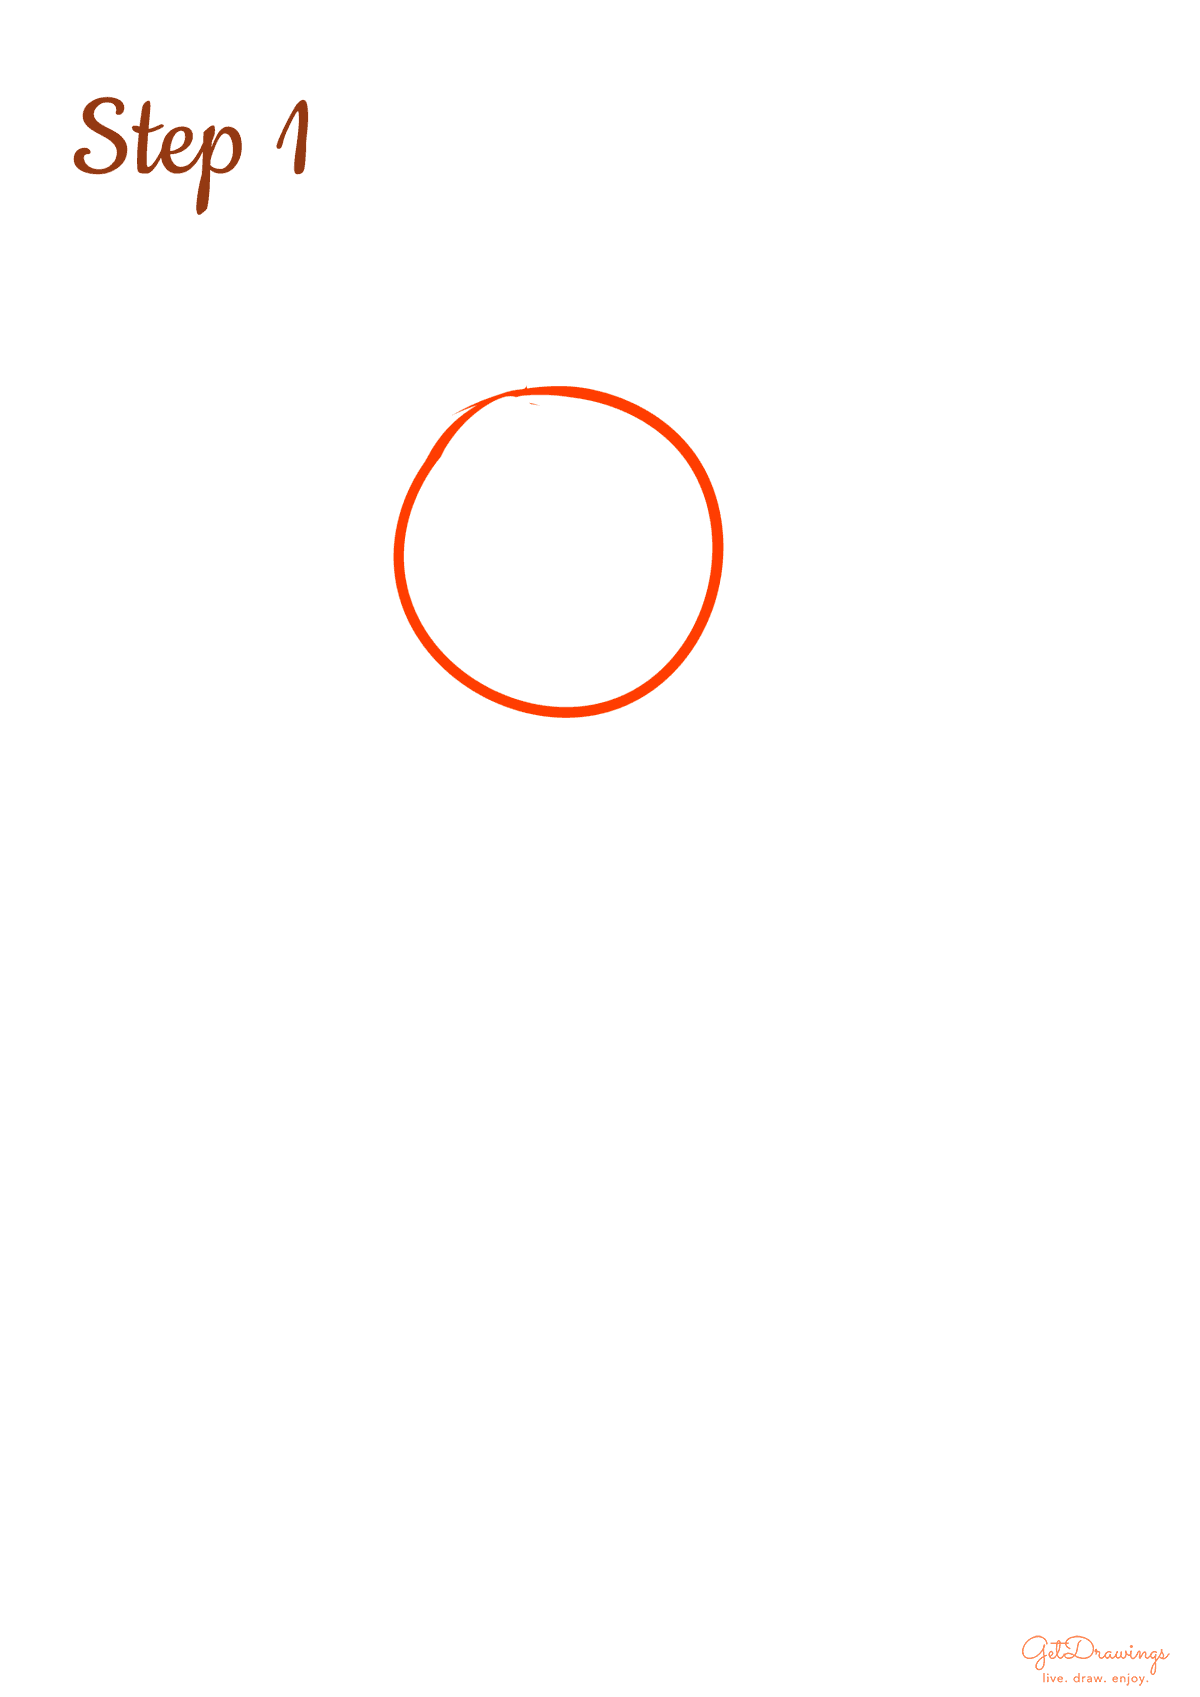
Step 1: First of all, we’ll start by drawing the guidelines. The purpose of guidelines is to help you estimate the size of the head, body, and to guide you in drawing the rest of the body. Therefore, we’ll draw a circle first. This will be the head guideline.
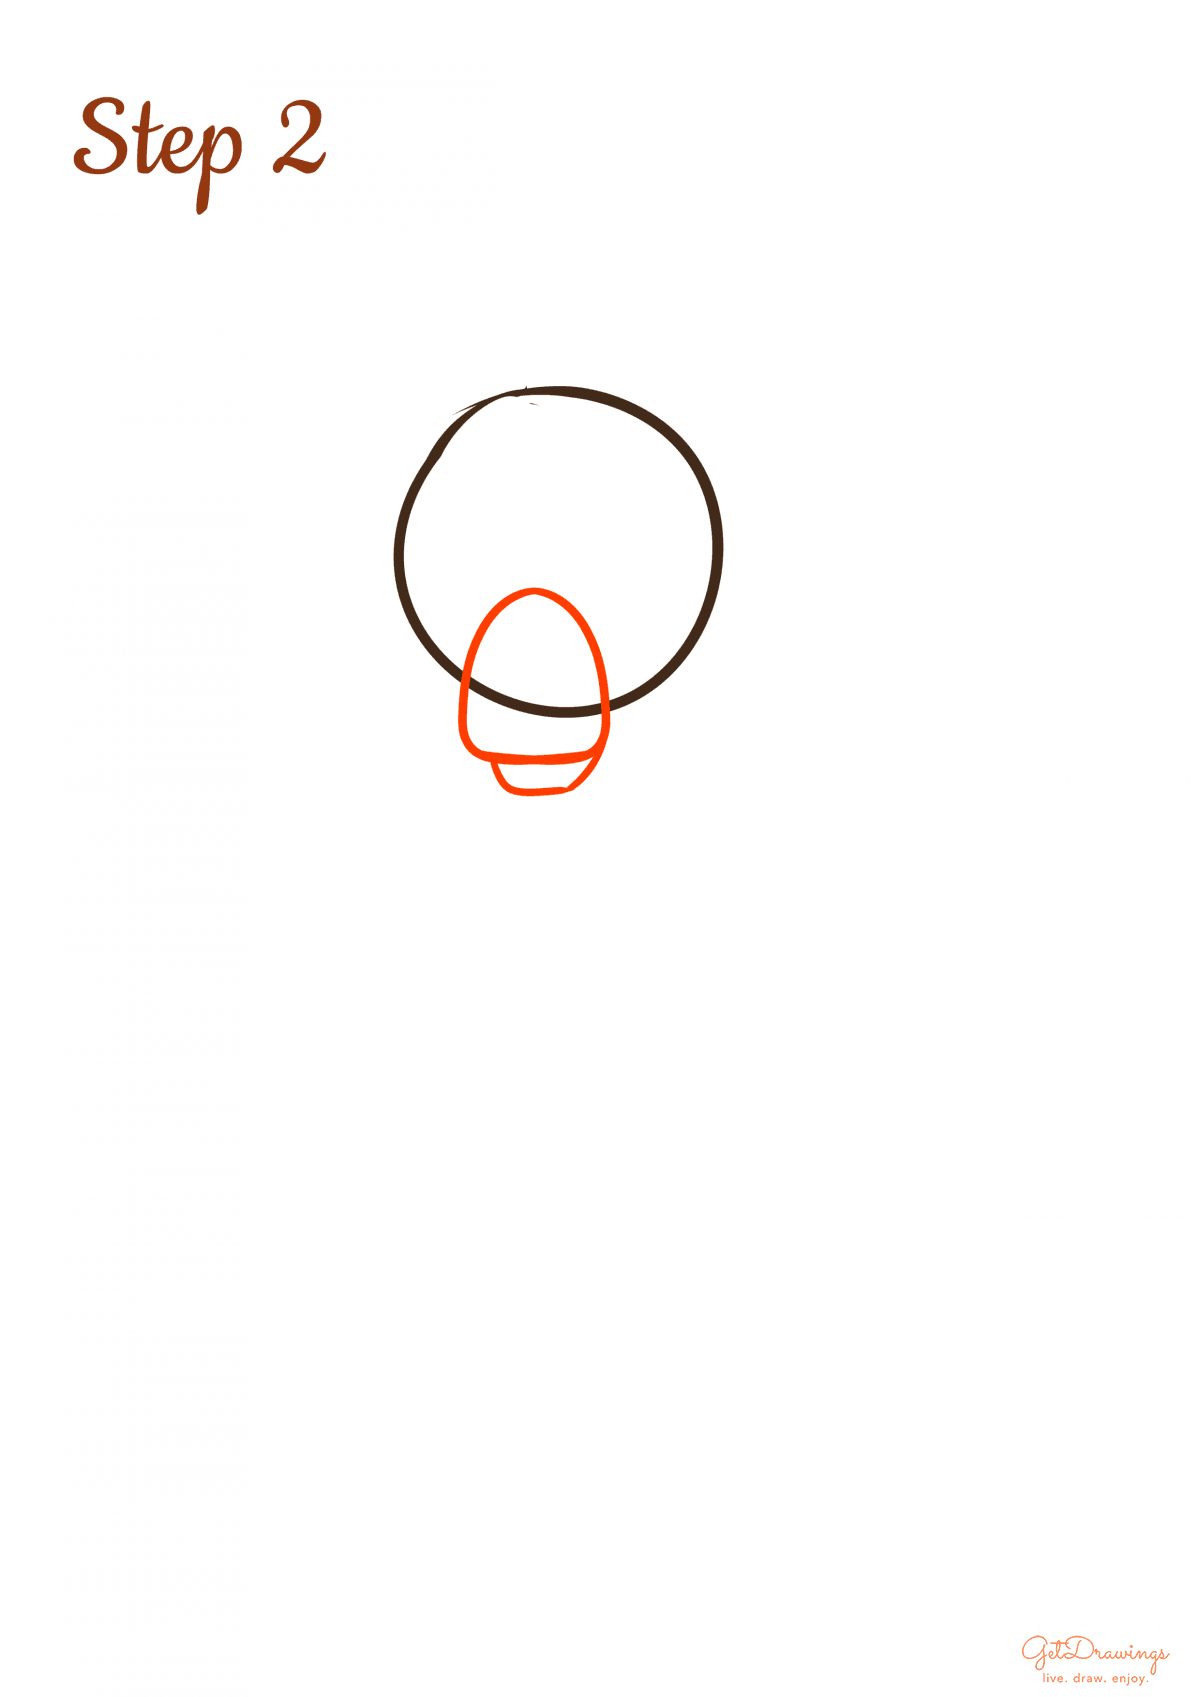
Step 2: Moving on to the next step. We’ll add its snout by making a vertical bullet-like shape with additional curve below it. The curve below depicts its lower snout.
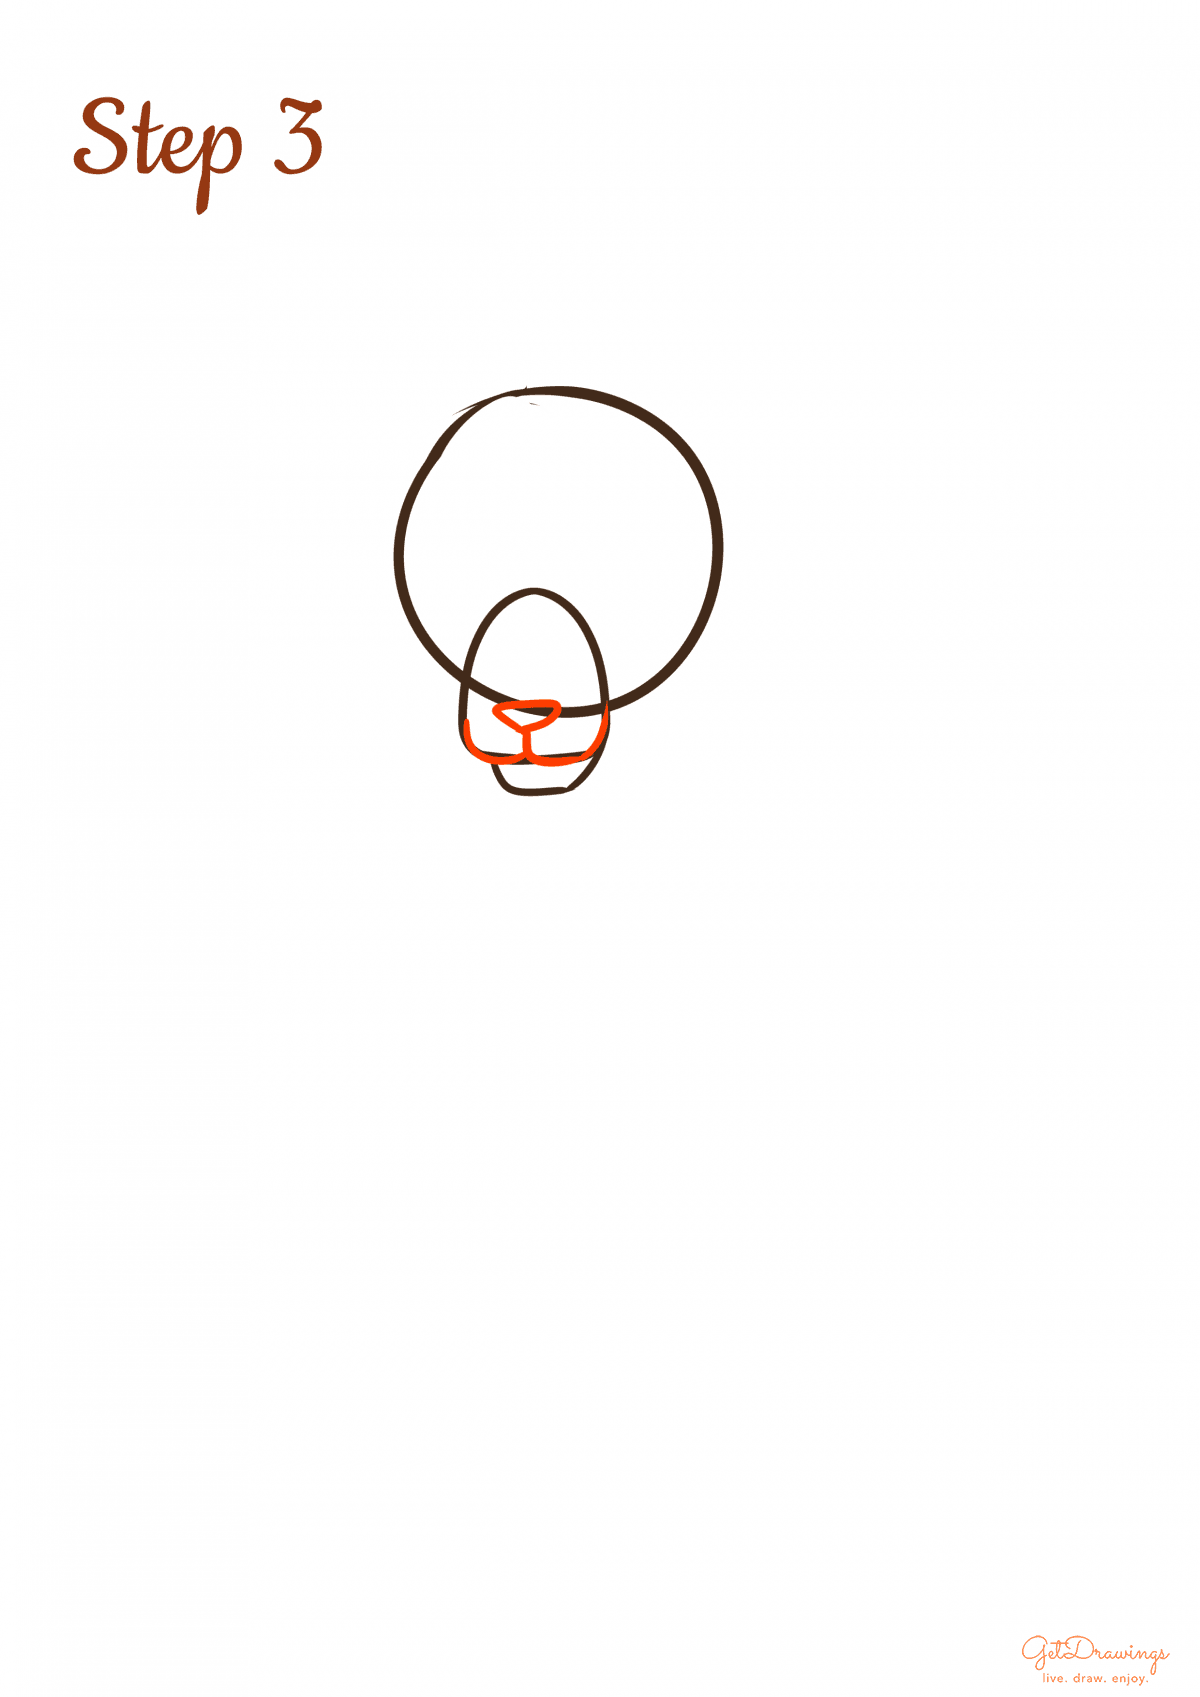
Step 3: After the previous step, we’ll continue drawing its detail on the snout such as nose and mouth. The nose can be drawn in a curvy small triangle on the snout. Add the mouth by making a curvy “w”-like shape below it.
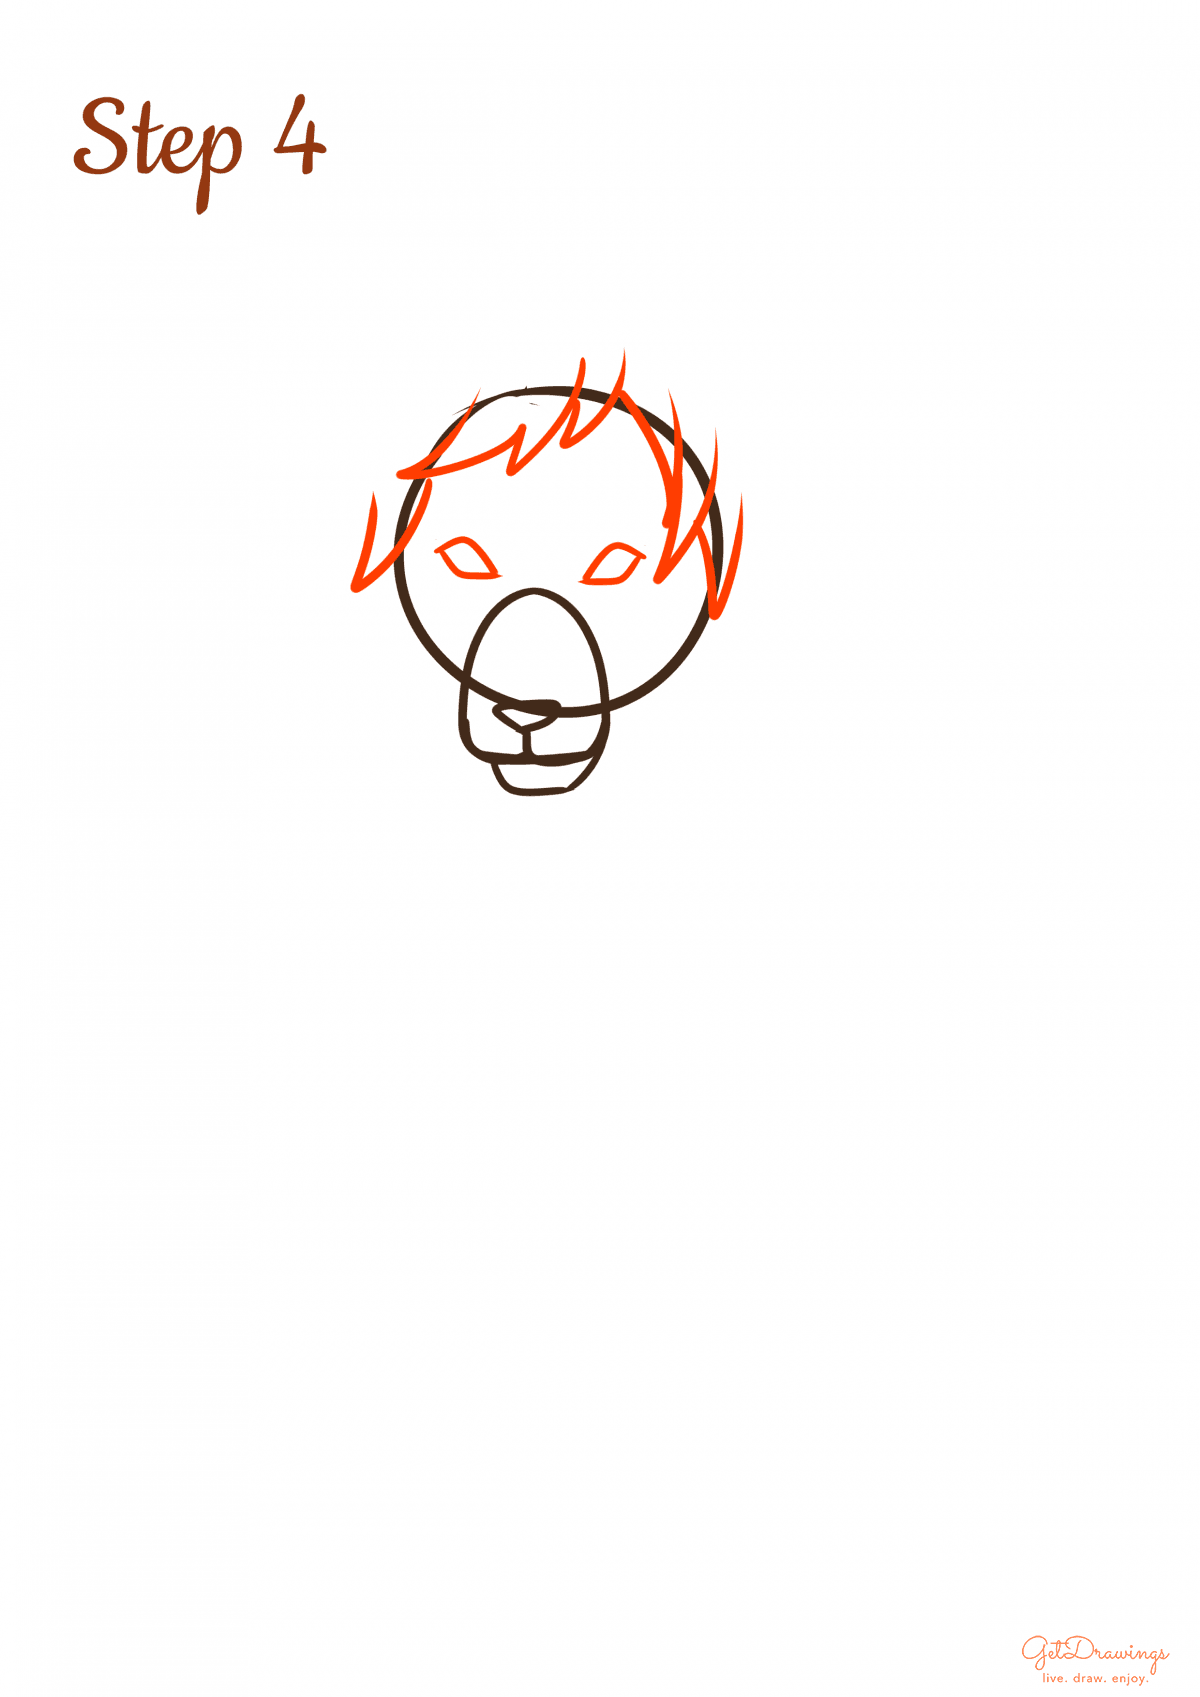
Step 4: Continuing the detail of Lion’s face, add its fringe by creating uneven curvy lines intersecting the head guideline (see picture to better understand). After that, add its eyes by making two leaf-like shape on top of the snout.
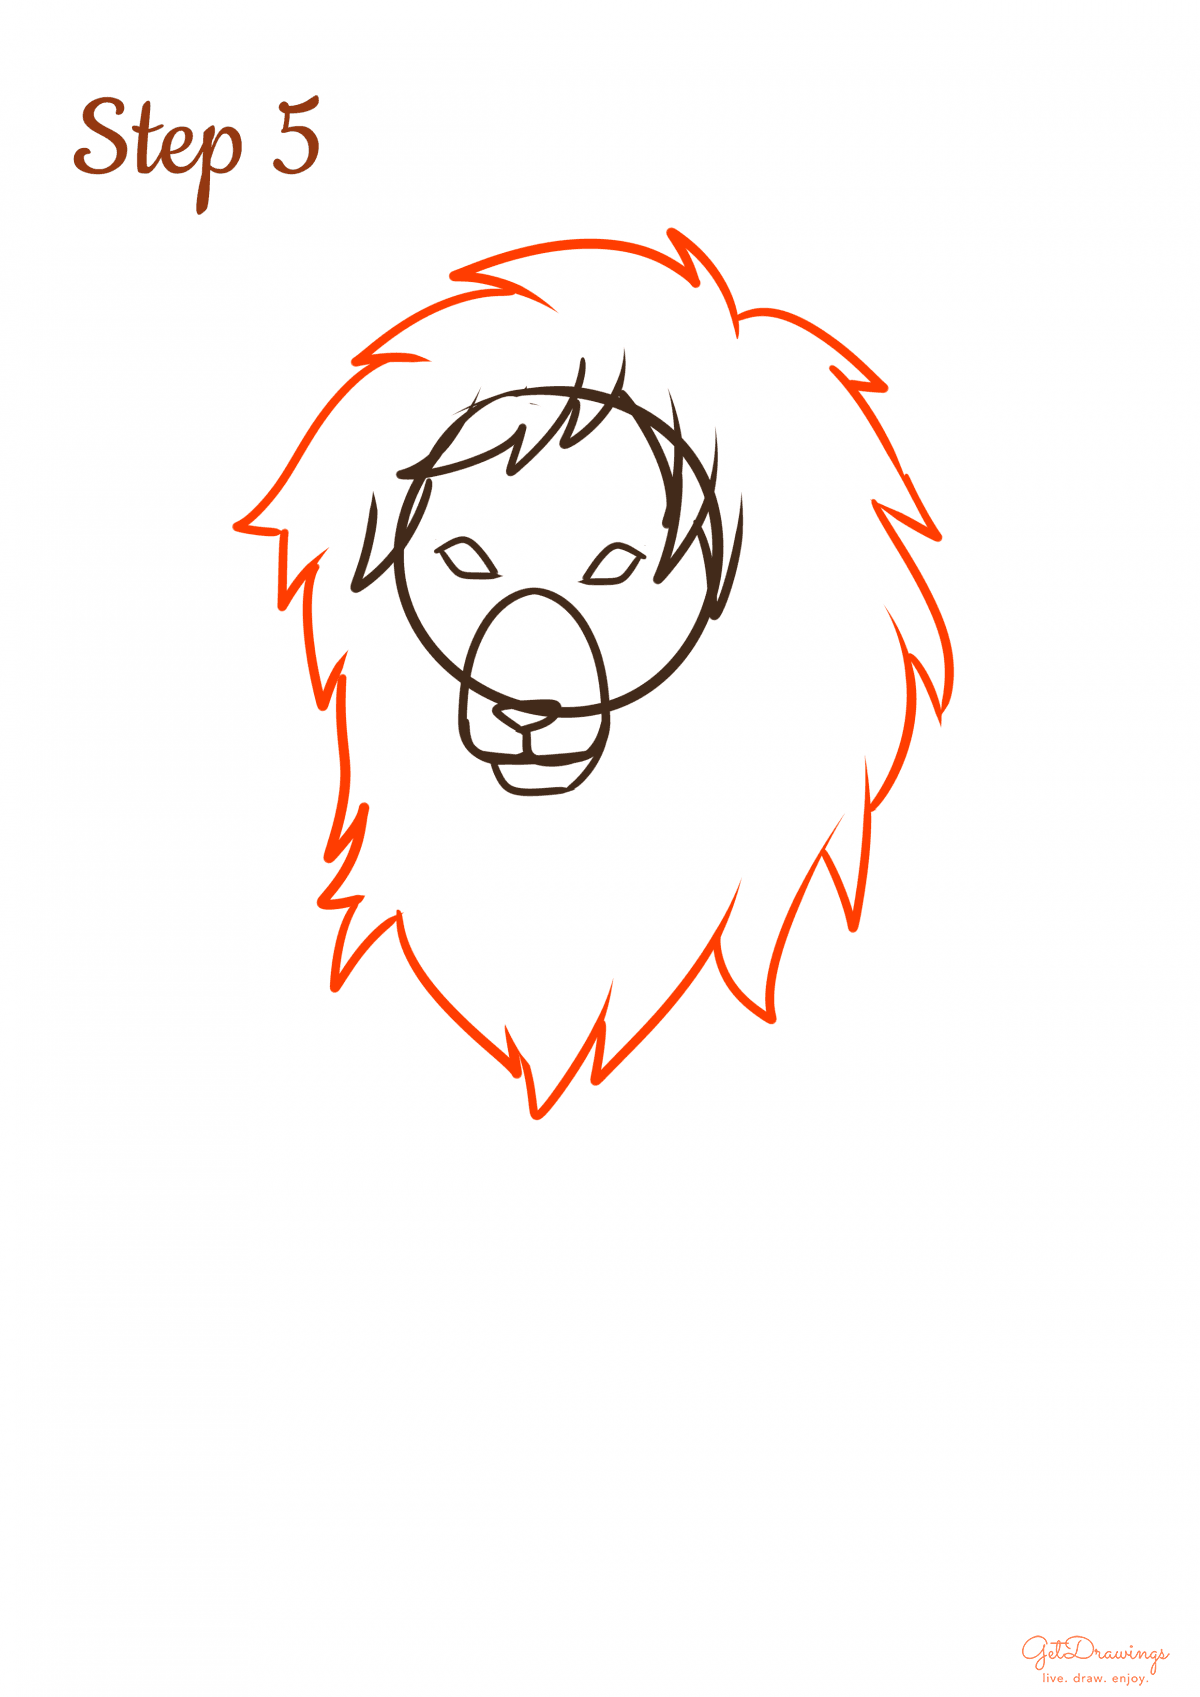
Step 5: In drawing the lion’s mane, you’ll need to know the flow of lion’s mane from top to bottom. Start drawing spiky curve lines around the head guideline. Draw its mane as if you’re drawing a human hair with wavy flow.
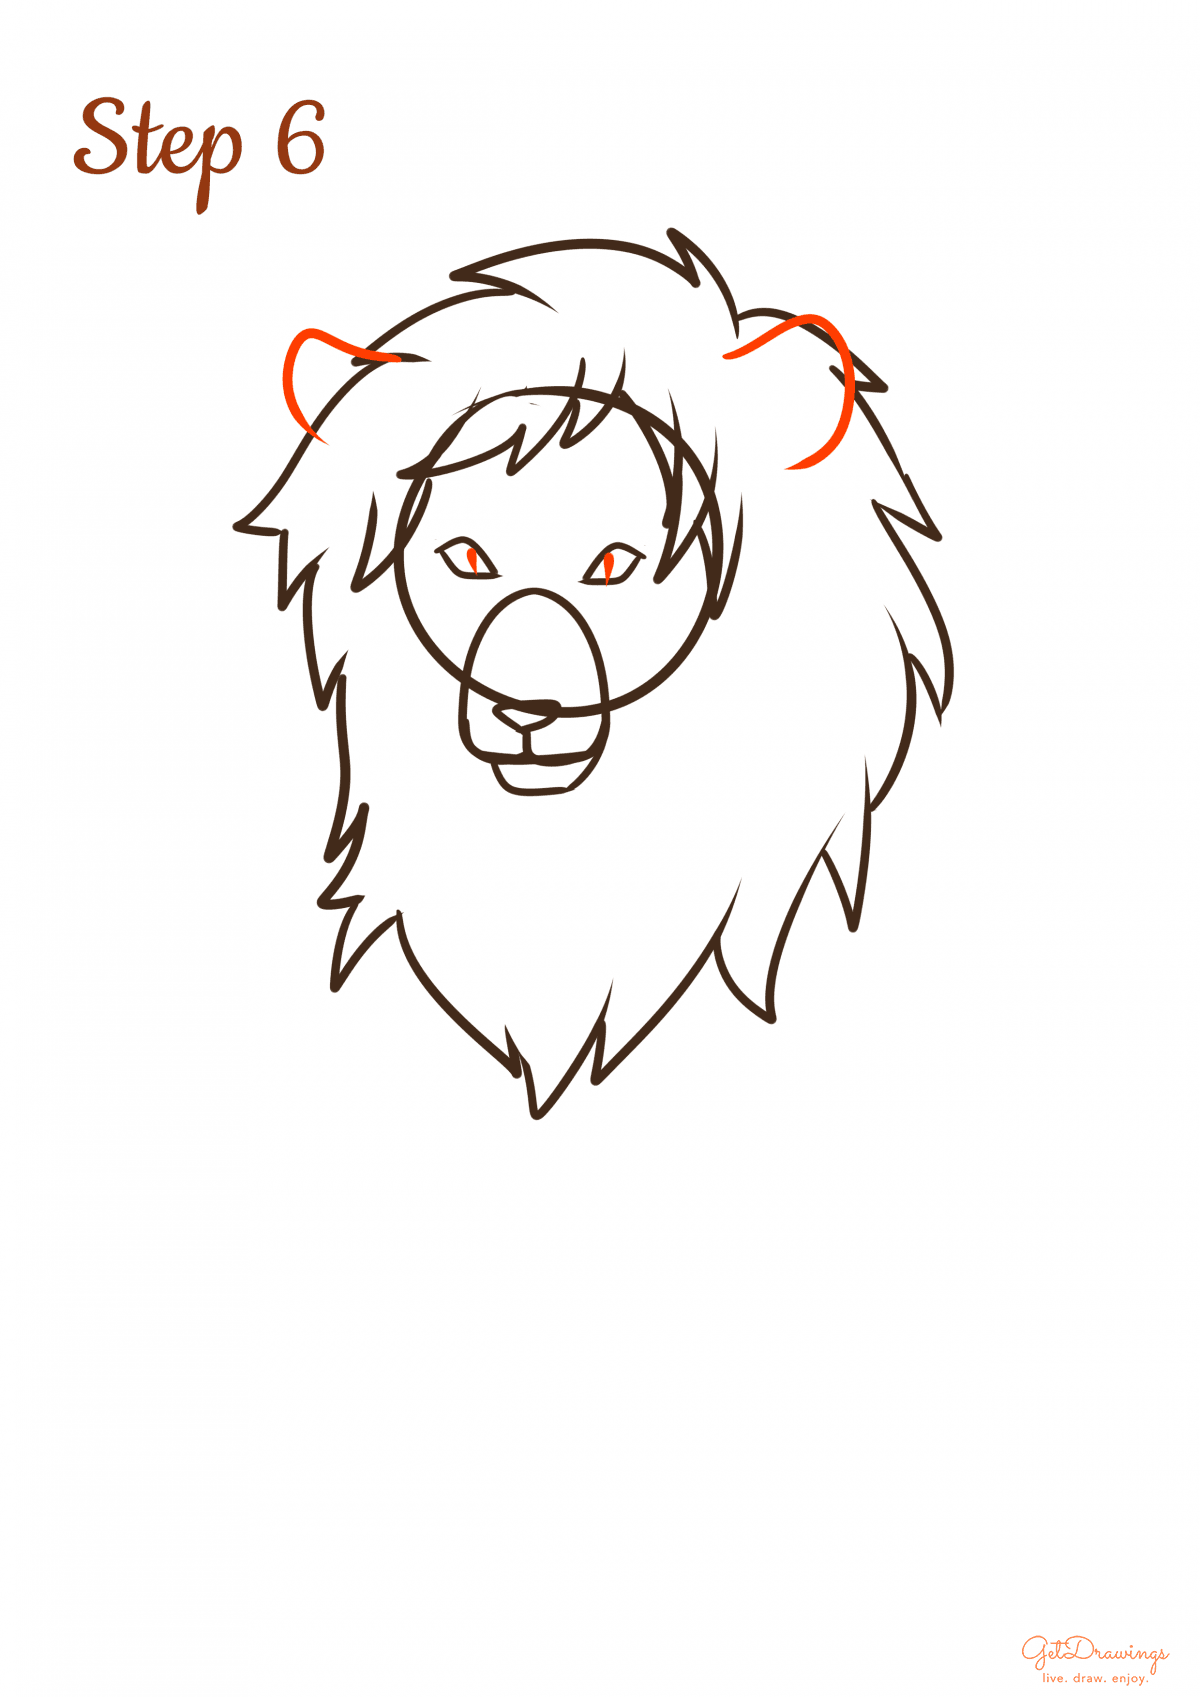
Step 6: Then, we can continue on to the detail of its face and ear. On the upper sides of lion’s head, add two uneven curve lines to create its ear. As for the eyes, lion has the eye similarly with cat. Thus, add two vertical line inside the eye that you’ve made on the previous steps.
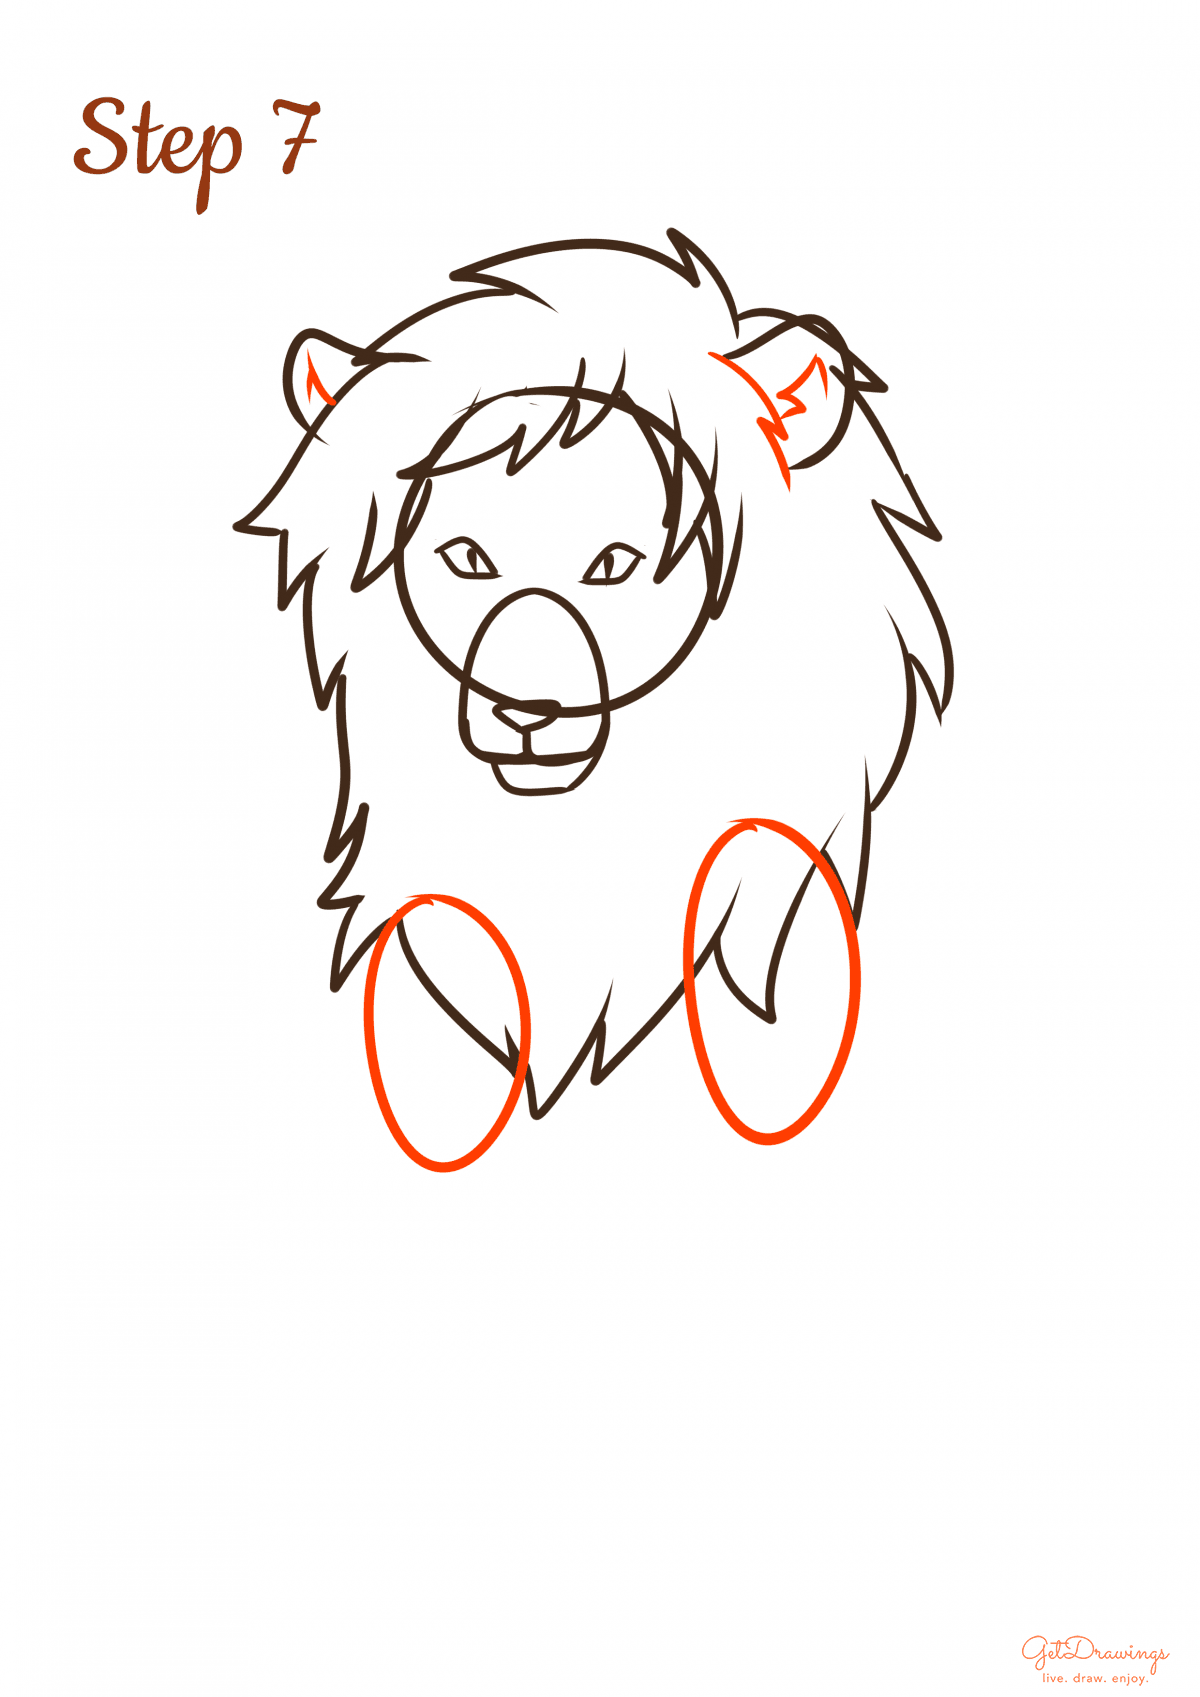
Step 7: After finishing the previous step, we’ll continue with the inner ear by making several curvy uneven lines (see picture) on each ear. Don’t forget to add another curvy line below the right-hand side ear to cover the ear with its mane. Next, add two of the lion’s upper fore legs intersecting with the lower mane.
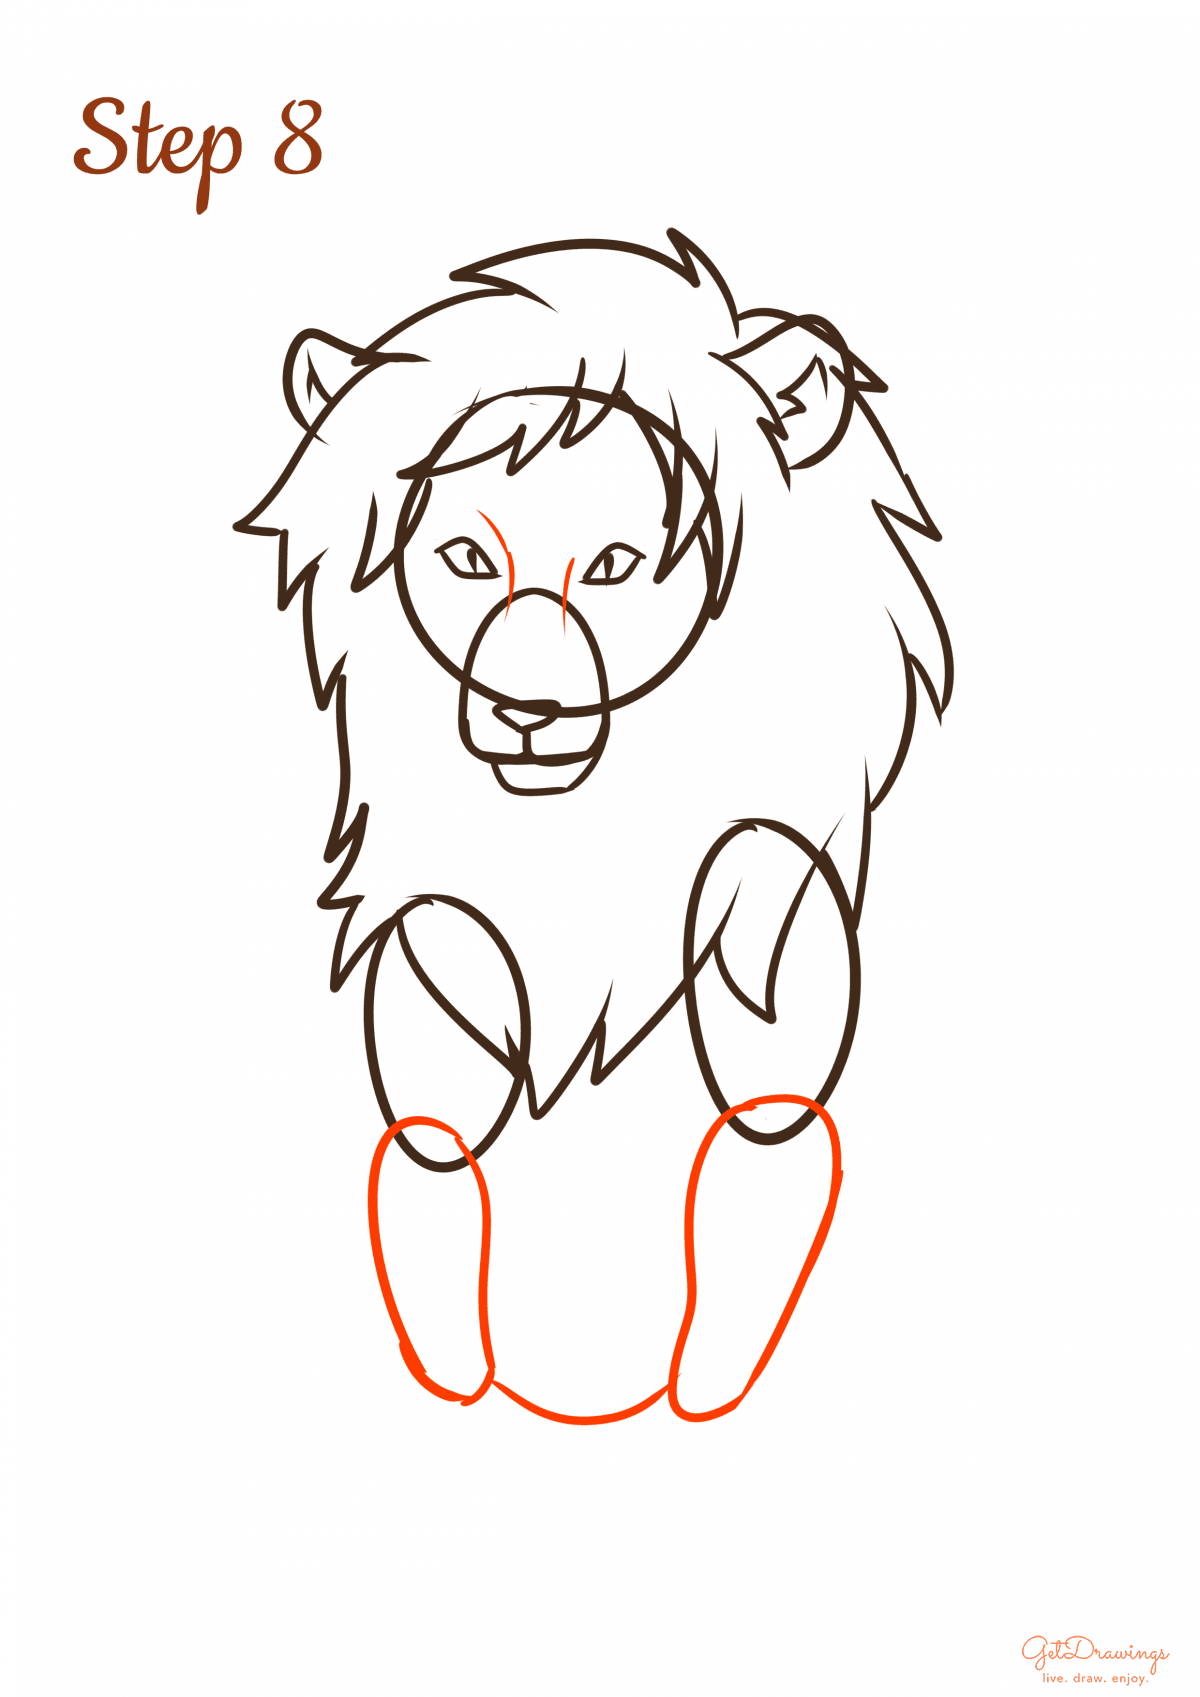
Step 8: Finish the detail on the face by adding curve line that gives a firm line to shape its snout. Then, add the lower fore legs. Lastly make a curve in between lower fore legs to create its belly.
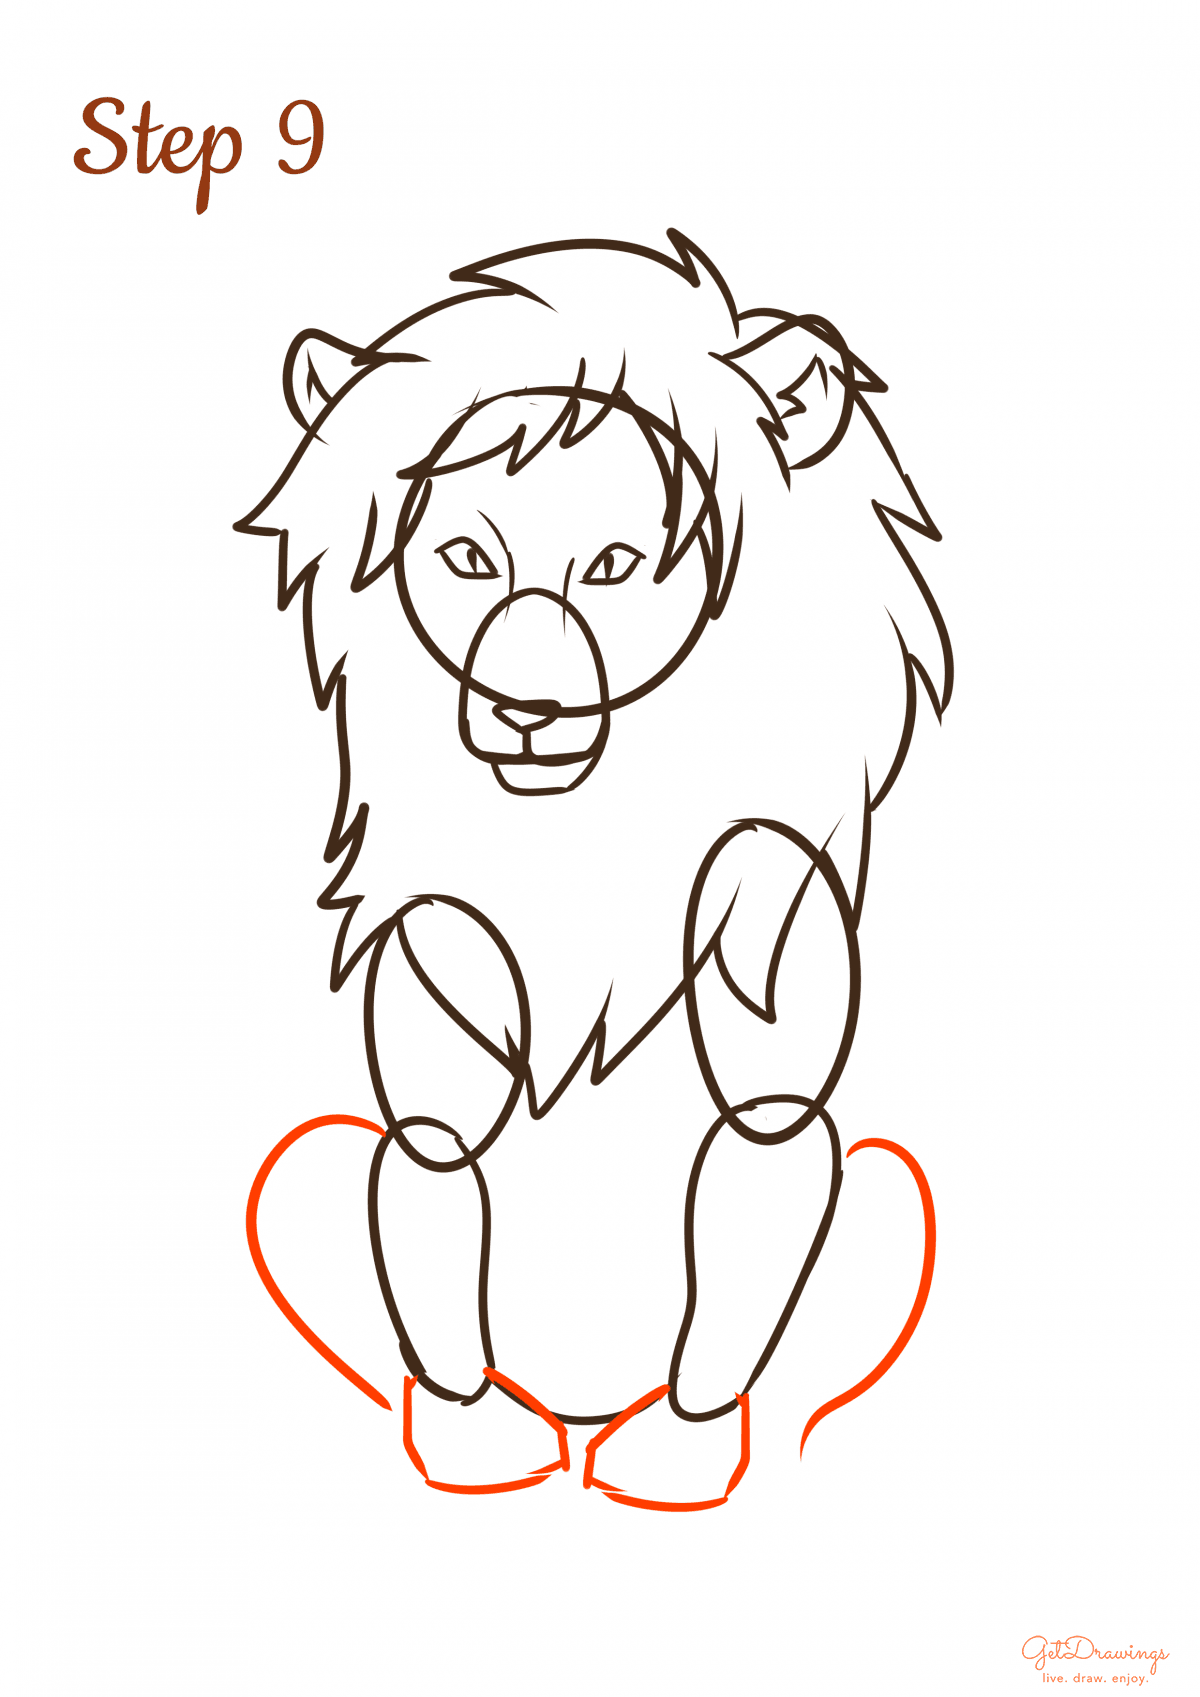
Step 9: Next, we can move on with its back legs and front paw. Start by adding a wide curve on each sides of the forelegs. Moving on, add two paw-like shape to create paws for the lion. The shape of the paws was uneven; thus, it’d be recommended to have a reference to draw its paw.
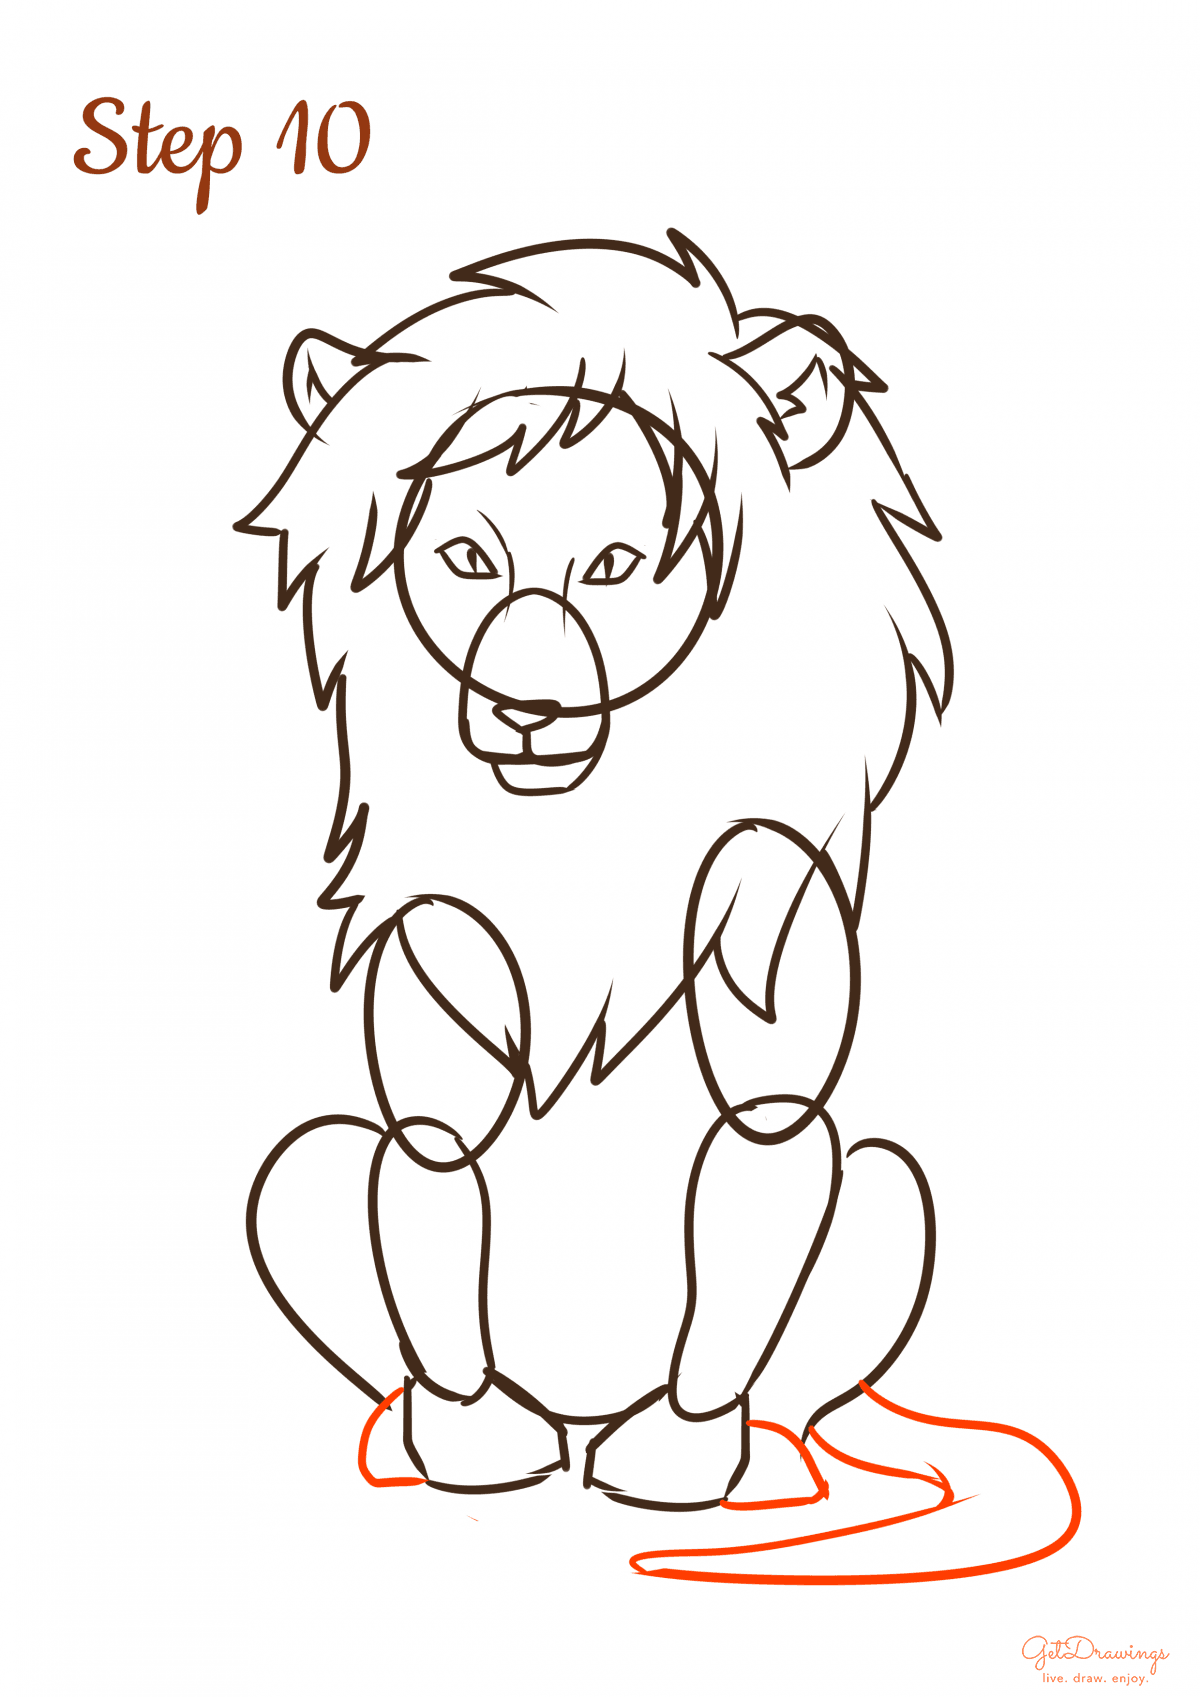
Step 10: Continuing the previous step by adding more paw for its back leg. Draw with a curve below the previous back legs step. As for its tails, just create the end of snake-like shape next to the back legs.
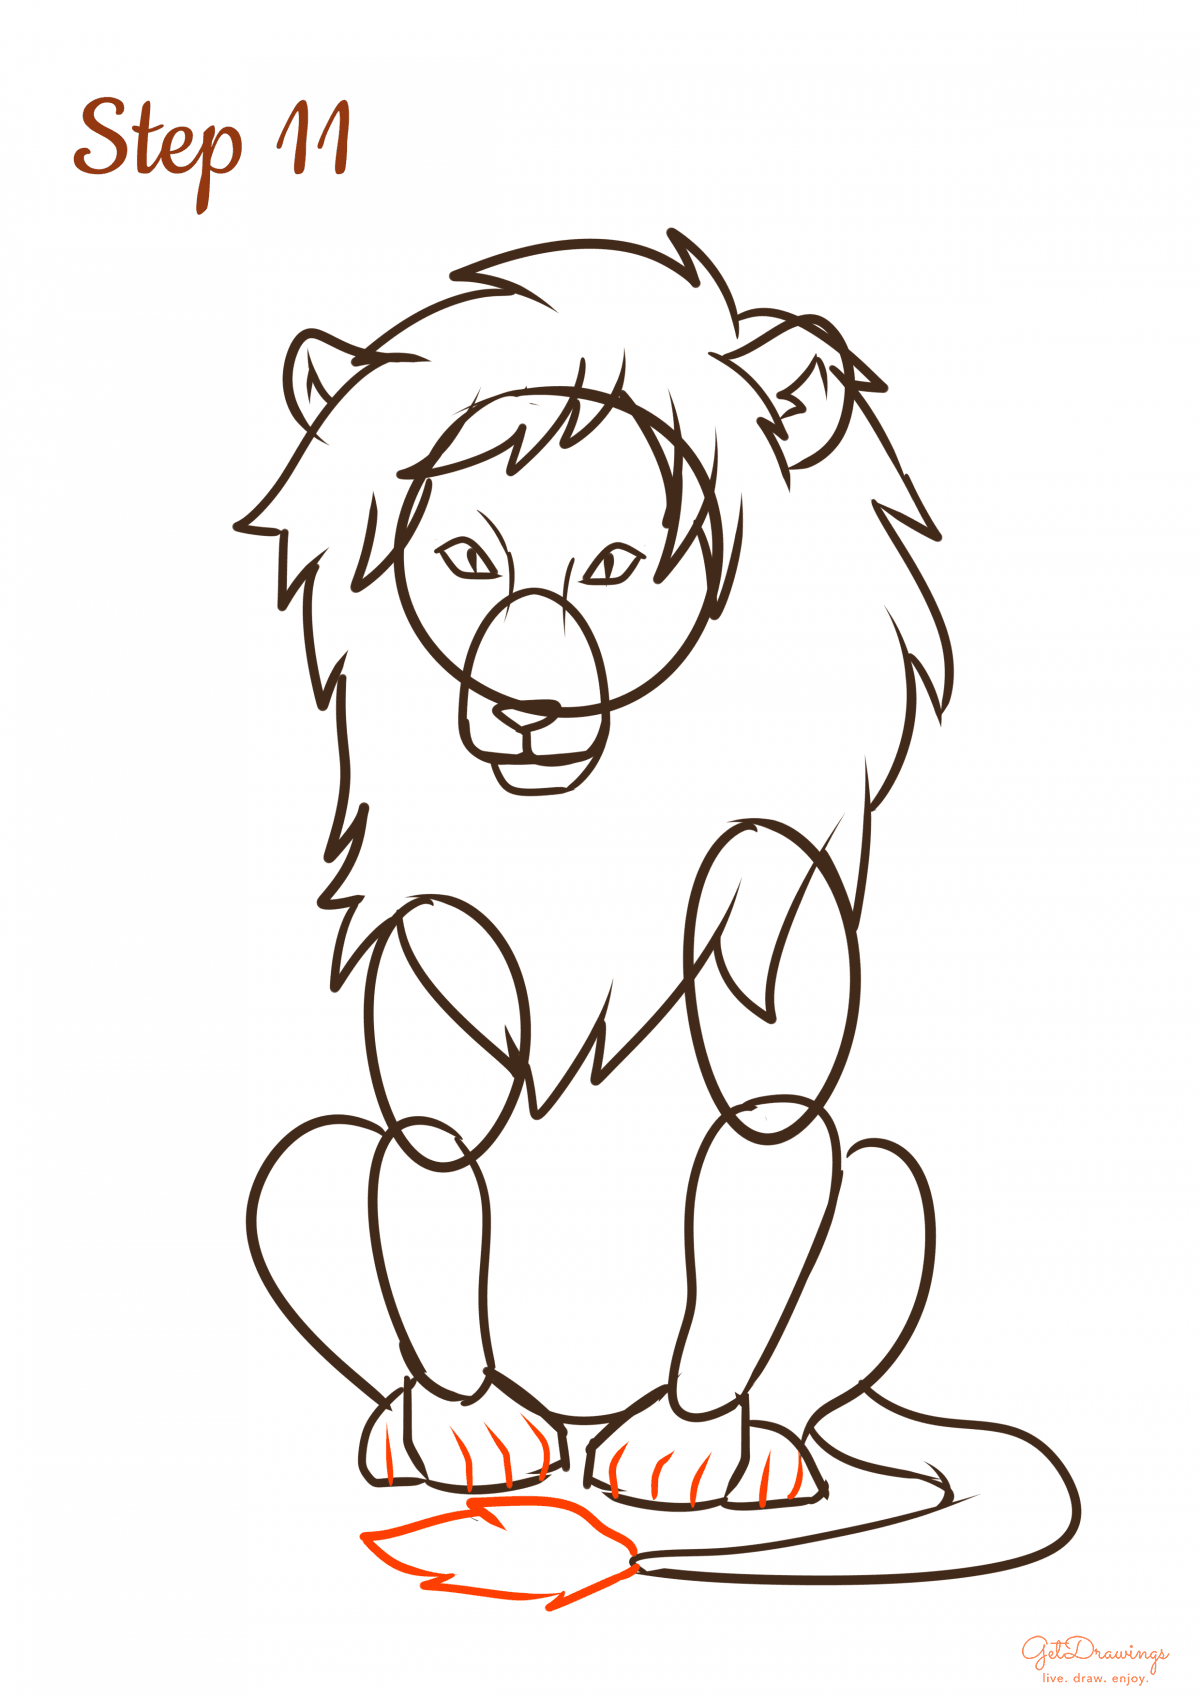
Step 11: Create the edge of the tail by adding more fur on the end of the tail from previous step. Also, don’t forget to give details to create its paws.
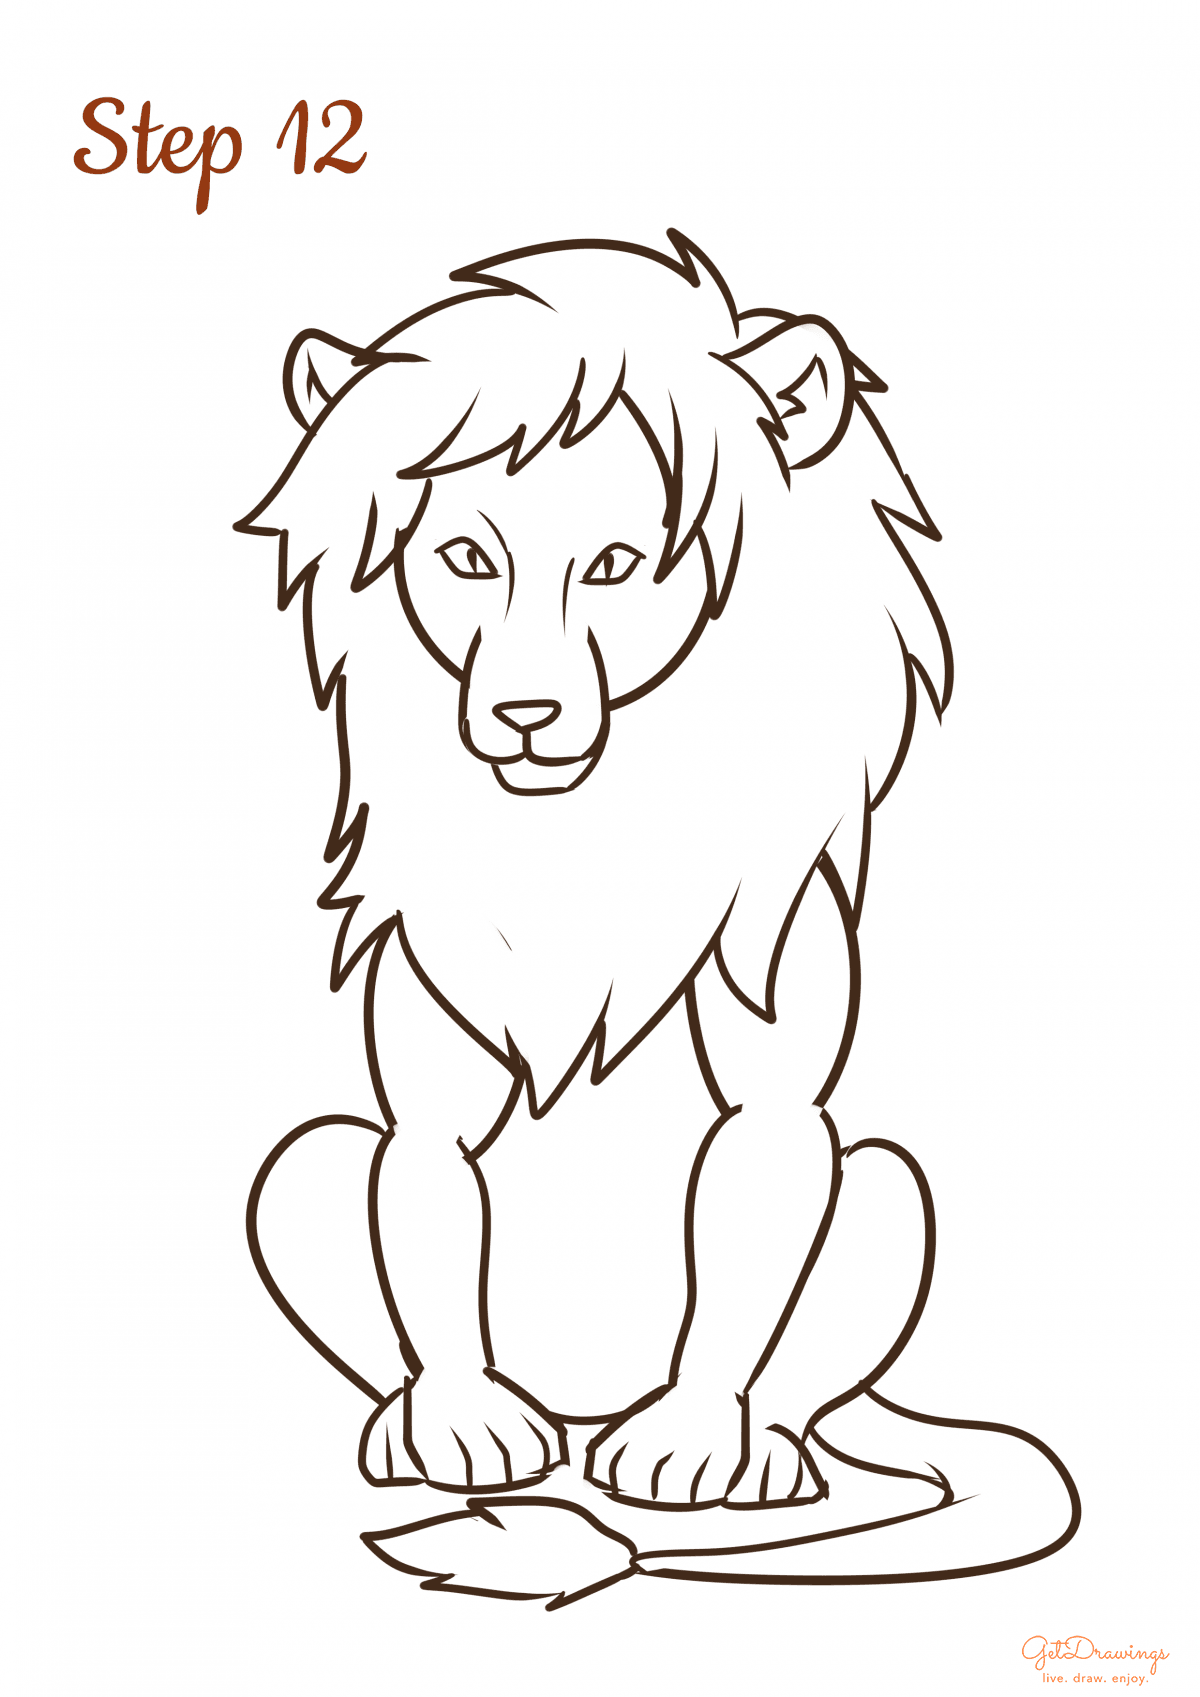
Step 12: If there’s a line that intersecting each other, this is the time to erase it. To see your lion, you’ll need clean lines. Voila! You’ve finished drawing a lion
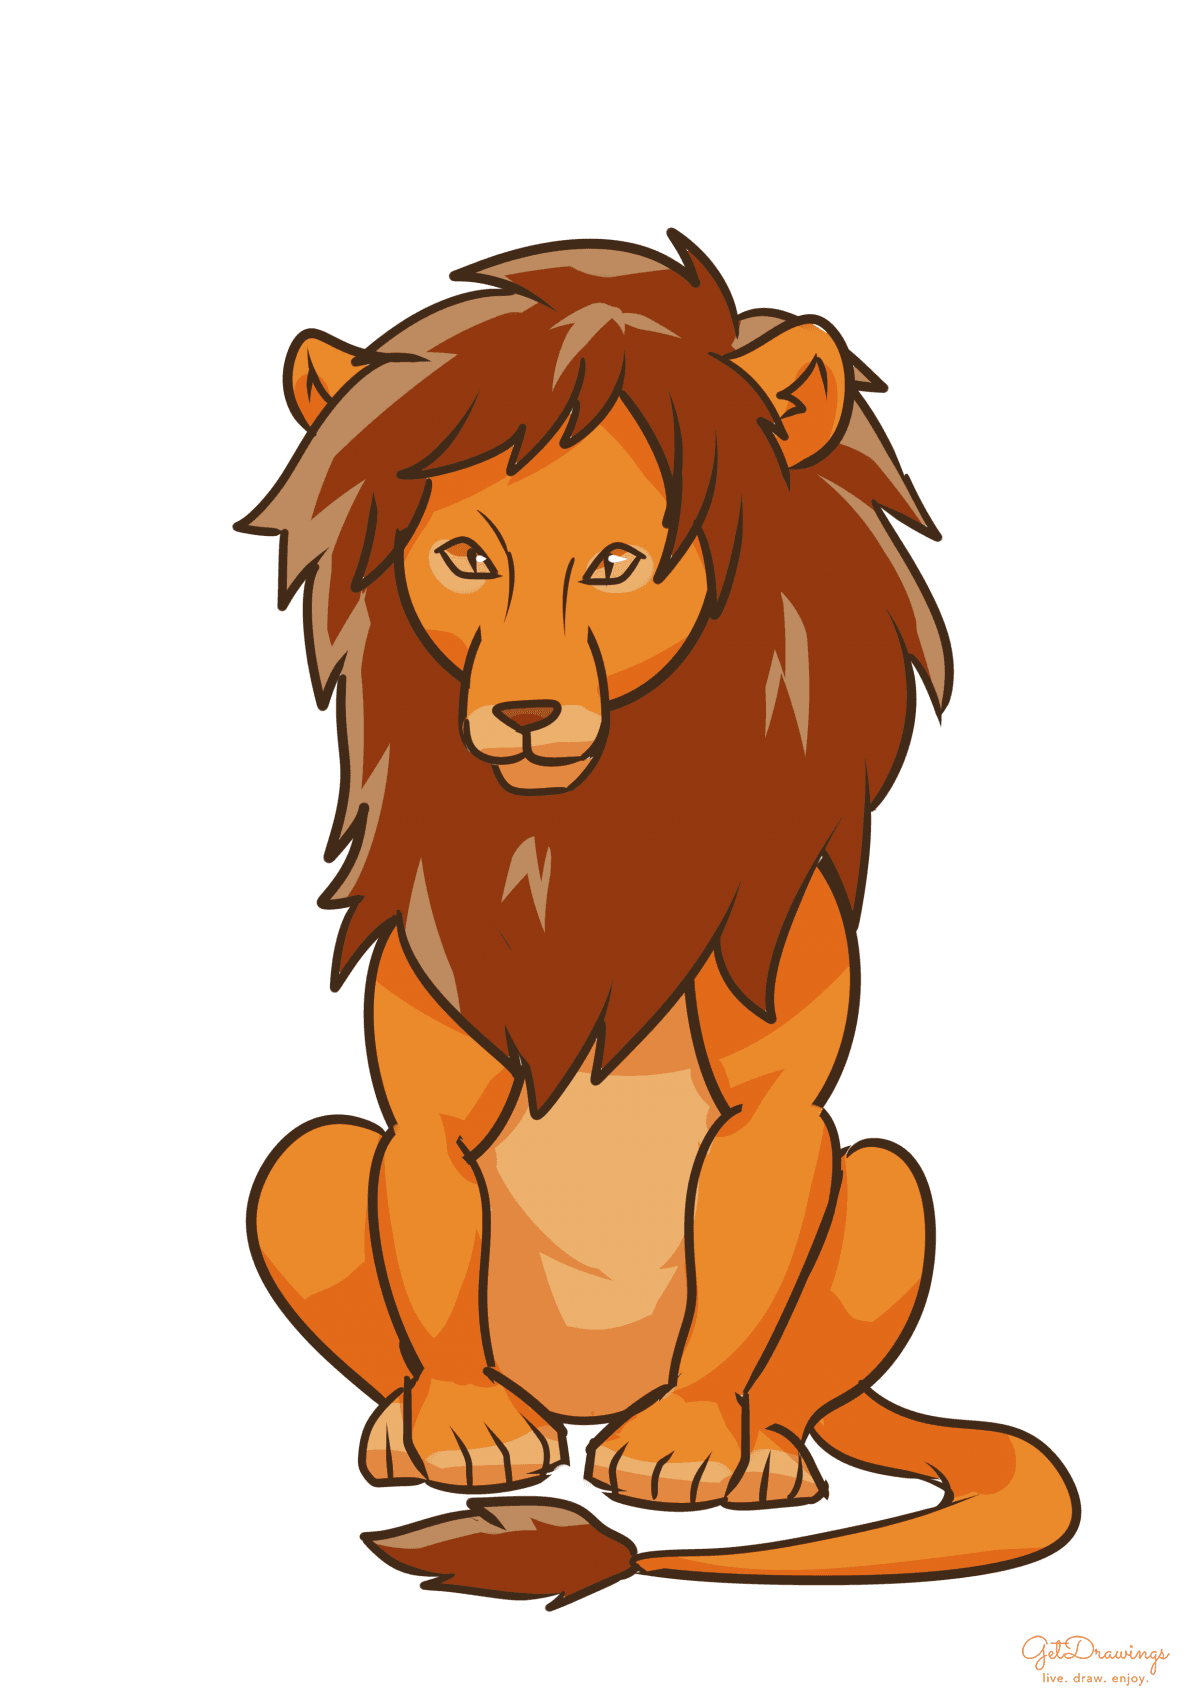
When drawing a lion, the most important part is to look at the reference. How’s the actual shape of its body, the mane, the ears, etc. This is important because living things’ form won’t be smooth or symmetrical. Even if it’s symmetrical, the form will still be uneven. Therefore it’s important, especially drawing the body. You’ll need keen eyes and a lot of practice so you can make your drawing perfect. Good luck!
