LIMITED OFFER: Save 15% off Shutterstock Images - GETDRAWINGS15 coupon
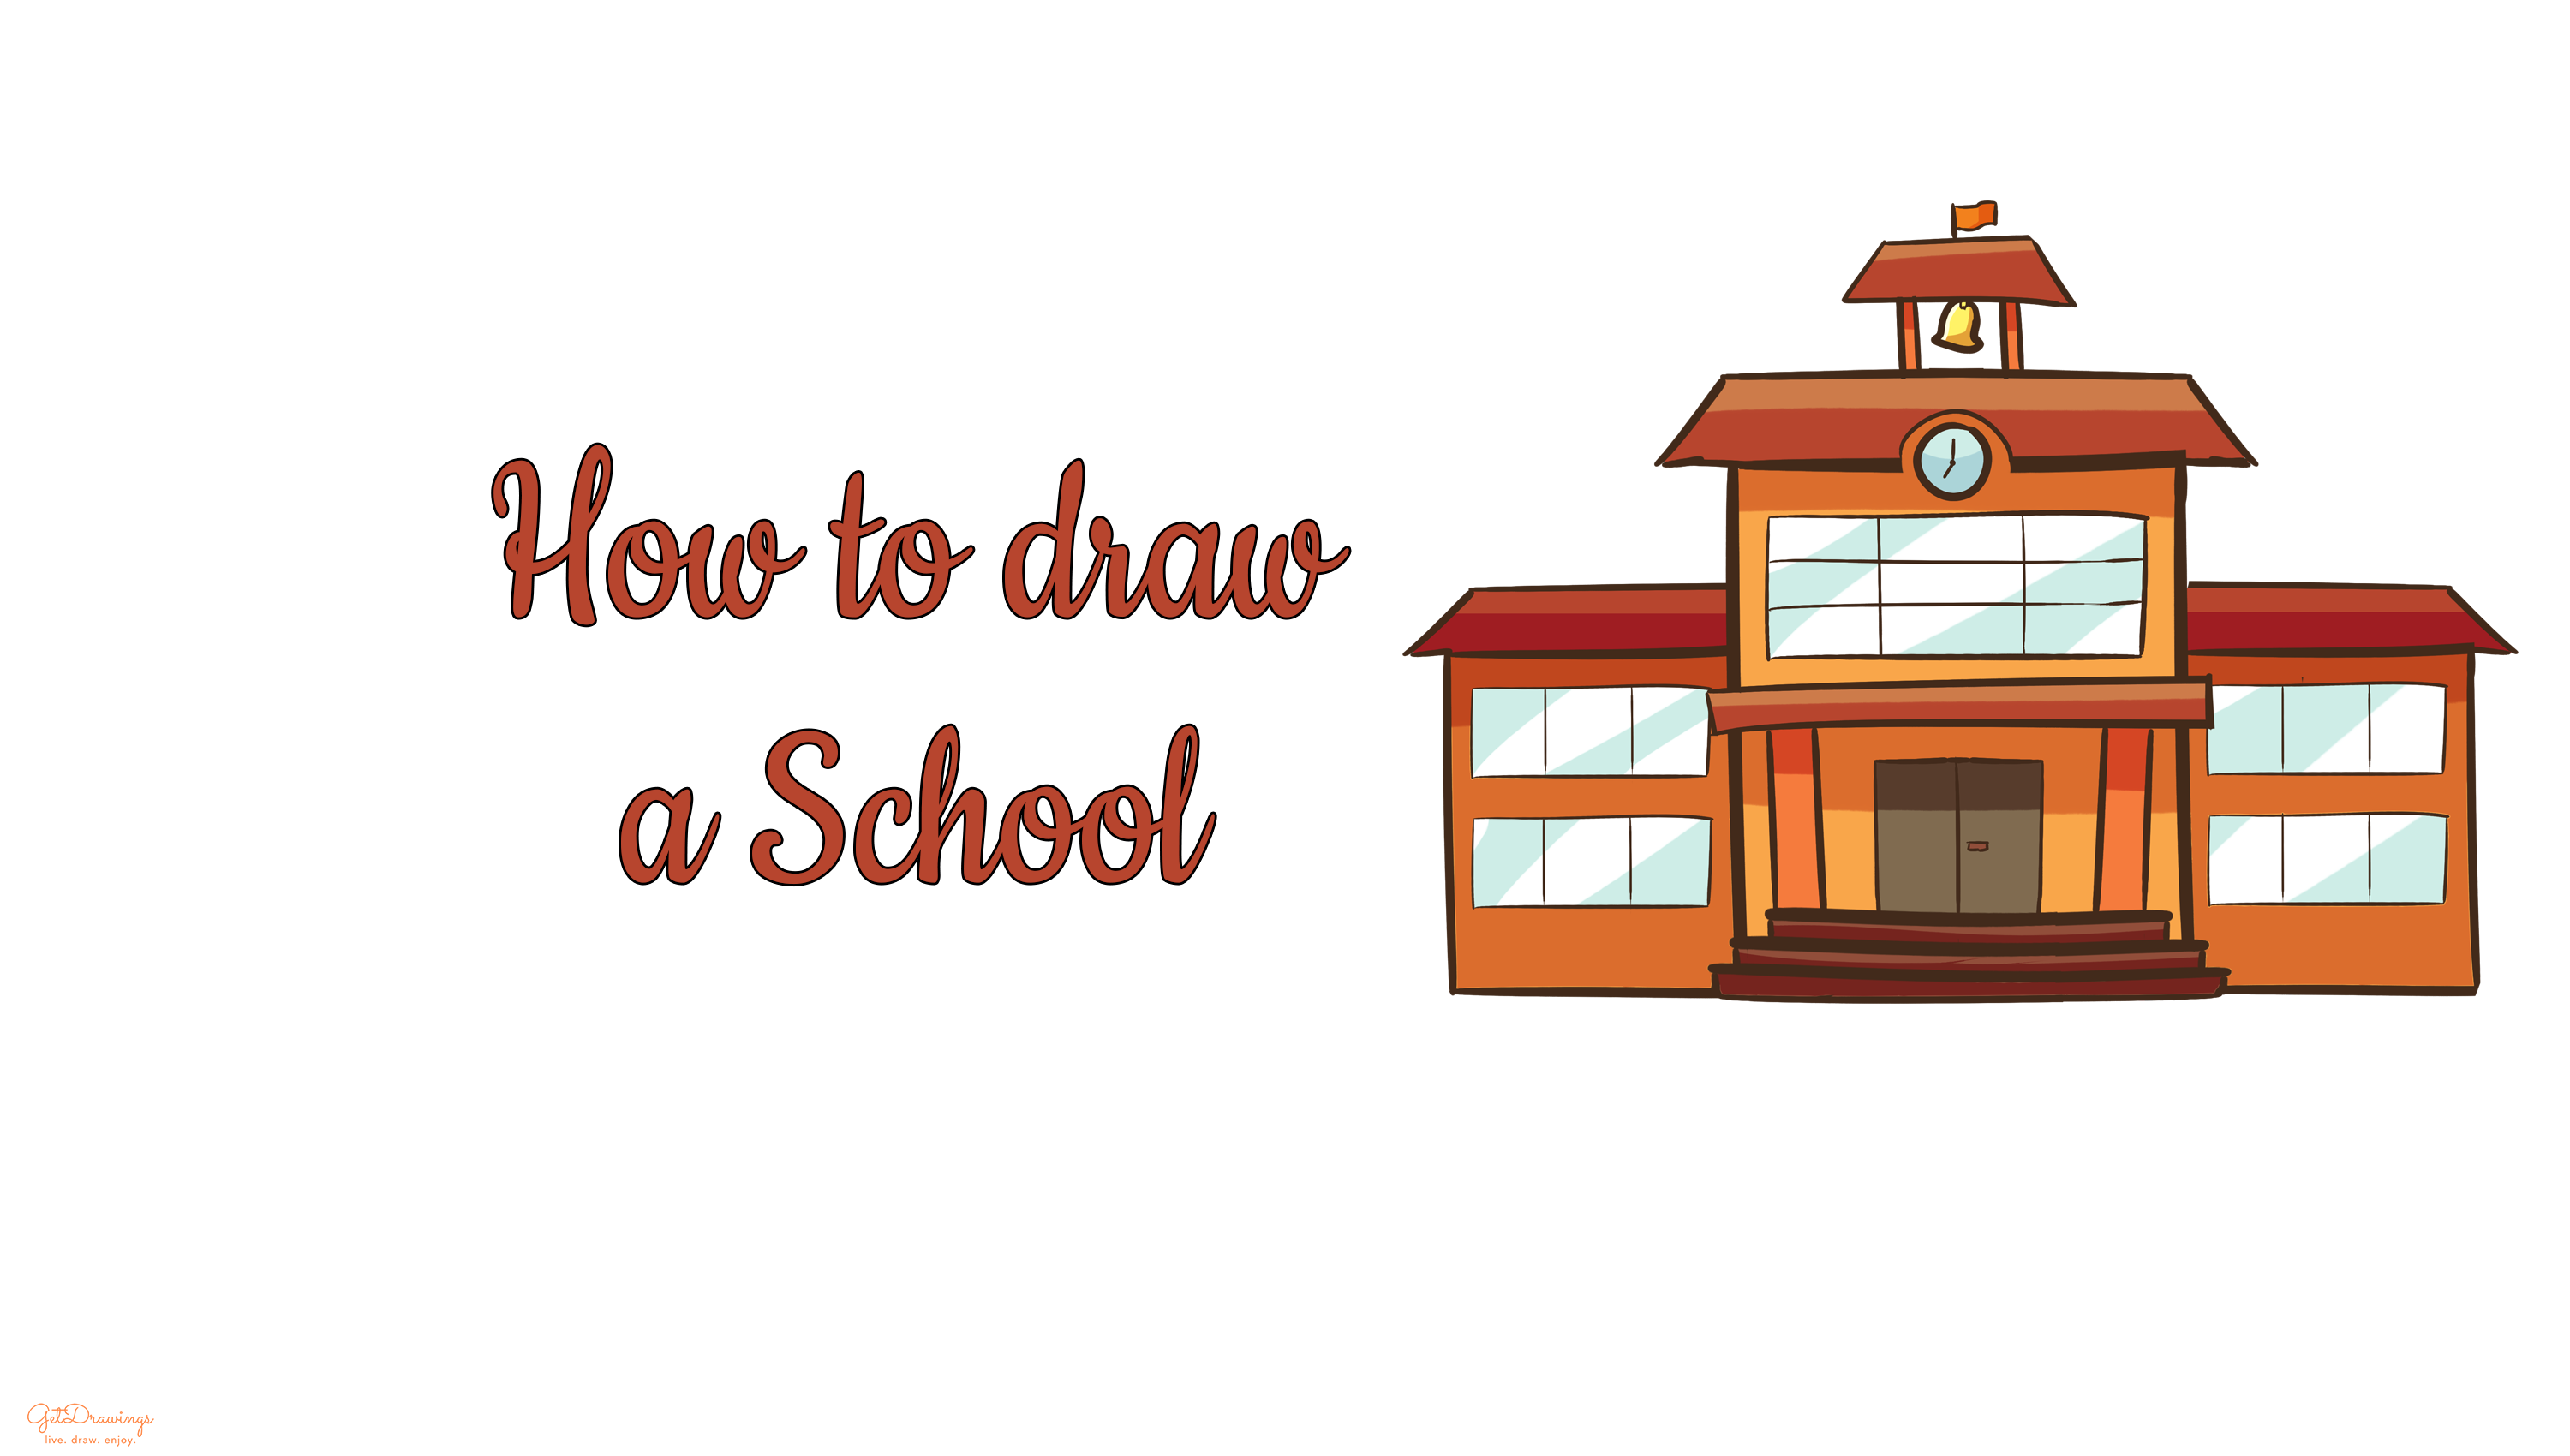
There’s a place in the world where you can learn lessons and meet new friends. In this place, someone can teach you lessons that you never know before. Yes! It is none other than a school! Where you can learn a lot of things and create a new experience. At school, you’ll meet a lot of different people. Whether they have different interests or can have the same and befriended with you. Someone needs to go to school because they need to learn a lot of things at an early age. Therefore to remind you of the school, we'll try to draw a school with this instruction. All you need is a pencil, eraser, and paper. Now we’re ready to draw!
Steps:
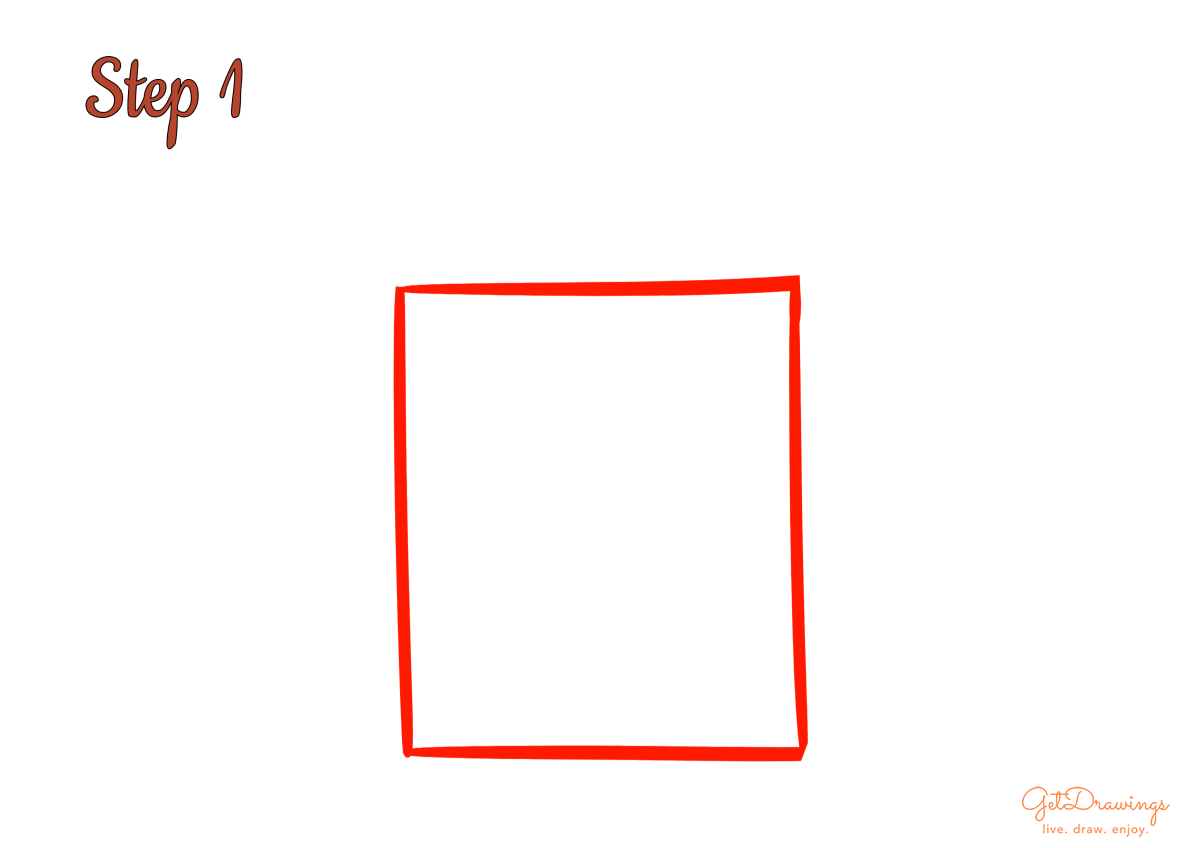
Step 1: Firstly, we’ll start by drawing the guidelines. The purpose of guidelines is to help you estimate the size of the school and to guide you in drawing the rest of it. Therefore, we’ll draw a long rectangle. This will be the guideline of the school
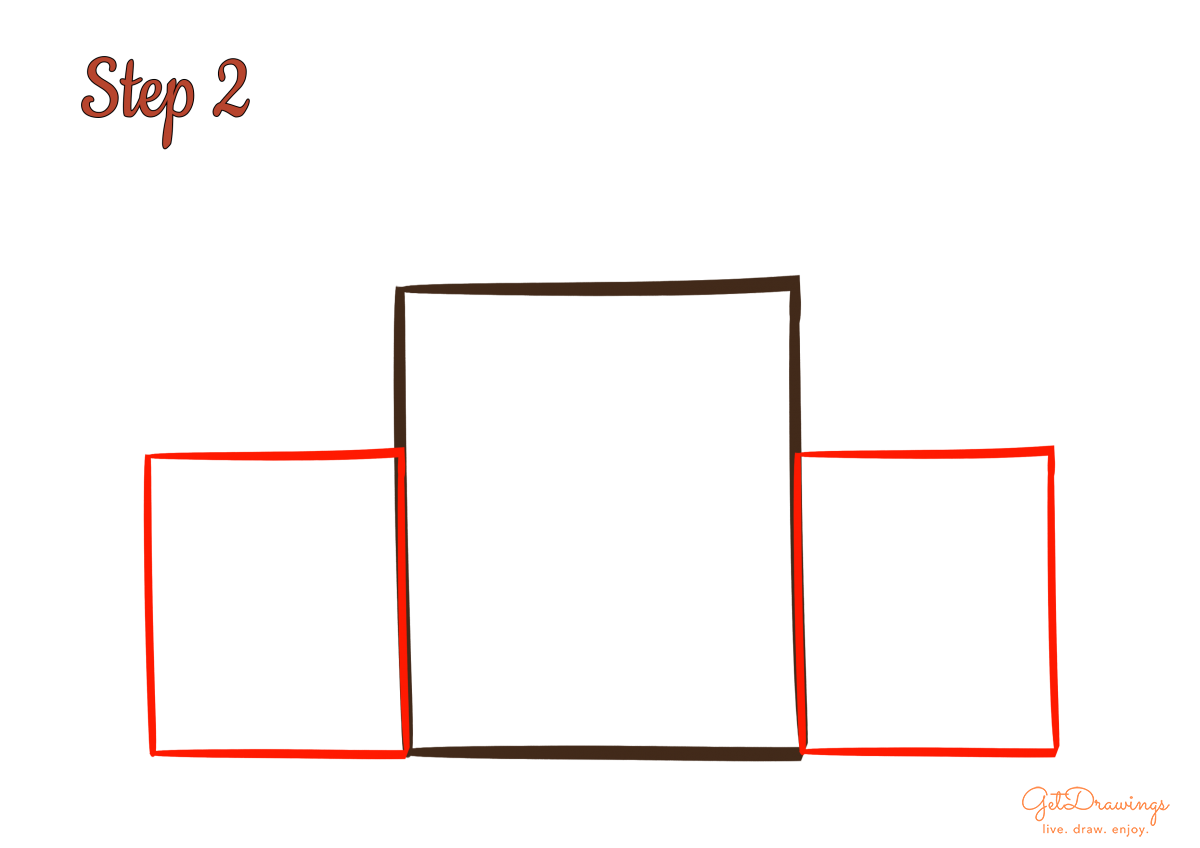
Step 2: Next, let’s start by creating another part guideline of the school. Now create another two rectangles on both the left and right side of the previous step. This time, the rectangle is shorter than the one in the center
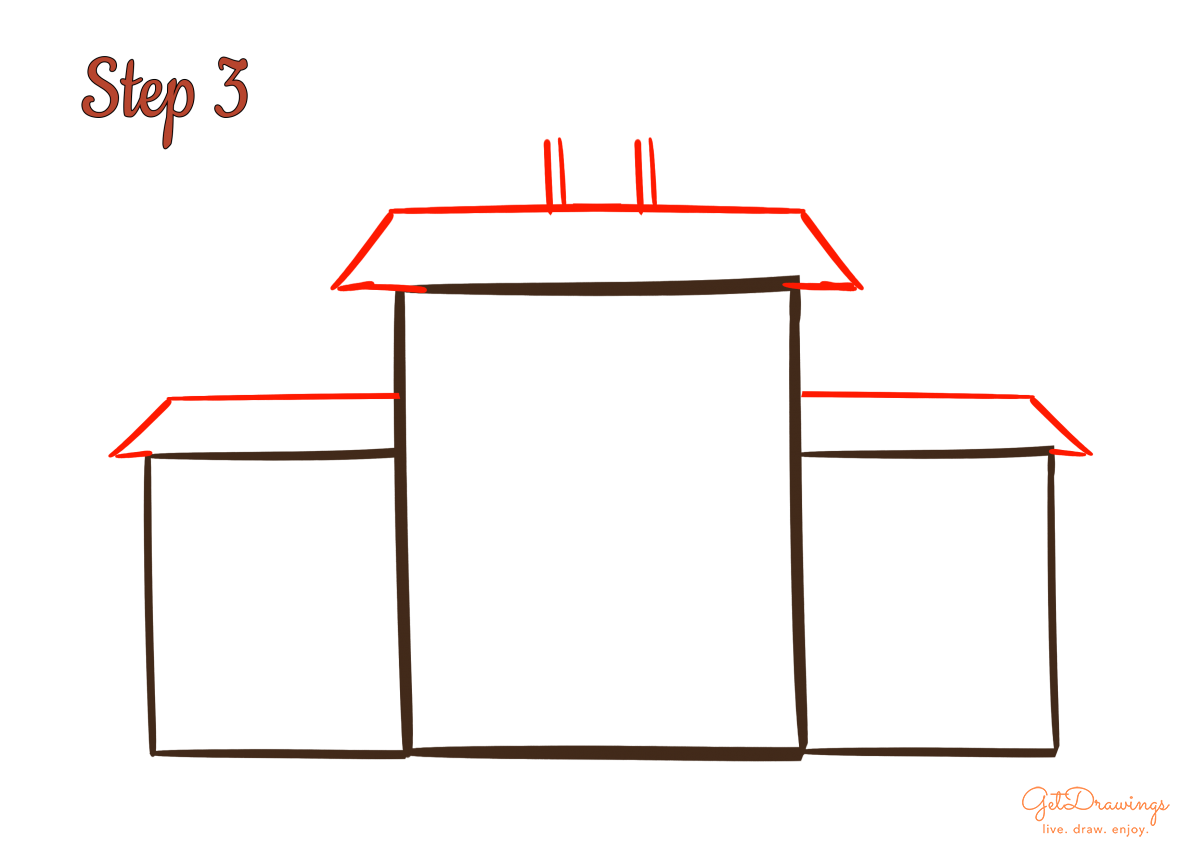
Step 3: We can move on to the roof of the school. Draw three narrow trapeziums on top of each rectangle (see picture to better understand). In some schools, there’s a bell on top of their school with the school’s flag. Therefore, create two pillars on top of the roof on the center building.
Step 4: After that, we can continue finishing the previous step by adding a smaller roof on top of the pillars. We’ll also be going to draw another roof in front of the school building by adding a narrow and long rectangle in the middle of the building.

Step 5: Now we can continue with the previous part, the bell, flag, and another pillar to hold the previous roof that we made. Starting from the bell, Then, add a bell-like shape in between the pillars (see picture). Next, add a line and other curvy lines that resemble a flag on top of the roof. This is to make the school’s flag. Also, don’t forget to draw another bigger pillar for the front roof of the school.
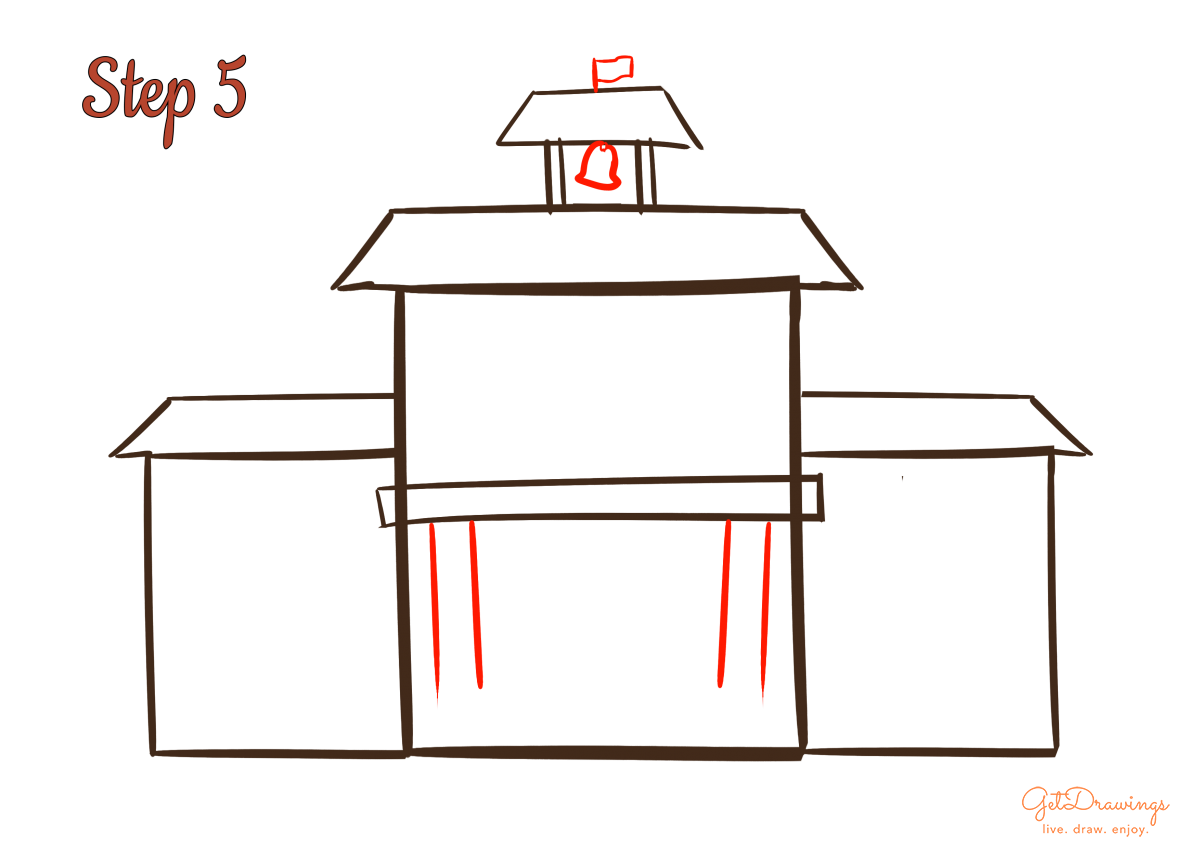
Step 6: Then, we can continue to create the windows. To create windows, draw a long vertical rectangle on each building. Make the center building have bigger windows than the rest of the building. On the two buildings next to the center, create two smaller windows on each side.
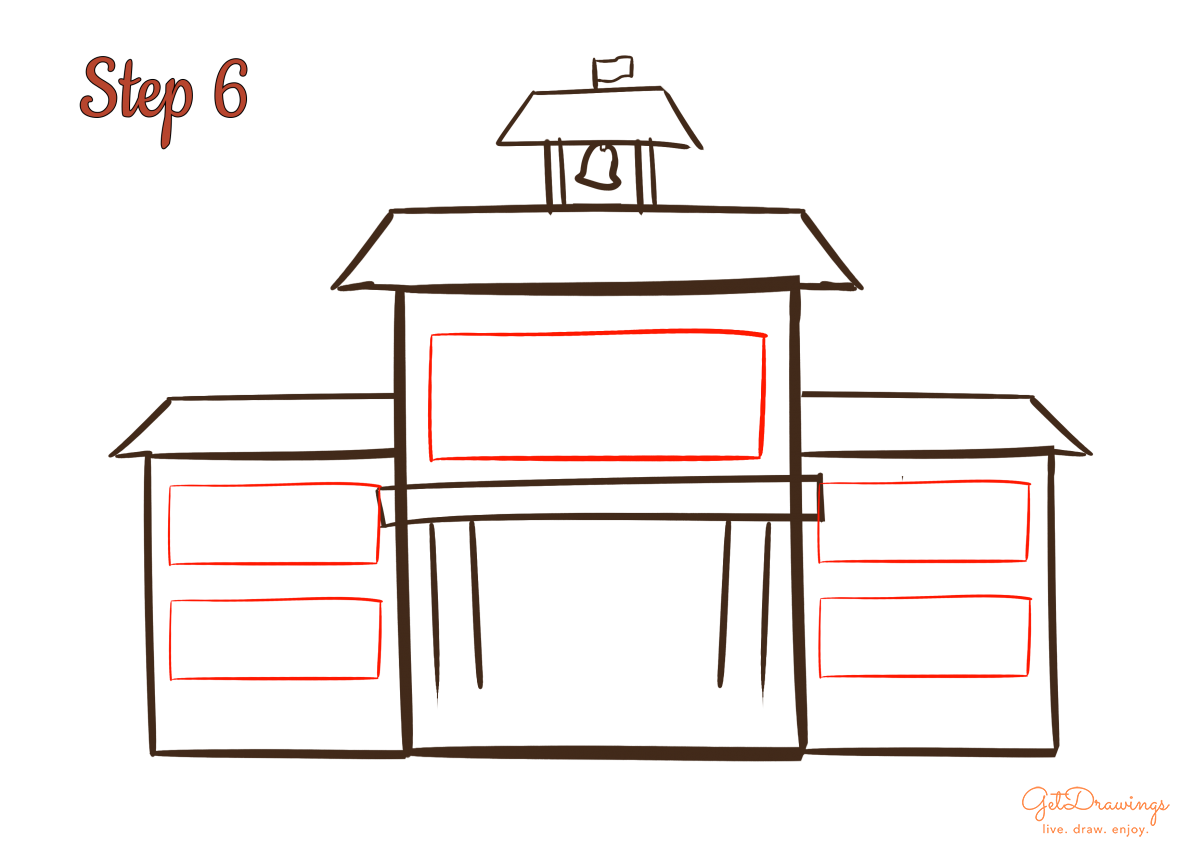
Step 7: Finally, we can finish the window by creating several straight lines in the middle of the windows (see picture to better understand). Then, we’ll add several stairs below the previous bigger pillar on the lower part of the school. Just create the stairs for the building in the center. You can create the stairs by making three narrow and long rectangles with different lengths. As it gets lower, the length will be longer than the upper one.
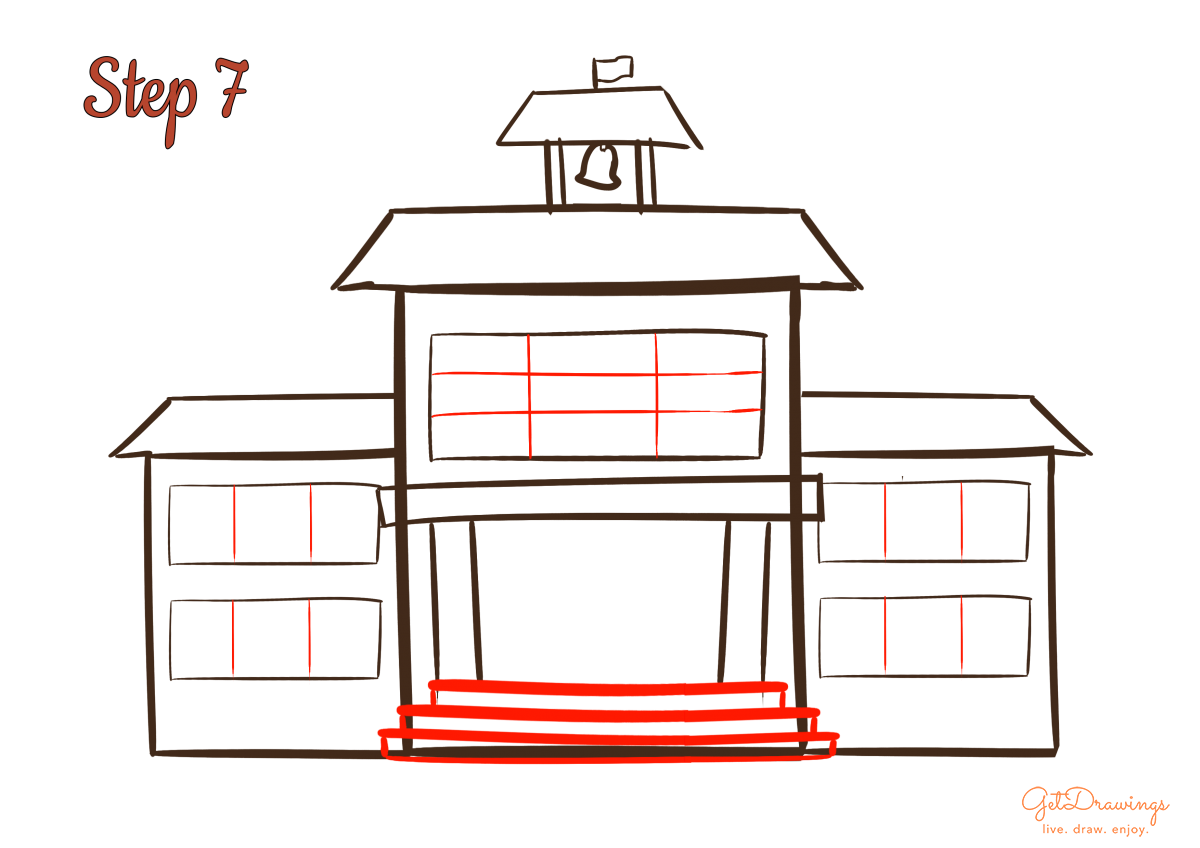
Step 8: Moving on, we’re going to continue drawing the door of the school. You can just draw a rectangle with a vertical line in the middle of it.
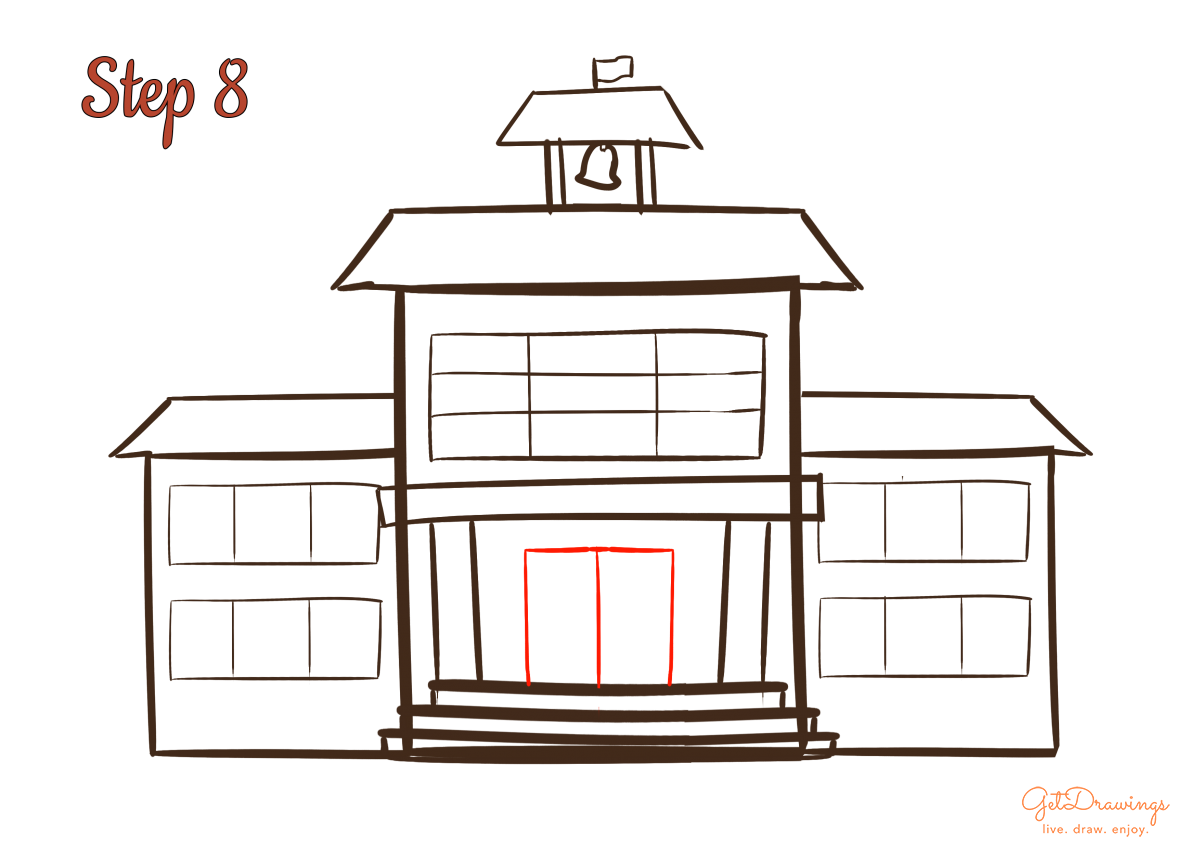
Step 9: Next, draw a doorknob to finish the door by creating a narrow and short rectangle in the middle of the right door. In some schools, there’s a clock on top of the school. Create a circle and a curve line on top of it, then make short and long lines with a dot inside the clock.
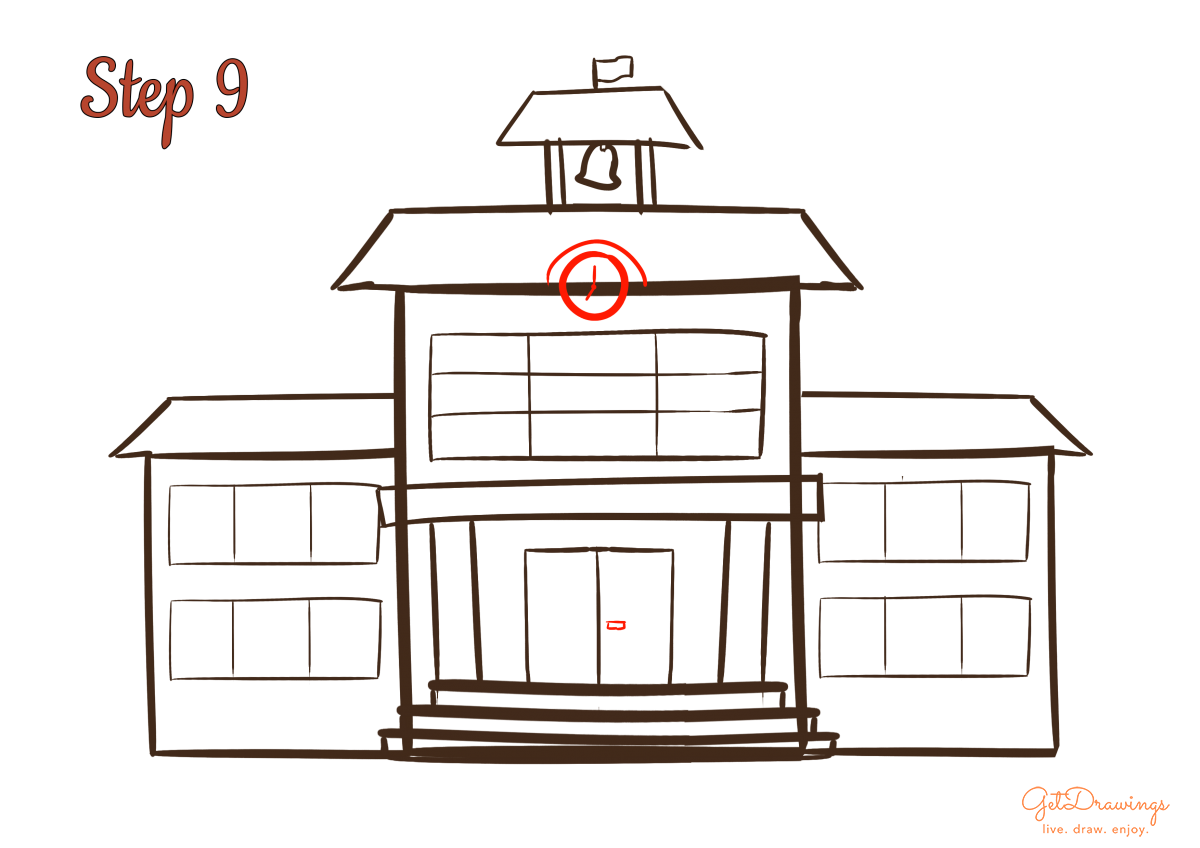
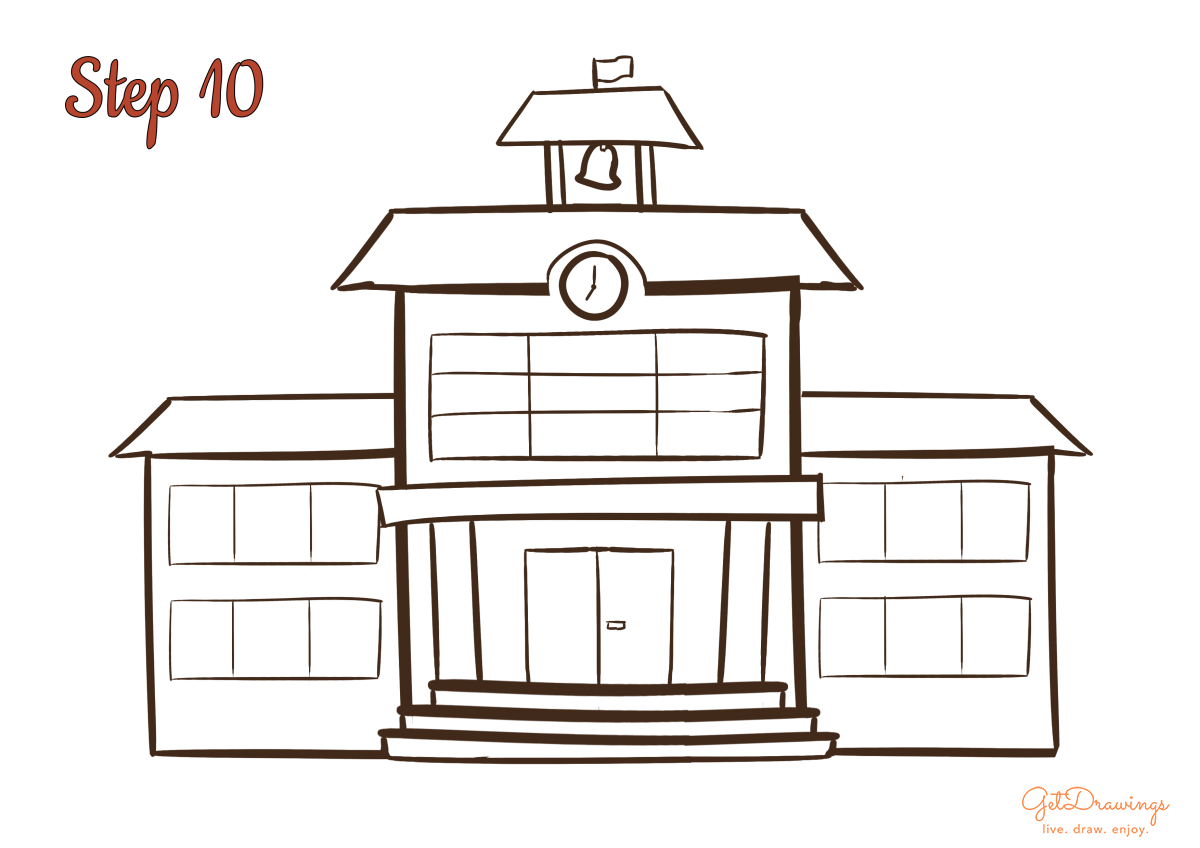
Step 10: Lastly, If there’s a line that intersecting each other, this is the time to erase it. To see your School clearly, you’ll need clean lines. Voila! You’ve finished drawing a School!

Since you’re drawing a School, you need to look at the actual reference of what you’re going to draw. Creating a building can be hard for the first-timer, therefore it’s important to keep looking at the reference of the building you want to make. You’ll need keen eyes and a lot of practice so you can make your drawing perfect. Good luck!