
How to draw an Apple on a graphic tablet?
Apple is one of the most delicious and useful types of fruits. They are consumed both as a raw and prepared from various dishes and freshly squeezed juices. Today we will consider this fruit from an artistic point of view, namely - as an object for drawing still life. Apples have a round or oval shape and a bright color. Any beginner, and an experienced artist, should know how to draw an apple. This is a great way to work out at the drawing of rounded shapes, as well as to learn the color reproduction and smooth color transitions.
That is why, in this step-by-step lesson for beginners, you will learn how to draw an apple on a graphic tablet. You can also use a pencil to paint an apple in a monochrome color.
Tools and materials:
1. Graphic tablet (used Wacom Intos Draw, but any analogy is suitable).
2. USB connection to a computer or laptop.
3. Software Adobe Photoshop.
You can also use a simple pencil, an eraser and a piece of paper.
Steps of the work:
Step 1. Create a new document in Adobe Photoshop with such parameters: width - 1024 pixels. and the height is 724 pixels. The background should be white, not transparent. Diameter of the brush must be 9. Apples will be located in the middle of the sheet. On the left we place the whole apple, and on the right - half of the second fruit. But first you need to draw an axial line - the middle of an apple:

Step 2. Now through the middle of the apple we draw another line, which means width. At the ends of the segments we place the notches:

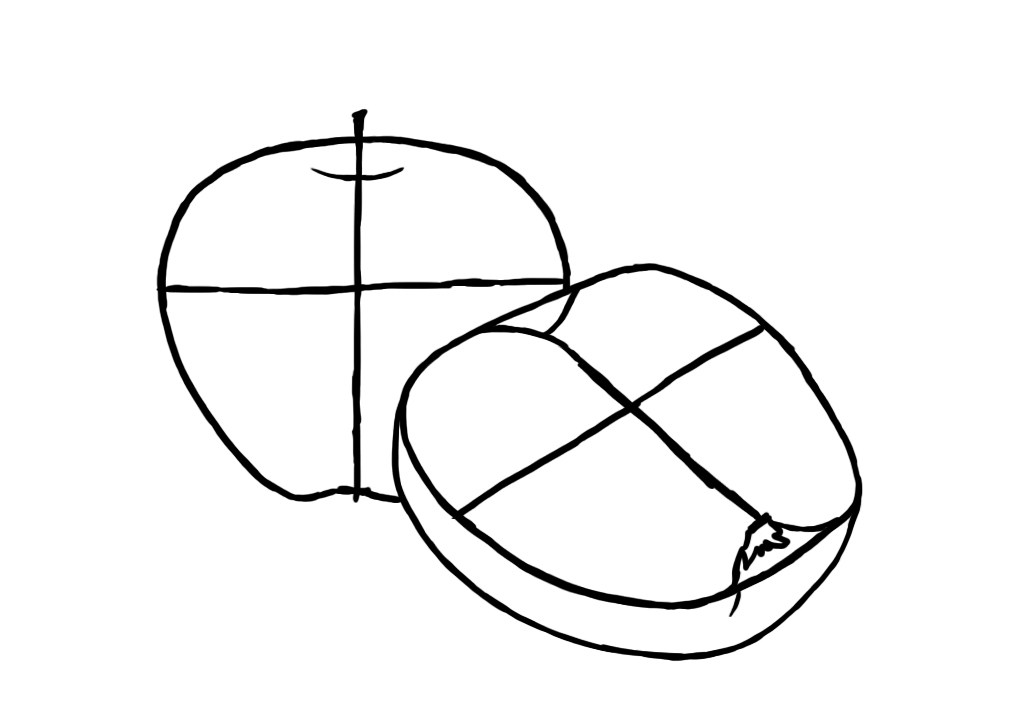
Step 3. On the lines constructed, let's draw an outline of the apples. The left fruit will stand, and the right – lies, leaning:

Step 4. We give the width of the apple, which is on the right, after finishing the part. On the left apple, we add a notch from which the tail grows:

Step 5. We'll draw the tails, and specify the curves of the apple shape:
Step 6. With the eraser we remove unnecessary lines that are located inside the apples and equalize the outer contours. Let the apple, that to the left, have a leaf, and inside the other - small bones:

Step 7. We pass to the color of our drawing. Let's start with a dark yellow color, which will fill the areas of the apple skin:

Step 8. Then we paint with orange color over the yellow. It will not cover the entire surface:

Step 9. Now bring a dark orange tint to the skin of the fruit. Mostly this color is in the foreground:

Step 10. It remains to draw red color, on top of other shades:

Step 11. The tail and the leaf will be filled with green colors. It is best to apply two shades, because this is enough to convey the volume:

Step 12. The inside of the cut apple should also be covered in beige color. The center region and the bones is a bit dark yellow in color:

Step 13. Create a more voluminous picture with glares on apples:

Step 14. The falling shadow from the apples is depicted in brown tones. It is located on the left side of the sheet because of the light that is on the right:

Step 15. It remains to add a horizontal line in the background. Such a move will help make the drawing more stable:

We learned how to draw an apple on a graphic tablet, not only in its entirety, but also a cut version. With the help of a phased description, such a simple drawing of an apple, even young children can do. Despite the fact that the lesson does not seem too complicated, it is quite useful and can be repeated periodically to consolidate the skill.


Drawing hacks
Drawing hacks

9 Artists You Need to Follow on Instagram

How Can You Find Your Own Drawing Style?

15 Jobs For Artists Who Love Drawing
