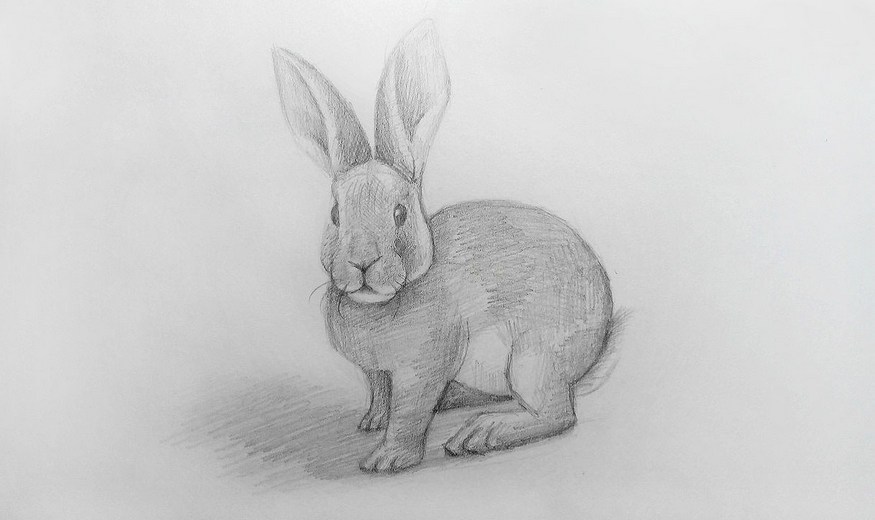
How to draw a Rabbit?
Rabbit is one of the sweetest animals on the planet. Thanks to its fluffy fur, small black eyes and long ears, it can easily win the heart of even the most stale man. How to draw a rabbit? Quite not easy, but with the help of this step-by-step tutorial, even children will cope with the drawing. So, prepare a simple pencil, paper and proceed to create a rabbit portrait.
Tools and materials:
1. White paper sheet;
2. A hard and soft simple pencil;
3. An eraser.
So, let's start to draw:
Step 1. The first step is to build a rabbit's head, using simple figures. For its basis, we use an oval, which will expand slightly to the bottom, which is not surprising, because there will be located the jaw of a rabbit:

Step 2. Now outline the body of the rabbit. We use an oval, close to the circle, which will intersect with the head:

Step 3. Draw one more circle. We will place it under the head, because this figure will serve as a neck for the animal:

Step 4. It's time to draw two ears. Make the edges of the ears slightly inclined in different directions:

Step 5. Next, draw the front paws. Due to the fact that the animal will stand sideways, feet length is different. Near foot will be slightly bigger than the far one. Thus it will be possible to adhere to the law of perspective:

Step 6. Draw two more (back) legs. They differ in their structure from the front. First of all, they are twice as long as the front paws. At the back we will draw a small tail of our rabbit:
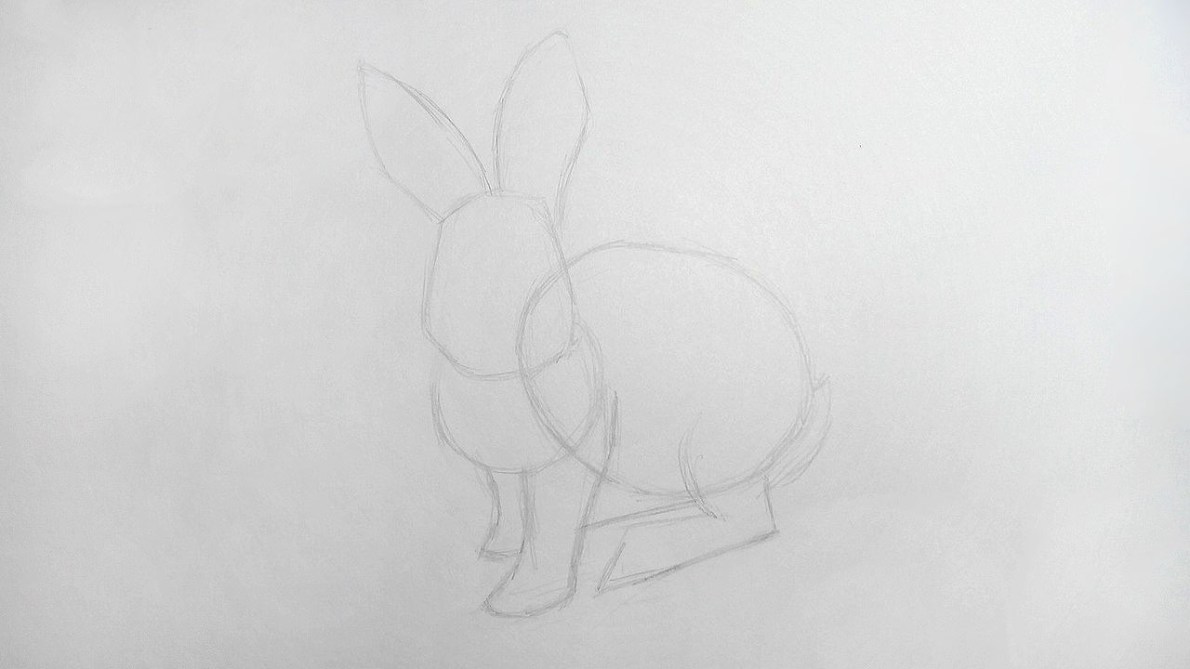
Step 7. With the eraser, remove the extra elements and make the lines smoother:

Step 8. We begin to add elements to the muzzle of the beast - a nose, two eyes and a mouth. Let's make them linear at this stage. In the ears we draw bends, and on the paws - fingers:

Step 9. Our eyes are not straight, but on the sides of the muzzle. Near the rabbit's mouth, make two small round cheeks:

Step 10. Draw the darkest parts on the rabbit's face - eyes, mouth and nose:

Step 11. We put an easy tone on the muzzle of the beast, and also begin to draw the ears. Near the bends, the strokes are laid denser:
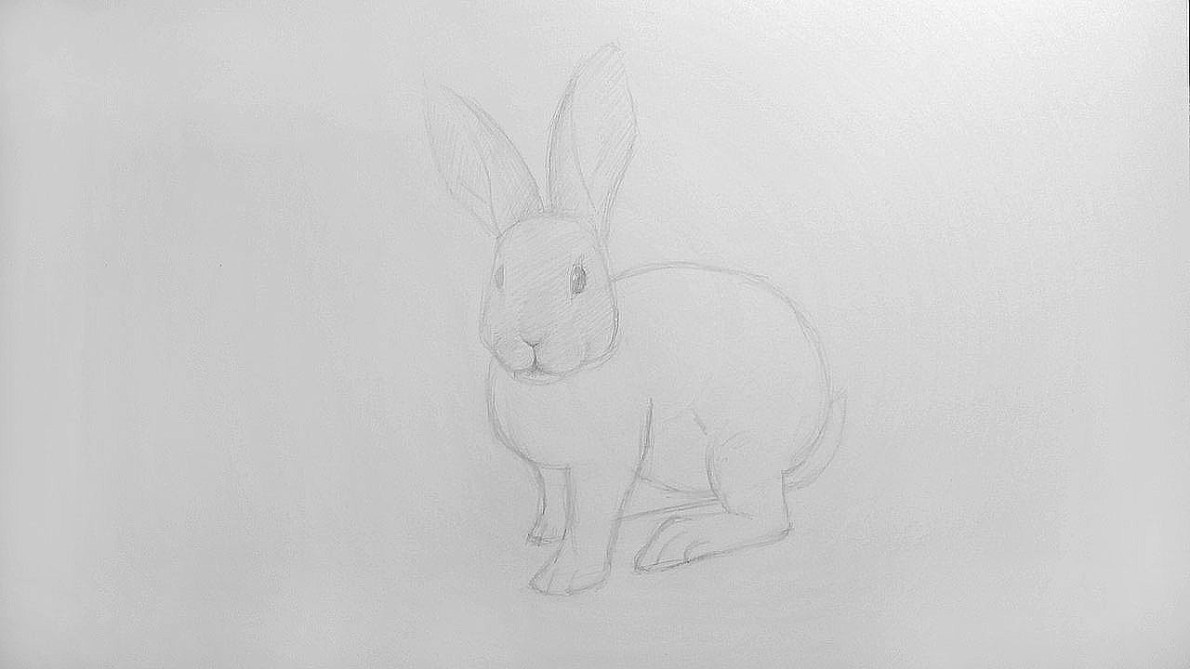
Step 12. Add a contrast to the ears and draw them in more detail. The middle of the ear is made as dark in tone as the outer part of the ears near the base of growth:

Step 13. In the same way you need to draw a muzzle of a rabbit. On the bends, the tone will be darker than on the convex parts:

Step 14. We continue to draw a fur from the neck. The strokes should be arranged according to the shape of the body of the beast, so that it turns out to be more voluminous. With an eraser gently remove the pencil on the edge of the cheeks and mouth. On these parts white wool grows:

Step 15. Smoothly move to the front legs and back. The paw that is farther away from us will be darker than the one that is located in the foreground:

Step 16. We continue to do the same thing. Pay attention that we will make darker the wool under the head - it will be a falling shadow from the head:

Step 17. The belly and edges of the tail are left lighter. The hind legs are drawn in the same way as the fore legs:
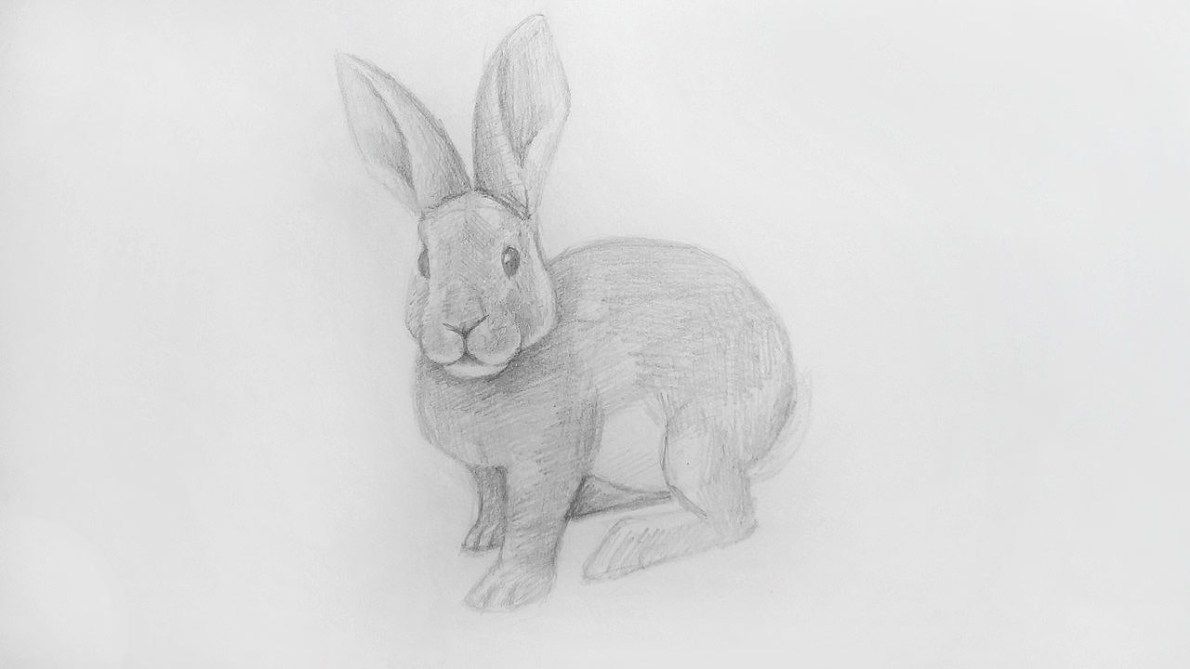
Step 18. Align the tone by applying a soft simple pencil. Harmonize the illustration. At the end, it remains to refine the details and the missing elements:

Step 19. It remains to add a falling shadow from the rabbit. The lighting falls on the right, respectively the shadow - on the left. The work is ready!

The figure of the rabbit came out pretty sweet and cute. Now you can say with absolute certainty that you can draw a rabbit easily and simply.
