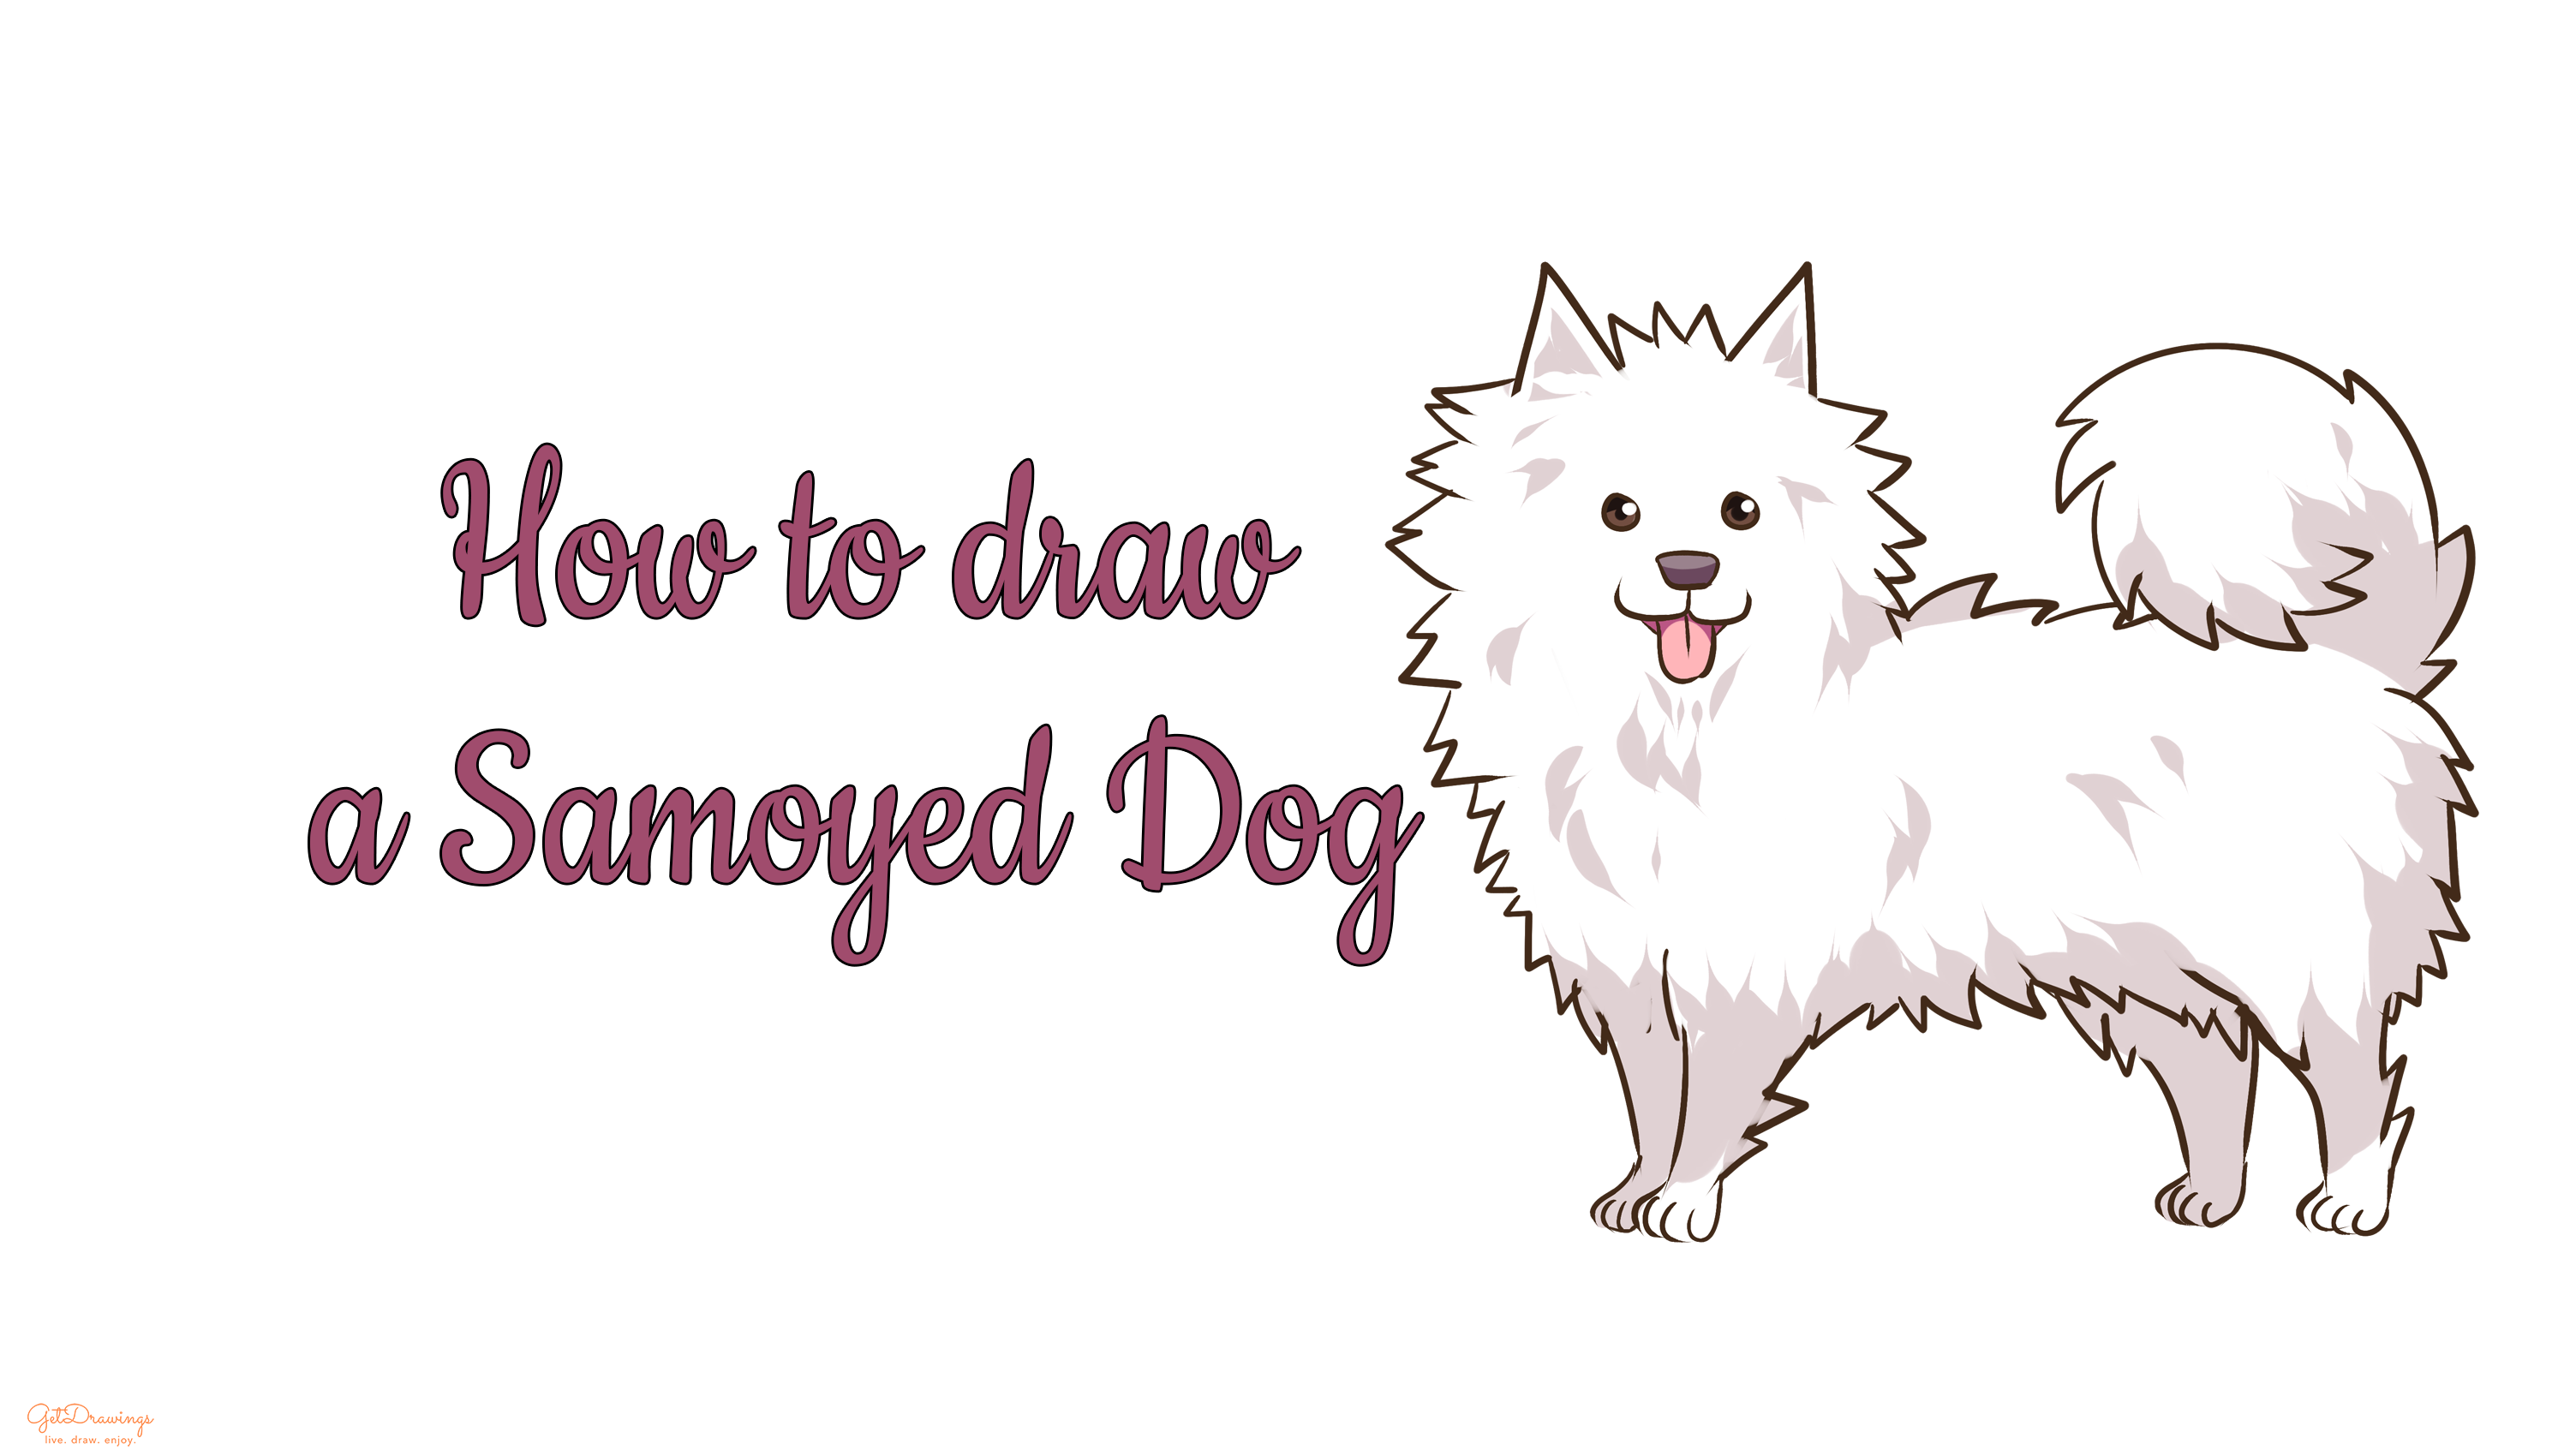
How to draw a Samoyed Dog?
When you have a pet, you usually want to pet them because either they did a good job, or they’re just cute, or even they have a long and fuzzy fur. There’s this dog that originated from Western Siberia and has fur like a cloud. It’s called Samoyed, a breed of large dog with a thick, white, and double-layer coat. What makes this dog lovable isn’t only its thick fur, but also it is known as a dog with a wide smile with its tongue out. It even has a common nickname such as “Smiley”. Since Samoyed’s smile and fur is something easily memorable, I suggest you to learn drawing it by following these steps. But first, you’ll have to prepare a paper, a pencil, and an eraser. Now you’re ready to draw!
Steps:
Step 1: Firstly, we’ll start by drawing the guidelines. The purpose of guidelines is to help you estimate the size of the head, body, and to guide you in drawing the rest of the body. Therefore, we’ll draw a circle on top of your paper to make a guideline for the head of your Samoyed. Then, with the two times the size of the previous guideline, create an uneven parallelogram with curved edges on the right lower corner of the previous guideline. This will be the guideline for the Samoyed’s body. Also, leave a space to create a space between the head and the body. The purpose of the space is to create its neck.

Step 2: Next, let’s start by creating its neck. Make two straight lines below its head with the same length. (see picture to better understand). After that, we’ll continue drawing its legs. Draw two ovals for the front legs with the same amount of size. Also, draw two inverted triangles with curved edges to create the guidelines of Samoyed’s thighs.

Step 3: We can move on to the forelegs by adding several curve lines (see picture) below the previous step. This will be the forelegs guidelines.

Step 4: After that, we can continue finishing Samoyed’s legs with drawing paws. Each legs consist of four curve lines to make a paw shape. Then, we can start drawing the features on Samoyed’s face. Starting with the nose, create an inverted parallelogram with curved edges.

Step 5: Now we can continue with the next features on Samoyed’s face. Starting from its eyes, draw two small circles on top of the previous step. Below the nose, we can start drawing its mouth. Make several curved lines (see picture to better understand) that makes a shape of Samoyed’s mouth. It kind of resembles a shape of an anchor.

Step 6: On to the next step. We’ll start drawing Samoyed’s ear. Usually, Samoyed has pointy ears, Therefore, create two right triangles (see picture) on top of the head guidelines. Then, we’ll need to add a feature of Samoyed that we often see. It’s Samoyed’s wide smiles with its tongue hanging around. Therefore, you’ll need to make a curve below the mouth. Then, add several short lines to complete its smile (see picture to better understand)

Step 7: Finally, we can start drawing its fuzzy fur. You can create fuzzy fur by making uneven spiky lines starting from around its head (see picture).

Step 8: After that, continue making Samoyed’s fuzzy fur around its body guidelines. This step is tricky since you want to make the spiky look less stiff. Therefore, when you draw the spiky line, create the spiky lines a bit curvy in the same direction (see picture to better understand).

Step 9: As for the last detail, add the fuzzy tail using the same technique as the previous step. Usually, Samoyed’s tail is curling up. Make the direction of the spiky lines the same as if you’re making a curled line.

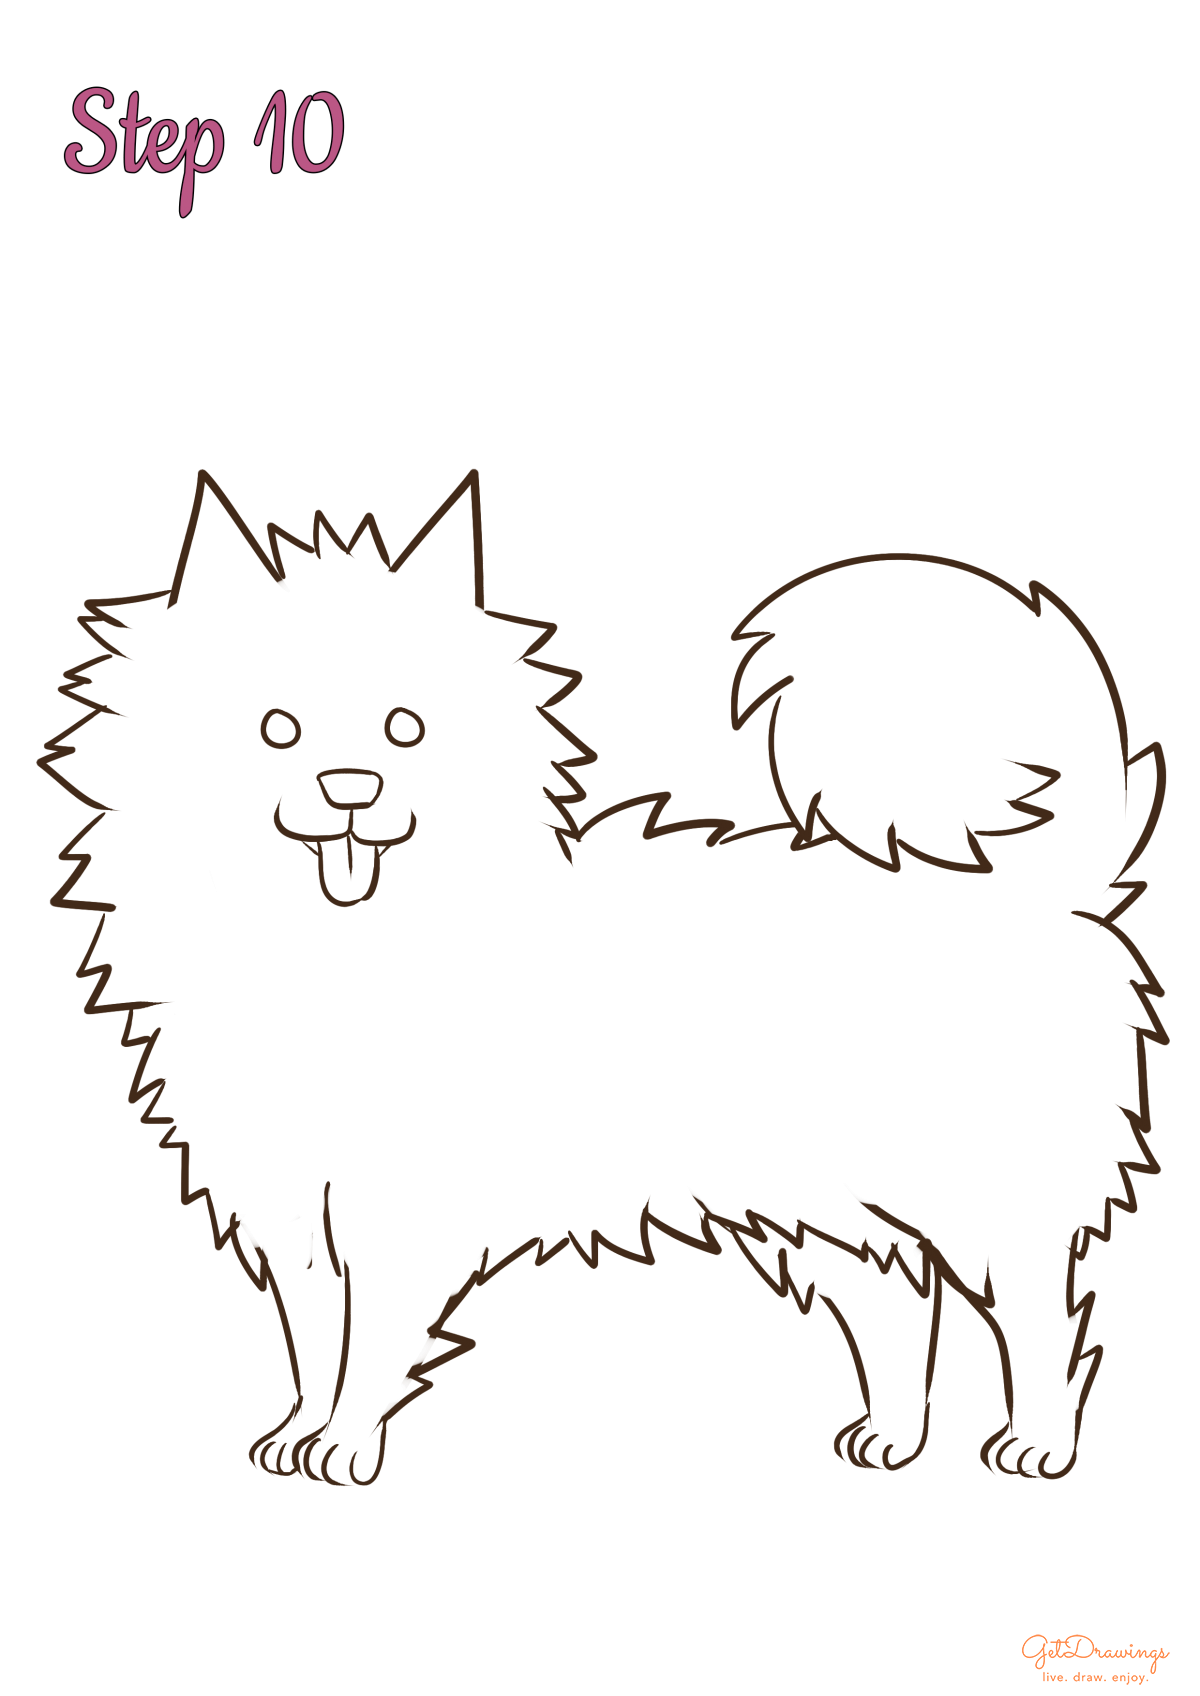
Step 10: Lastly, erase several guidelines and Voila! You’ve finished drawing a Samoyed! Find more animal images!

Since you’re drawing a Samoyed, you need to look at the actual reference of what you’re going to draw. It is important because living things’ form won’t be smooth or symmetrical. Even if it’s symmetrical, the form will still be uneven. You’ll need keen eyes and a lot of practice so you can make your drawing perfect. Good luck!
