How to draw an Eagle?
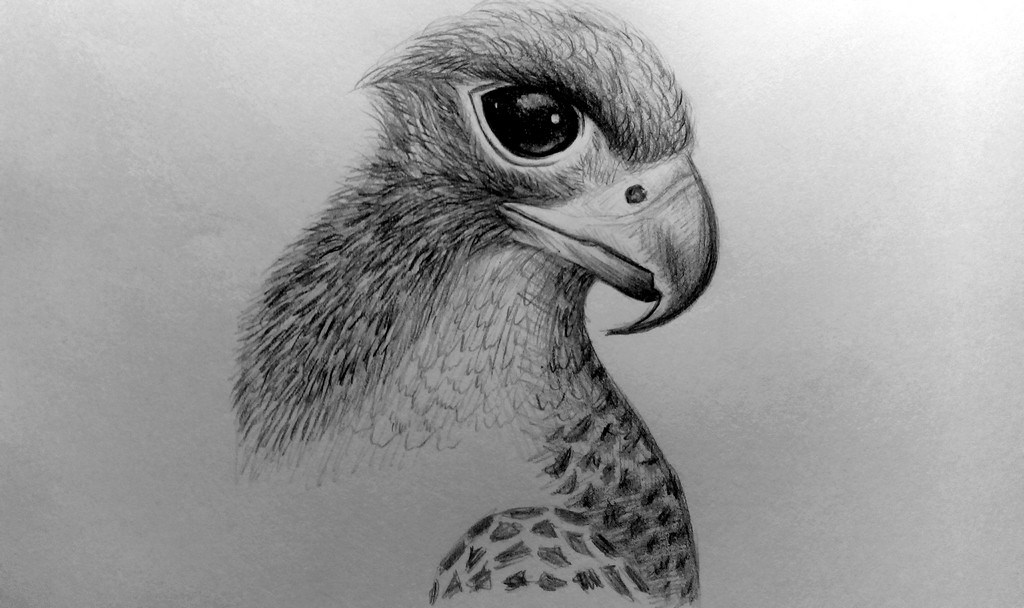
Today we will learn how to draw a bird of extraordinary beauty - the eagle. Among the birds, the eagle stands out rather impressive in size, it has powerful paws and large wings. Because of these, the eagle hunts small animals and can proudly soar in the sky. Often the silhouette of a majestic bird is used as a symbol of courage and strength, and of course everyone knows that the eagle is depicted on the coat of arms of the United States. Therefore, any artist, simply must be able to draw a portrait of an eagle in profile, depicting its sharp beak and keen eye. Our step-by-step tutorial "how to draw an eagle" for beginners, it will help to easily cope with this difficult task even for the child!
Tools and materials:
1. White paper sheet;
2. Soft simple pencil (2B or above);
3. An eraser.
Steps of the drawing:
Step 1. With a simple pencil, we outline the length and breadth of the portrait of the bird, drawing two lines of cross to the cross. A short segment will indicate the width of the head given the beak, and the long one - from the head to the middle of the body of the eagle:

Step 2. Draw the silhouette of the bird. The head will be located in the profile, where the beak is on the right side. On the left we will outline the back of the head and the border of the arrangement of the feathers:

Step 3. Now let's draw a place for the growth of the beak and its edges. Its beginning will be located approximately in the middle of the head. Near the place where the center lines intersect:

Step 4. Add a big eye, almond shaped. Around it we draw a line, and on the top we draw a lid:

Step 5. Again we return to the beak. Now you need to draw its middle, as well as the sharp curved upper part and the bottom. From above, draw a small hole - this is the nostrils of the bird:

Step 6. To the right we add a wavy line, thus we have drawn the body and part of the wing of the eagle:

Step 7. With an eraser remove all the extra lines and leave a common silhouette. Inside the eye, we add two flares:

Step 8. Let's move on to hatching. First of all, let's draw an eye, leaving a glare blank. For volume, we make the top and bottom of the eye slightly lighter, weakening the pressure on the pencil:
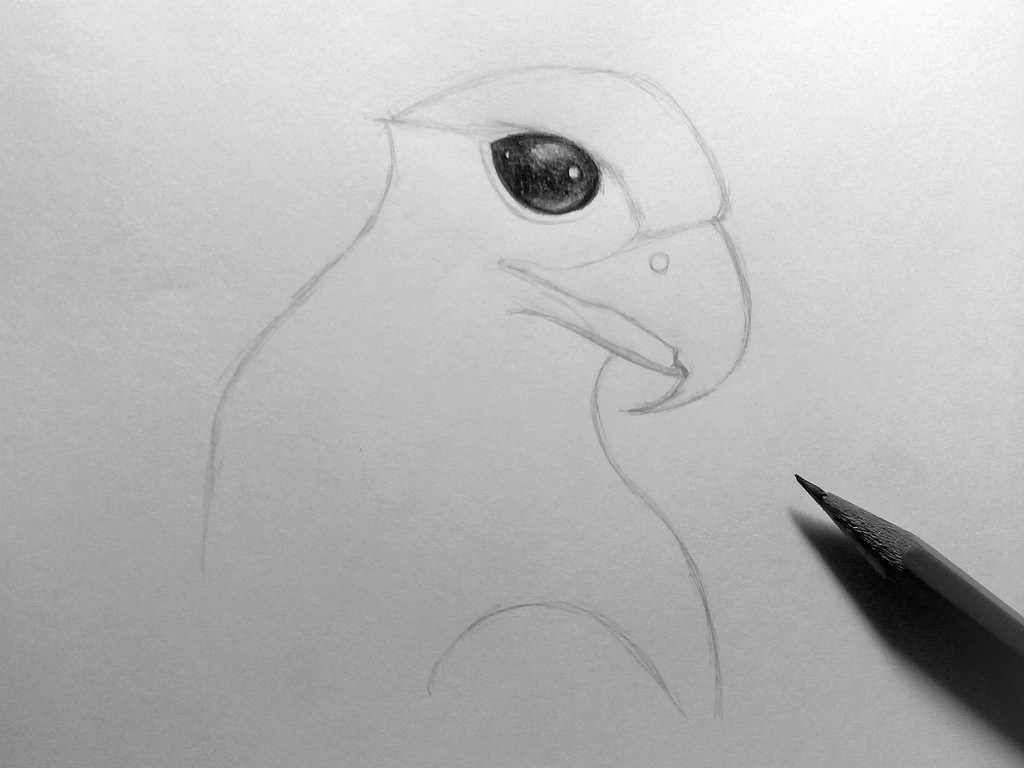
Step 9. Circle the line around the eye and draw a bird's eye:

Step 10. Now draw the upper part of the head of the eagle. Strokes are applied in one direction, making gusty lines. With the help of this technique it will be possible to show that the feathers on the head are short and slightly furry:

Step 11. We continue to hatch going down. Around the eye leave a little empty space, and under the eye and on the eyelid we will intensify the pressure on the pencil. At these places, the density of feathers will be greater:

Step 12. Next, we put the finishing touches on the bird's chest. We begin to draw feathers with weak pressure to denote the face:

Step 13. It's time to add contrast. These areas will be the darkest in the portrait:

Step 14. Just do not leave the beak without attention. Its edges will be darker than the base. Through the beak we barely noticeably draw two wavy lines:

Step 15. Next, make a small stretch of the shade under the head (from right to left) and add a pattern of feathers:

Step 16. Draw spots along the right edge on the feathers of the eagle. From the bottom there will be a part of the wing, on which there are also spots:

Step 17. Add a contrast and a shadow on the right side. Working on the missing steps and detail the drawing. The work is ready!

Now even children can easily draw an eagle in pencil. And how many more things can be drawn by them? In this will help other tutorials on our site.
