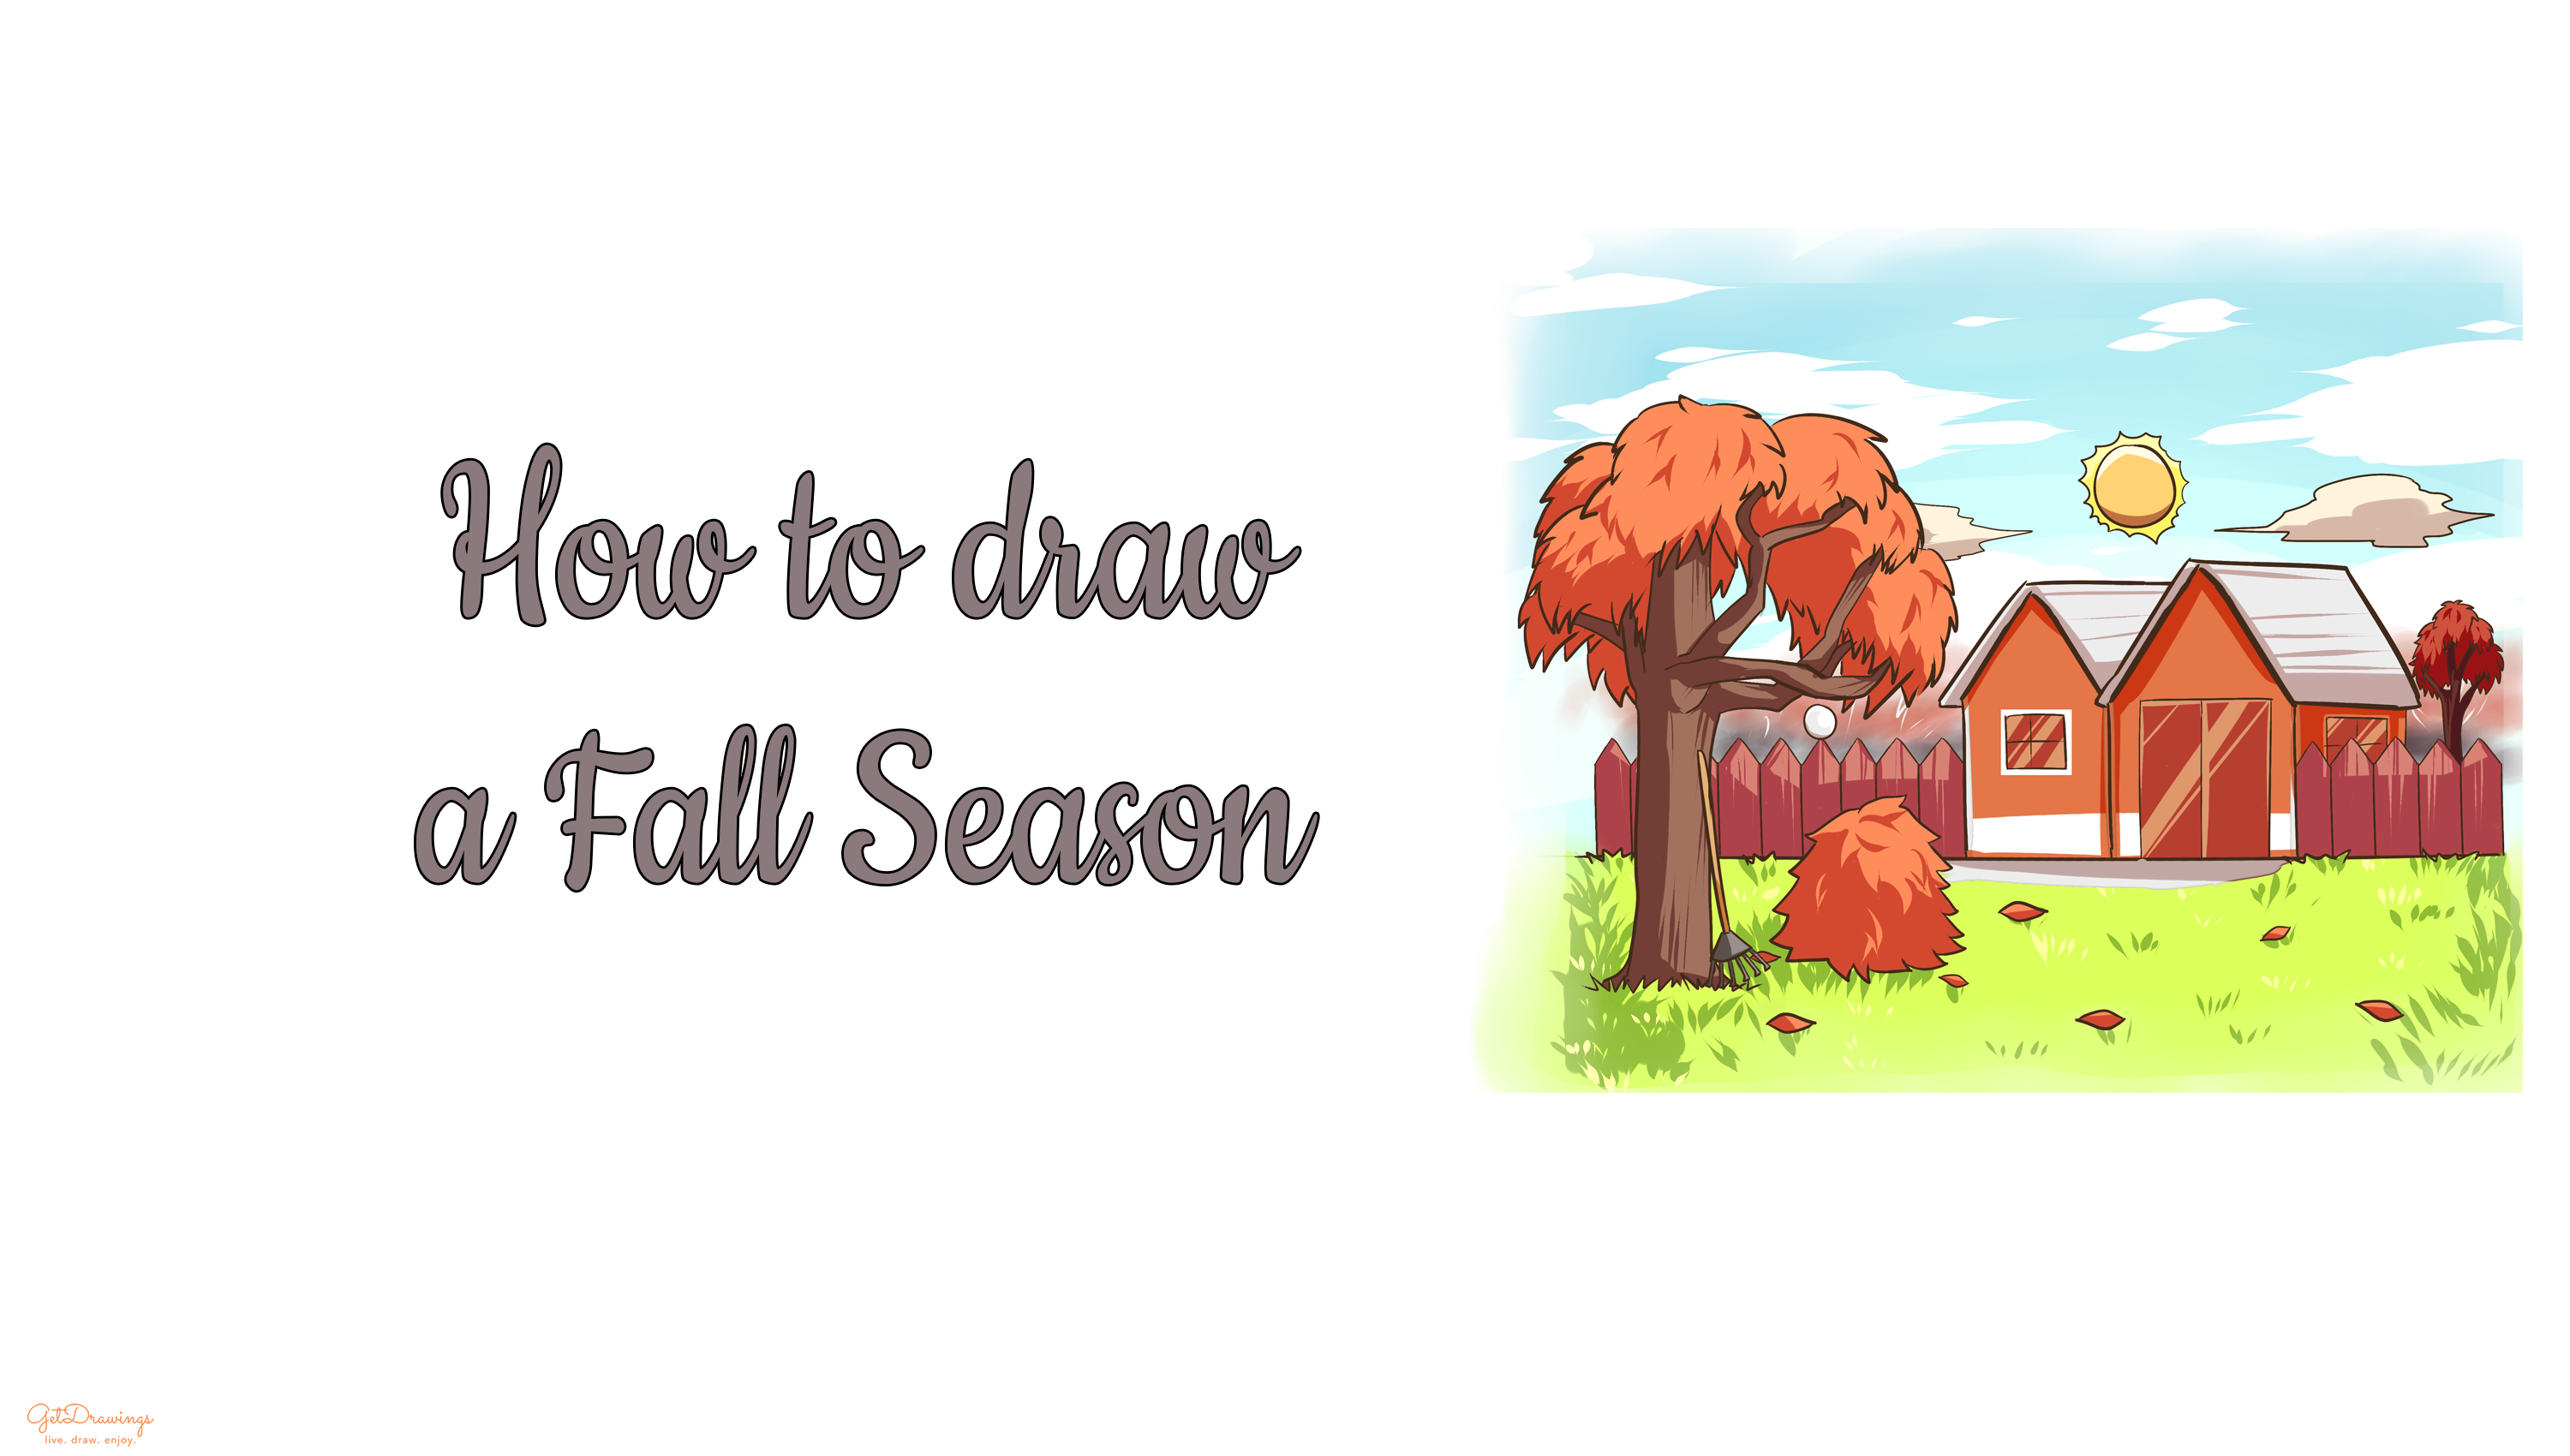
How to draw a Fall Season?
This season comes after summer. In this season, leaves slowly fall down. Hence the season named after an Old English word “feallan” which means “to fall or to die”, as the time goes by the phrase was shortened to fall. Mostly in the Fall season tend to have a lot of leaves falls down and there’ll be a pile of it. The reason’s why it all starts to fall down because it’s a season that transition from Summer to Winter. The plants slowly withered and the same goes with the tree. That’s why this season has so many leaves falls down and you can enjoy the beauty of it. Therefore, if you really want to portray the beauty of the Fall season, you can follow these steps and prepare several things beforehand. You’ll need paper, a pencil and an eraser. Now you’re ready to draw!
Steps:
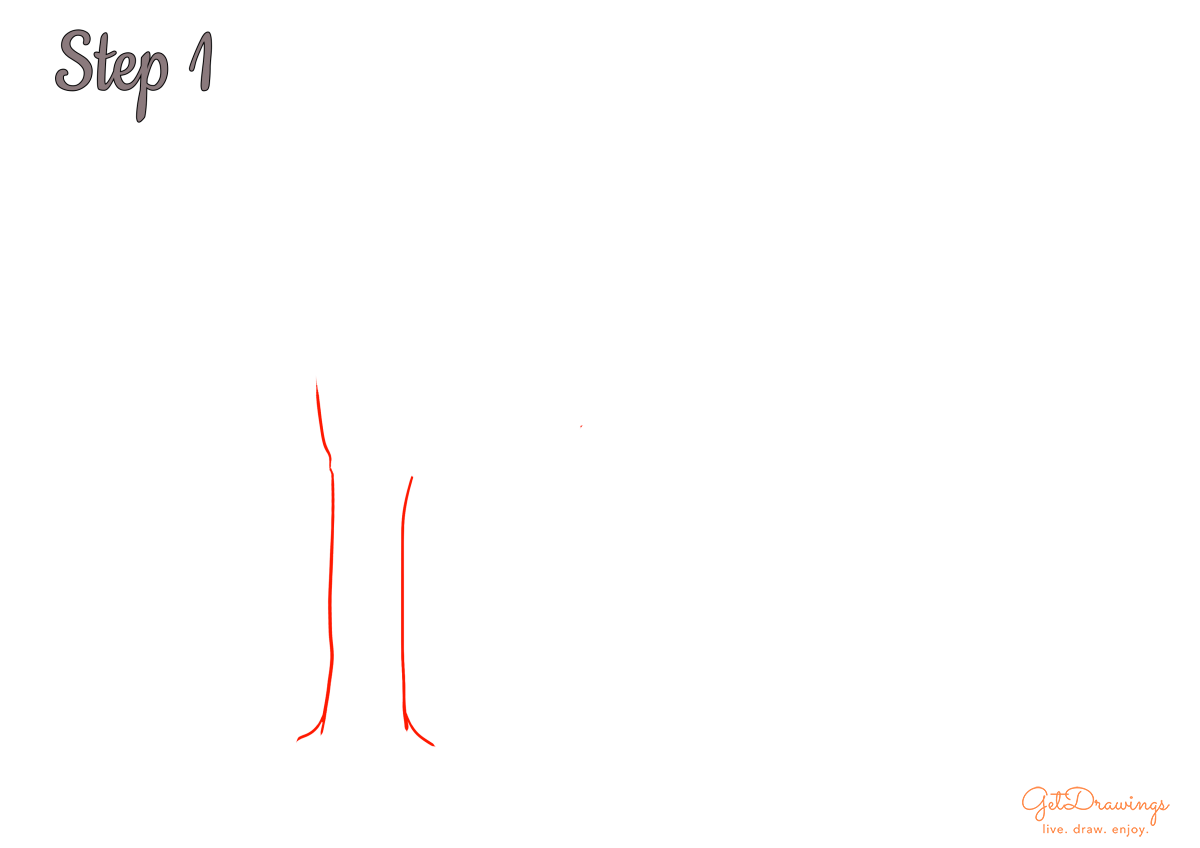
Step 1: Firstly, we’ll start drawing a tree by drawing its tree trunk. Create two vertical curve lines and make the left-hand side slightly longer than the right-hand side one. The lines also have to be uneven. Then, continue with the top end of the roots by drawing two short lines below the previous lines.
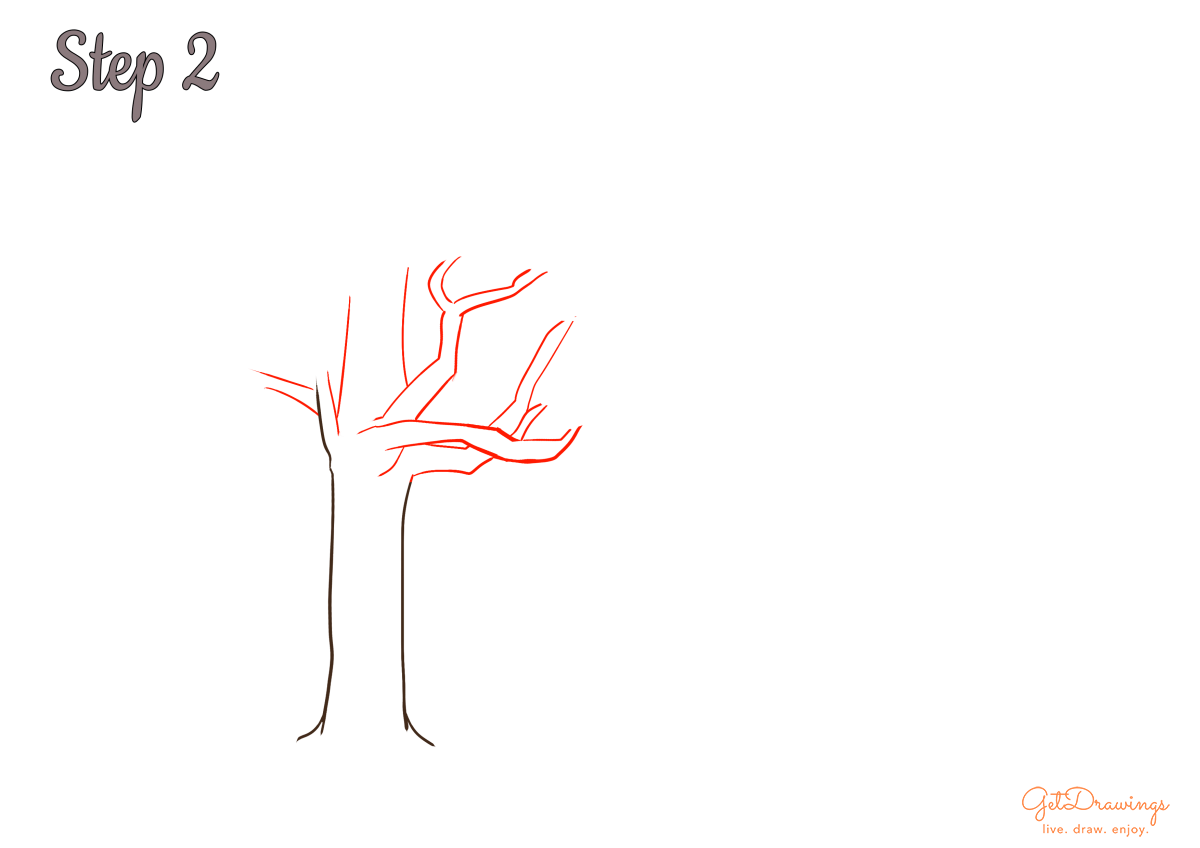
Step 2: Secondly, from the previous tree trunk steps, we can move to the upper part of the tree which is the branch. You can draw uneven curve lines (see picture to better understand) to divide the branches.
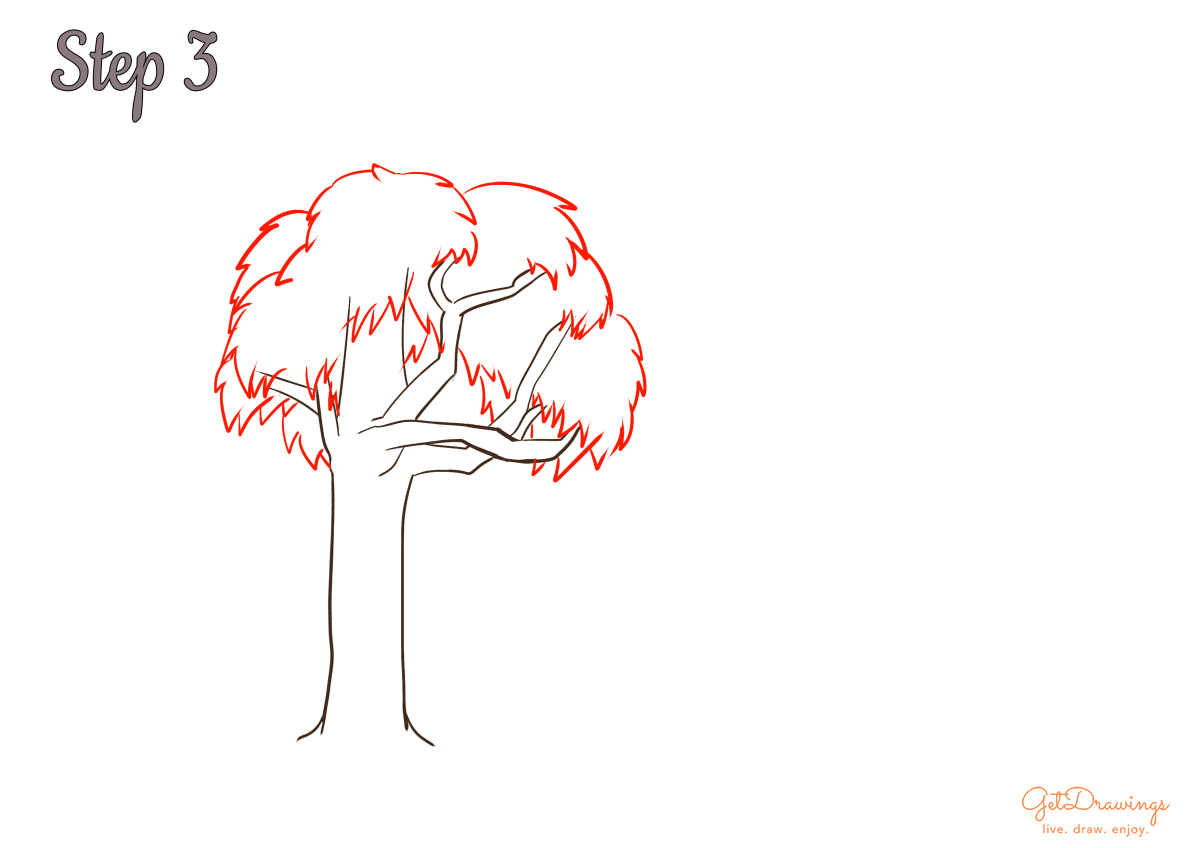
Step 3: Moving on to the next step which is the foliage. You can make it by simply draw several uneven spiky lines (see picture) that heading to the ground. Create the foliage around the upper part of the tree. Also to cover the end of branches with several spikes. This will make the foliage covering the branches. Since it’s Fall season, make the foliage less than the Spring season.
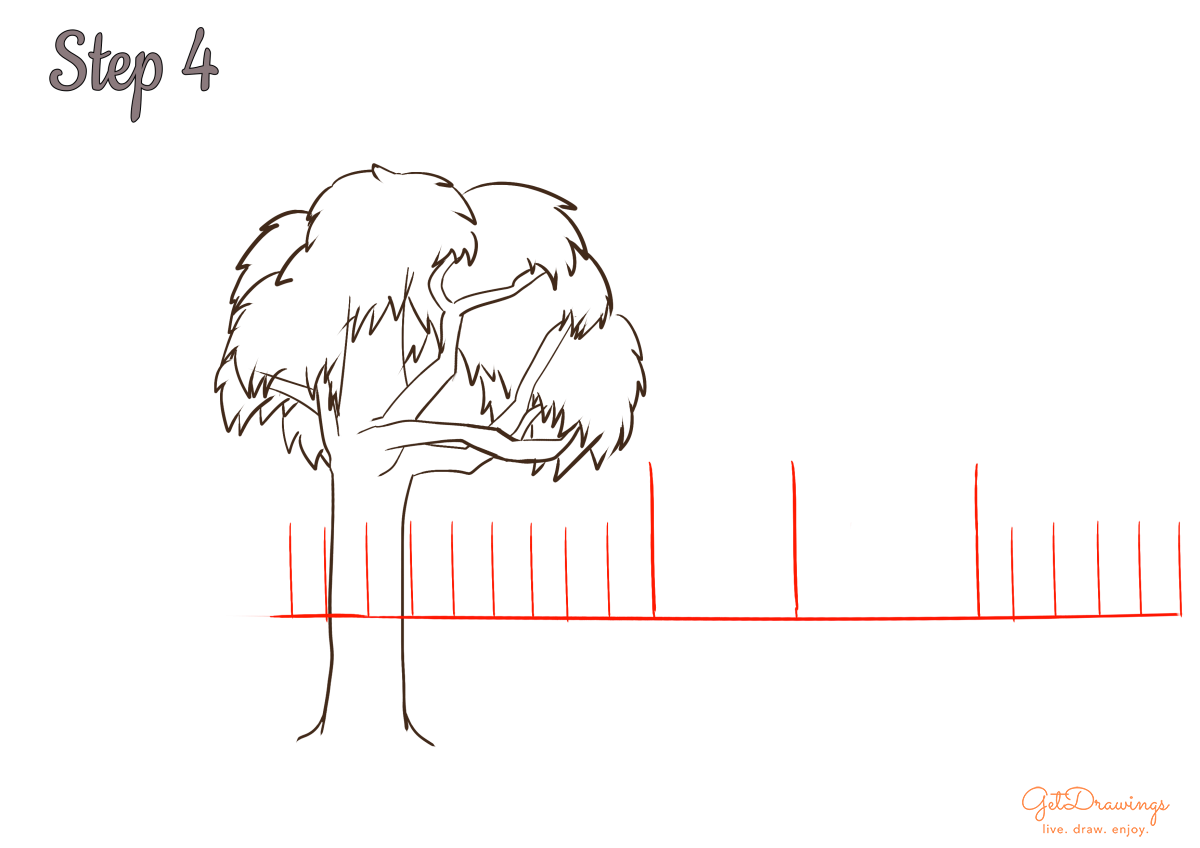
Step 4: Then, we’re continuing to the next part which is the fence and the house. Since we’re going to show the backyard of a house. Therefore, make a long horizontal line near the lower part of the tree and create several short vertical straight lines on top of the line. Since we’re going to create a house, make two longer vertical straight lines on the center of the horizontal lines
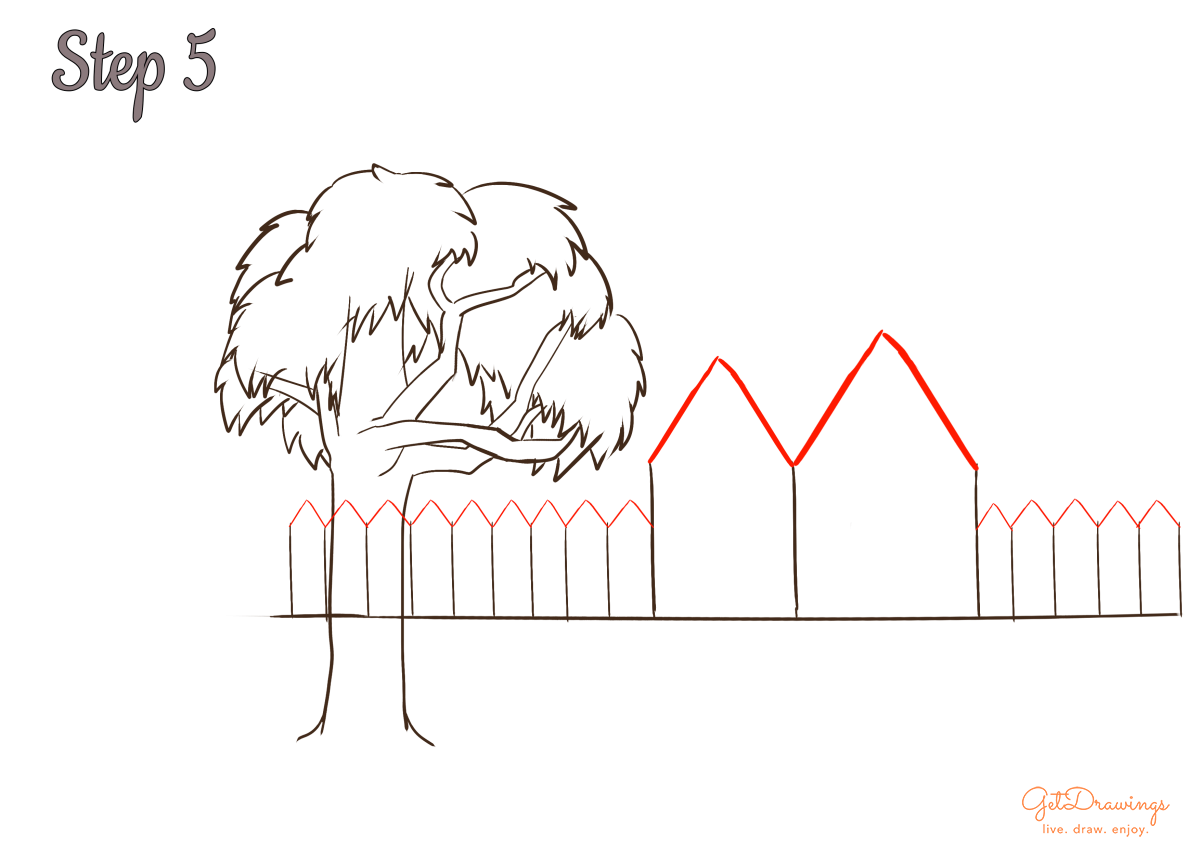
Step 5: To continue the previous step, we’re going to add several short diagonal lines that are opposite to each other (see picture to better understand). This is for every short vertical line. Also, it applies the same to the long vertical lines.
Step 6: After that, continue making the roof above the previous longer vertical lines that consist of shorter and longer straight lines. We’re going to make the roof resembles parallelogram shapes. Also, finish the base of the house by adding a short straight line from the right-hand side of the roof (see picture).
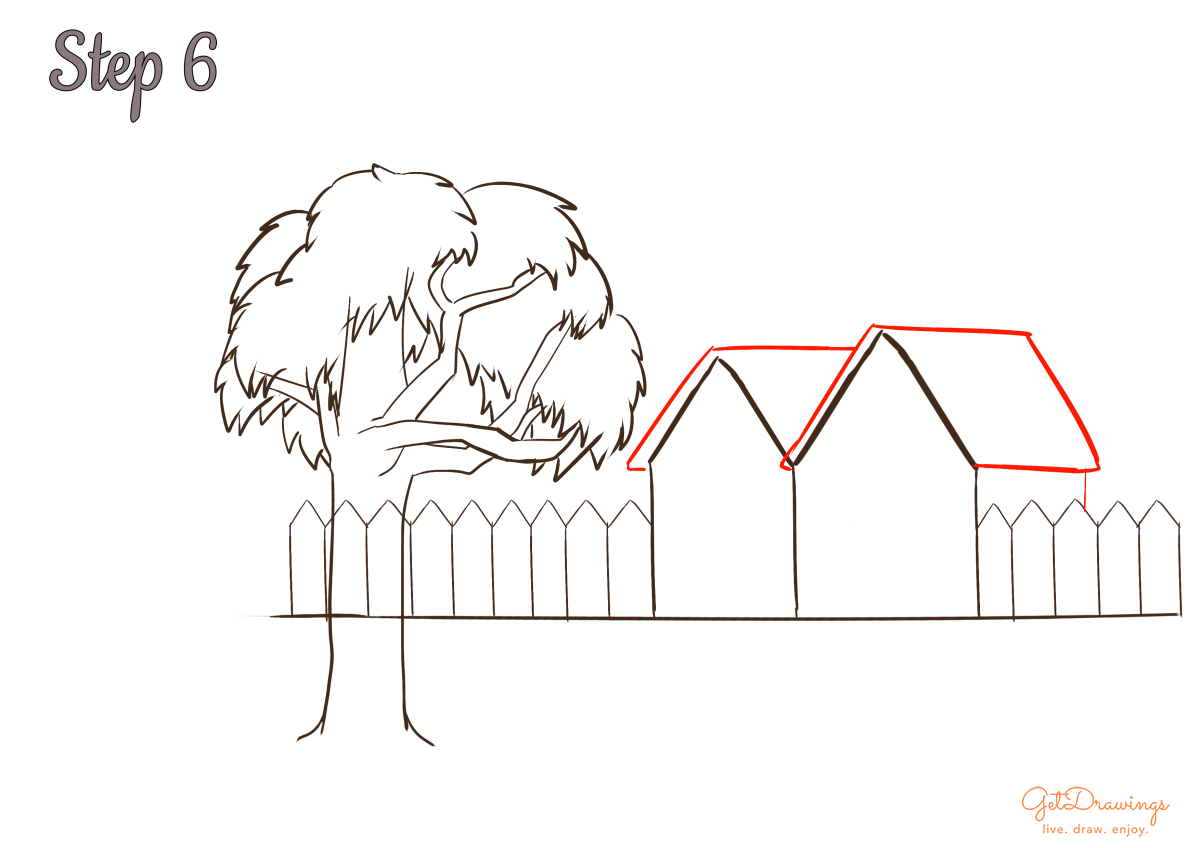
Step 7: On to the next step. Draw the details for the house such as windows and backdoor. You can make it by adding a small rectangle and make a cross inside of it for the window. As for the door, you can create it with a long rectangle with a straight vertical line inside the rectangle. Don’t forget to add the side windows and create it with a small parallelogram instead.
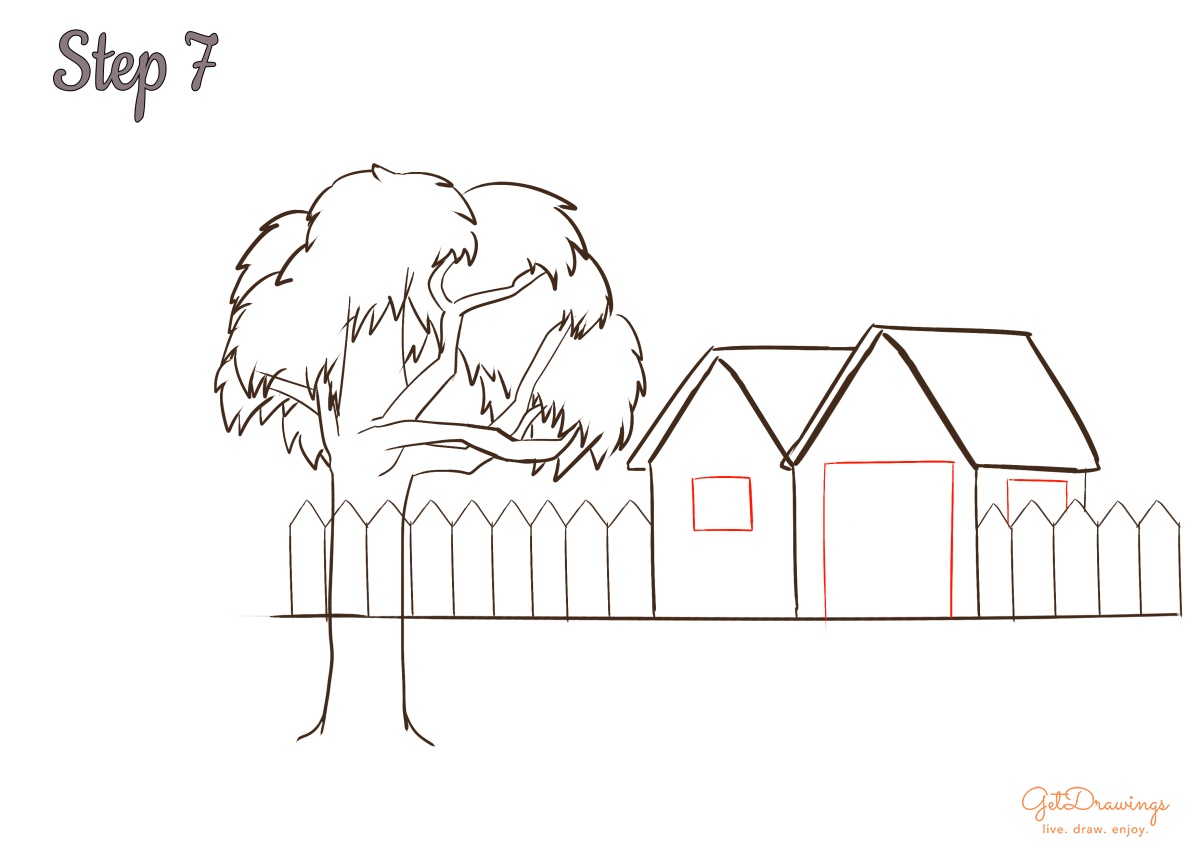
Step 8: Then, we can start with the Fall season decoration such as a pile of leaves. You can make it by drawing several spikes that shapes like a mountain full of leaves (see picture to better understand) next to the tree. Also, since it’s backyard we’re going to add little more detail such as adding grass. Therefore, draw several spikes lines below the tree and below the fences (see picture).
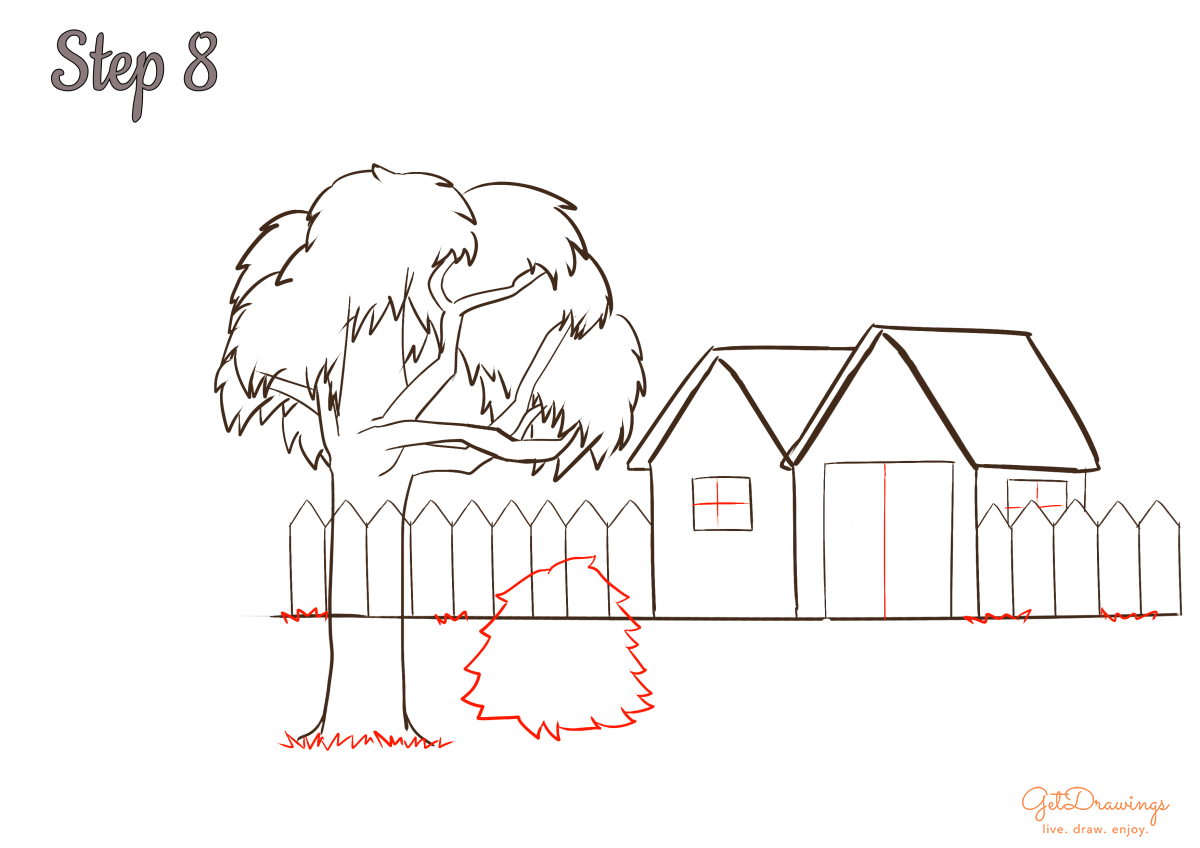
Step 9: Even though we sweep away and turn it into a mountain full of leaves, usually there’s still leaves spreading around it. Create it by making several leaf-like shapes around the backyard.
Step 10: Now we’re starting to draw the rake broom that usually appears on Fall season scenery. Draw it using several straight lines consist of the long and shorter ones. Make the lower part as if its shape just like a triangle (see picture to better understand). Also since this is a backyard, it also usually there’s an outdoor lamp. Therefore, create a circle above the fence on the left-hand side of the house.
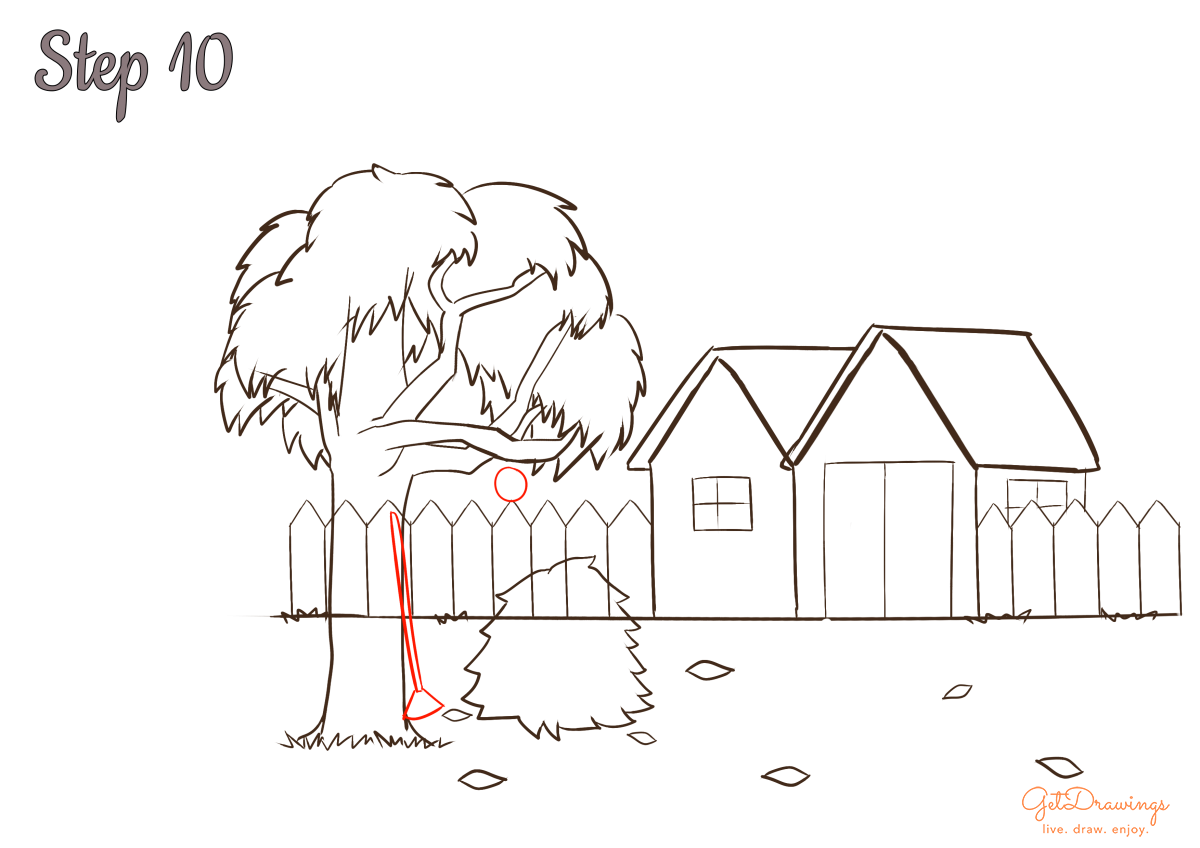
Step 11: Next, continue the rake broom by making a claw-like shape below the previous shape that has been made before. Then, since we want to make an additional detail for the background, let’s add another tree behind the house. We’ll start by drawing the tree trunk and the branches but smaller (see picture)
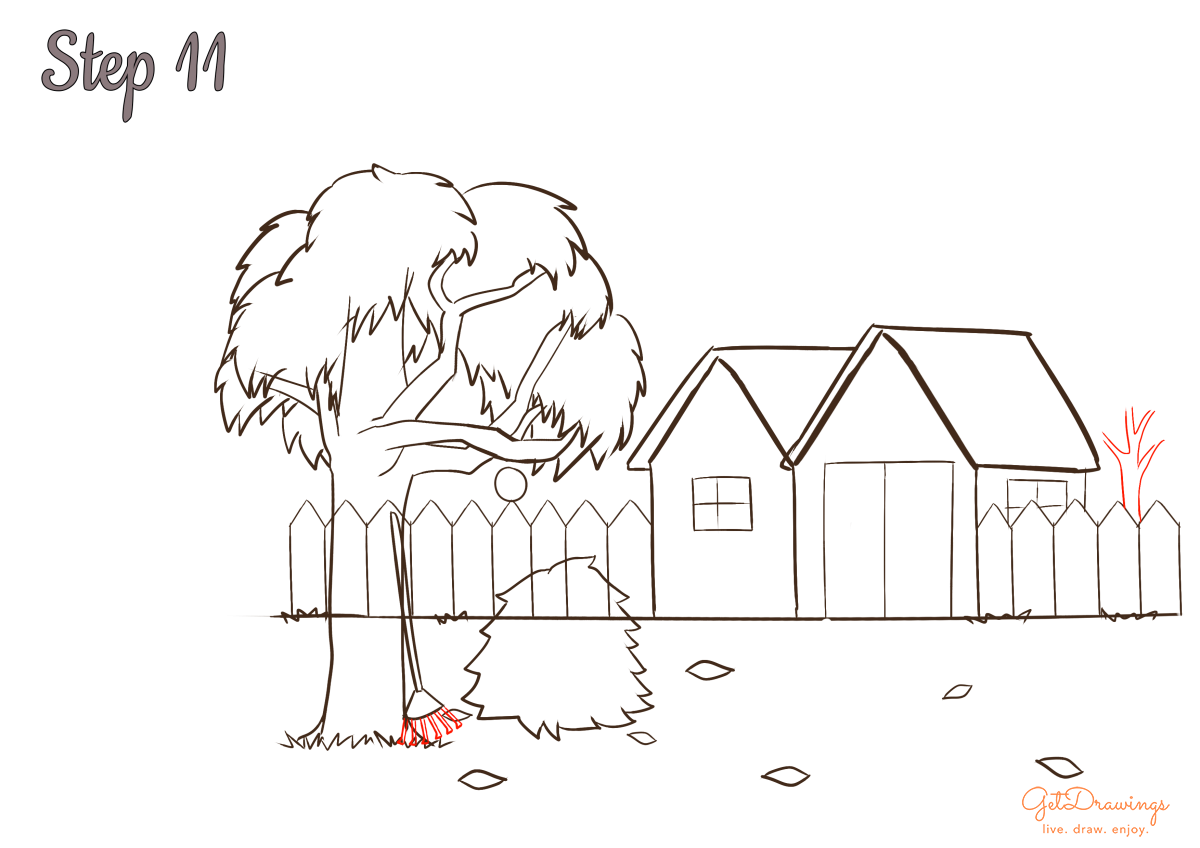
Step 12: Continuing the previous step, add the foliage for the back tree. After that, we’re going to add clouds above the house. We can draw it by making several curve lines (see picture to better understand)
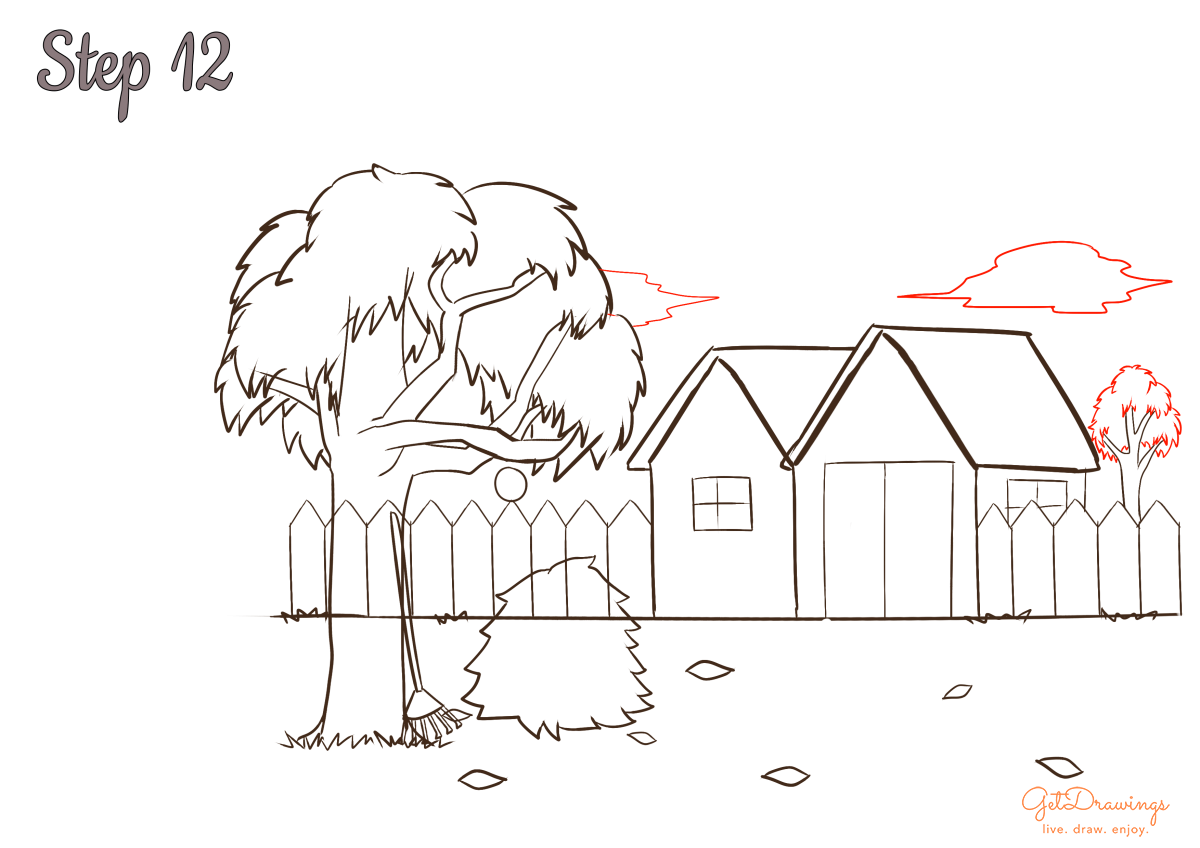
Step 13: The next step would be drawing the sun. Starting with a giant circle with the same height as the tree branches.
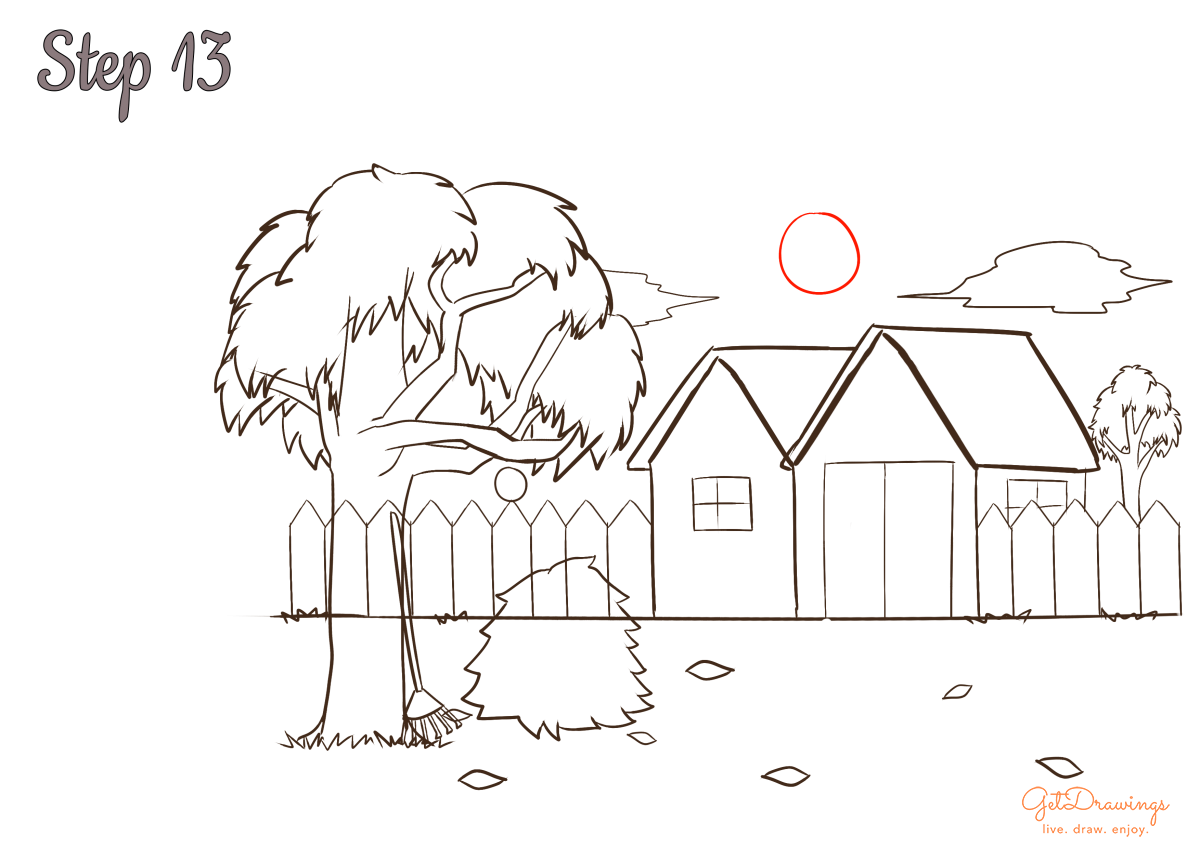
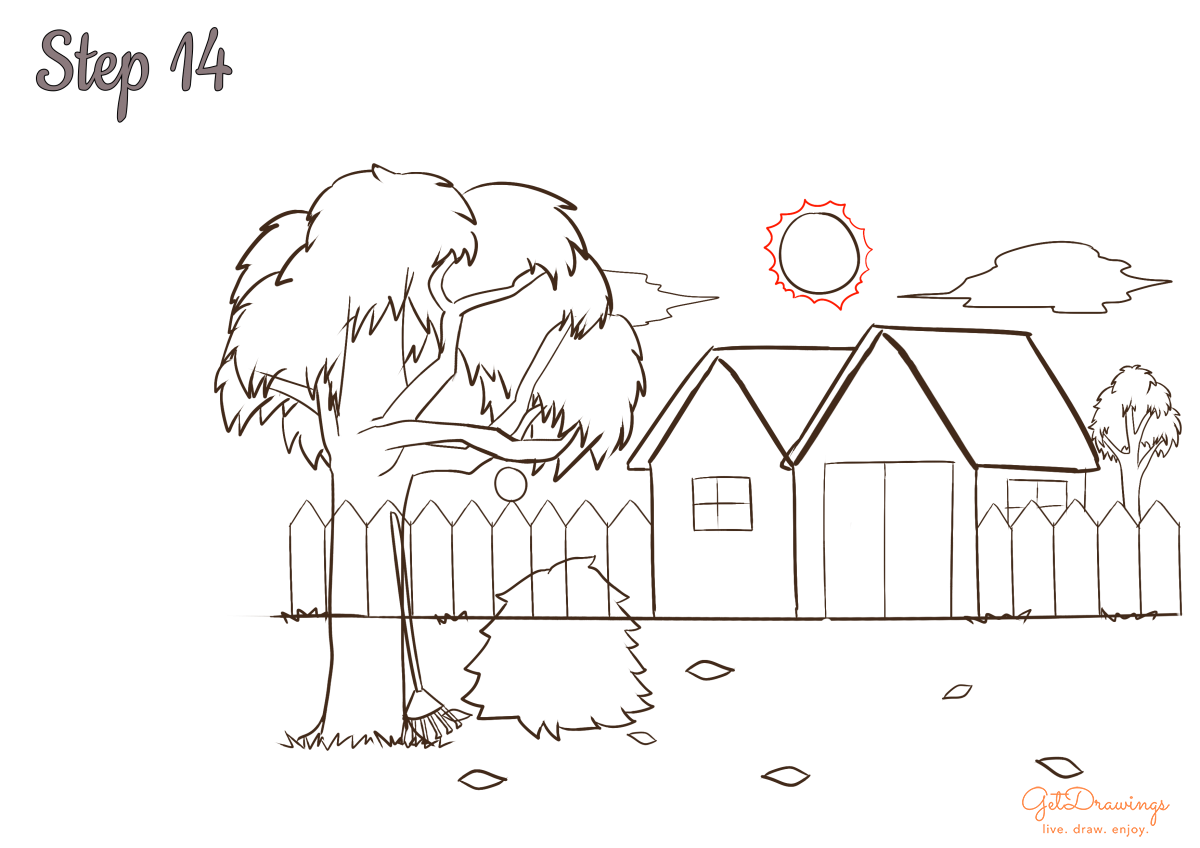
Step 14: To make the sun is shining brightly, we can draw several curves that resemble spikes around the circle. Also, try to make the spikes uneven to make it more dynamic.
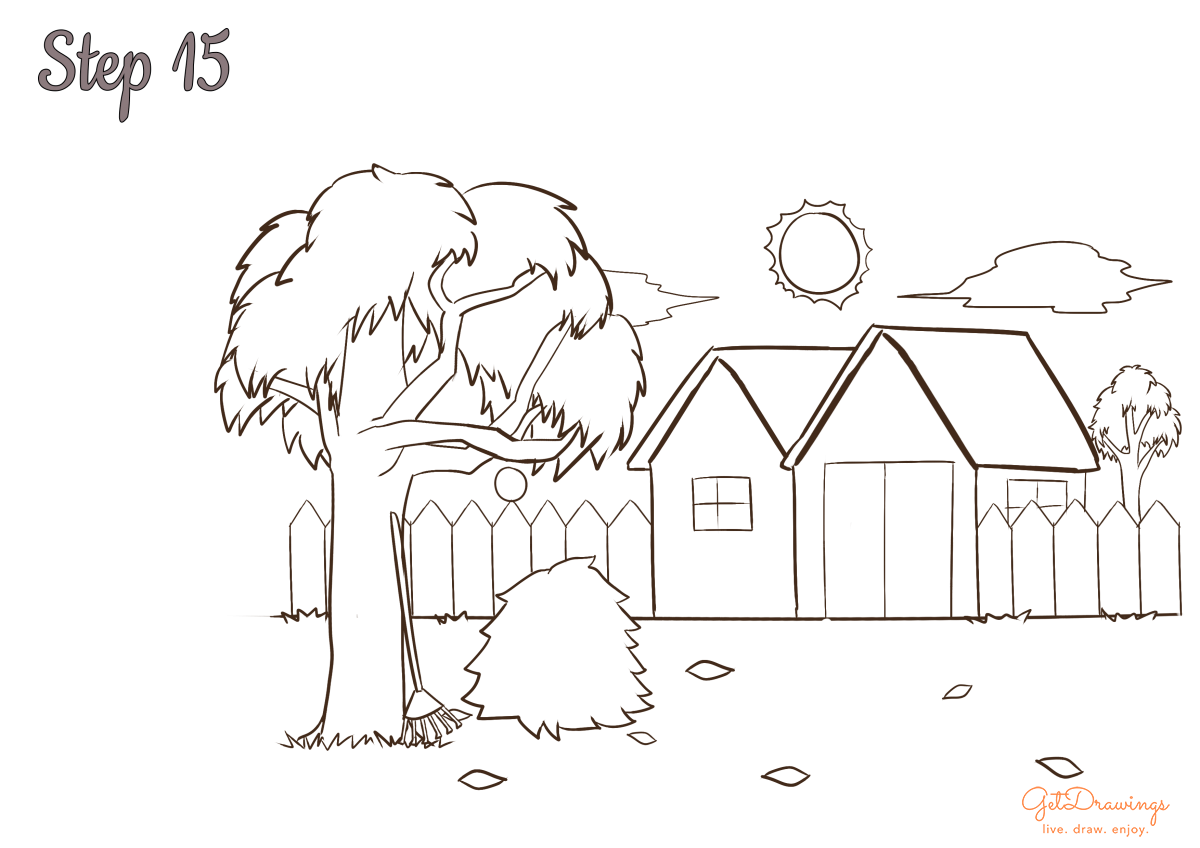
Step 15: Lastly, if there’s a line that intersecting each other, this is the time to erase it. Voila! You’ve finished drawing scenery of the Fall season!
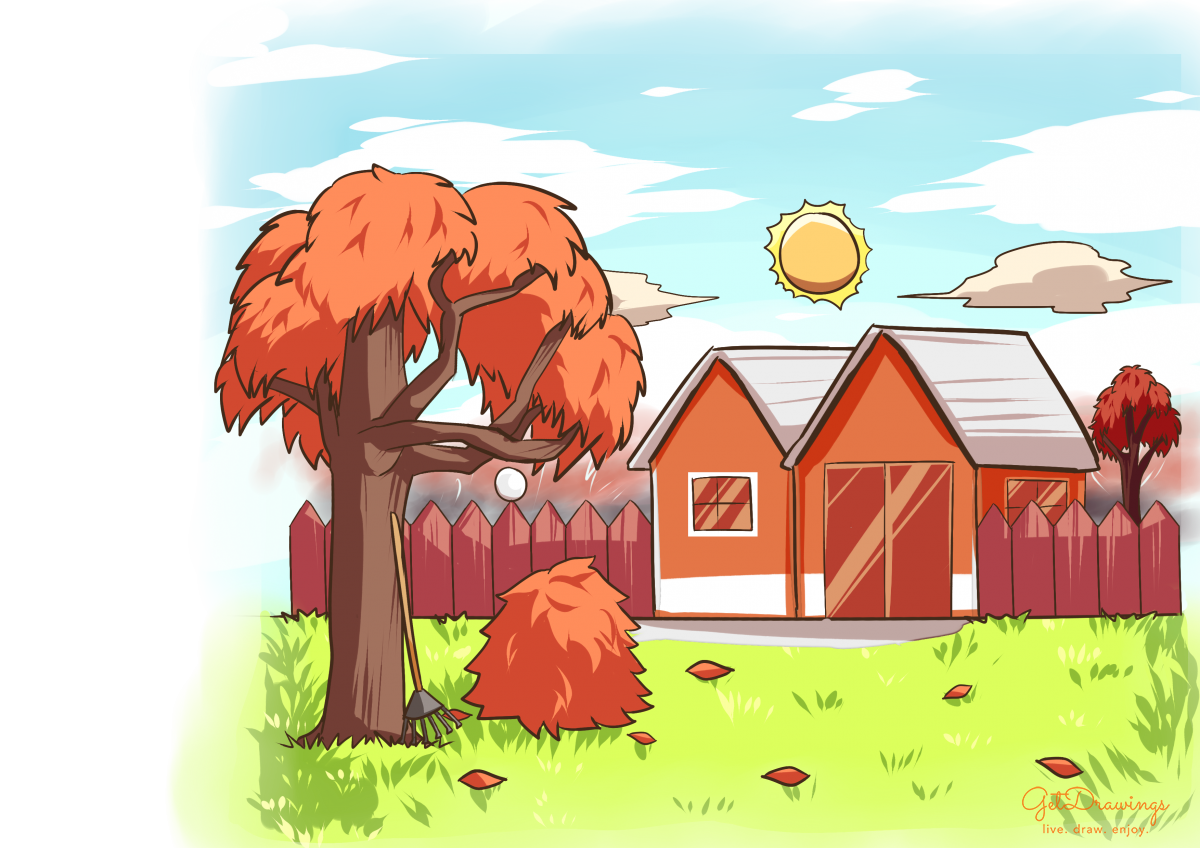
When drawing scenery, the most important part is to look at the reference. How’s the actual shape of the tree, the rake broom, the house, etc. This is important because living things’ form won’t be smooth or symmetrical. Even if it’s symmetrical, the form will still be uneven. Therefore it’s important, especially drawing tree branches and the trunk. You’ll need keen eyes and a lot of practice so you can make your drawing perfect. Good luck!
