
How to draw a Bear step by step
What do you usually think of when you’re in the forest? There’ll be trees, insect, and animals. One of them is Bear, a carnivoran mammals of the family Ursidae. They’re classified as Carnivora order. Despite being a carnivoran mammals, they can become herbivore or mostly omnivore depends on their locations. They have a heavy build but also an adept runners, climbers, and swimmers. If you want to know how the bear would look like and how to draw them, you can follow these steps and prepare several things beforehand. You’ll need paper, a pencil and an eraser. Now you’re ready to draw!
Steps:
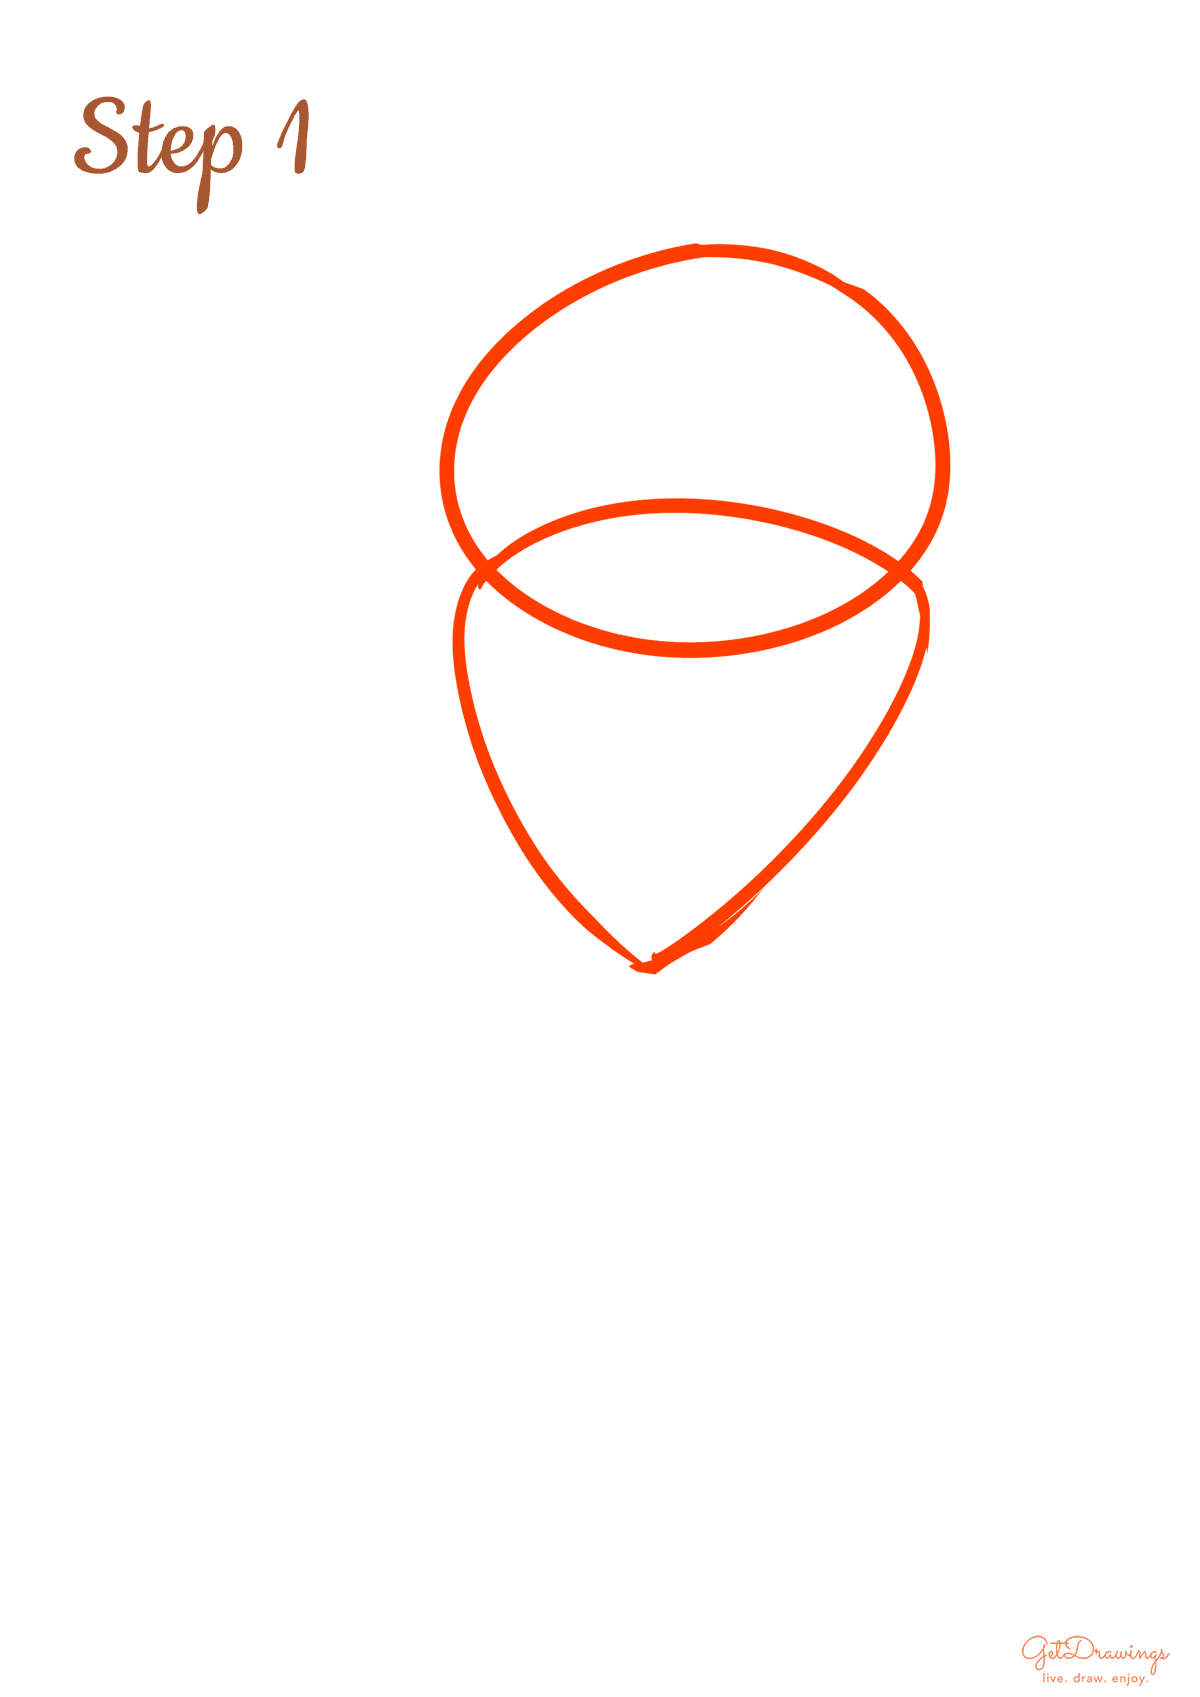
Step 1: First of all, we’ll start by drawing the guidelines. The purpose of guidelines is to help you estimate the size of the head, body, and to guide you in drawing the rest of the body. Therefore, we’ll draw an uneven oval first. This will be the head guideline. Then, add a guitar pick-like shape intersecting the previous shape to create its neck.
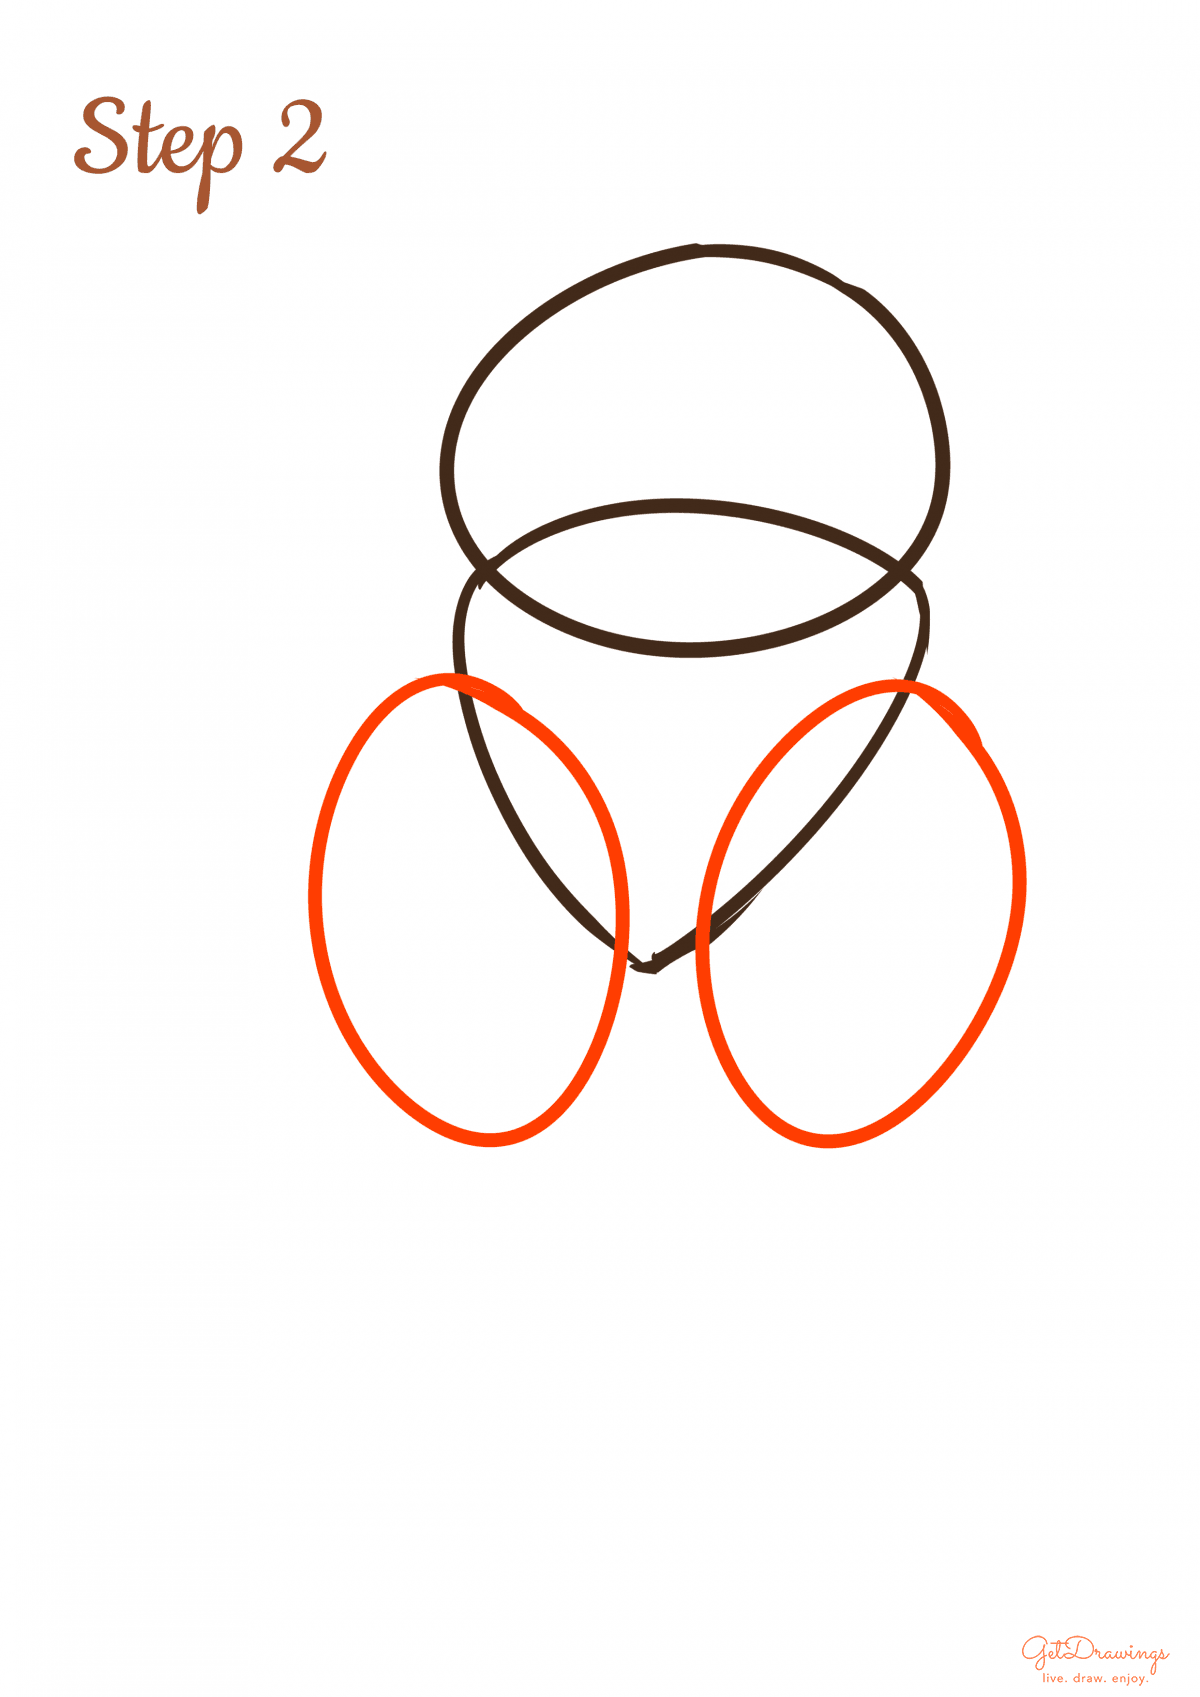
Step 2: Moving on to the next step. We’ll add its shoulder with upper arm by making two uneven oval shapes below the previous shape that we made. The ovals need to be put next to each other and the ovals needs to be wider than the previous step.
Step 3: After the previous step, we’ll continue drawing body and upper back legs. Draw a large curve on the left-hand side of the body guideline. Then, you can add two smaller curves to create its upper back legs (see picture to better understand).

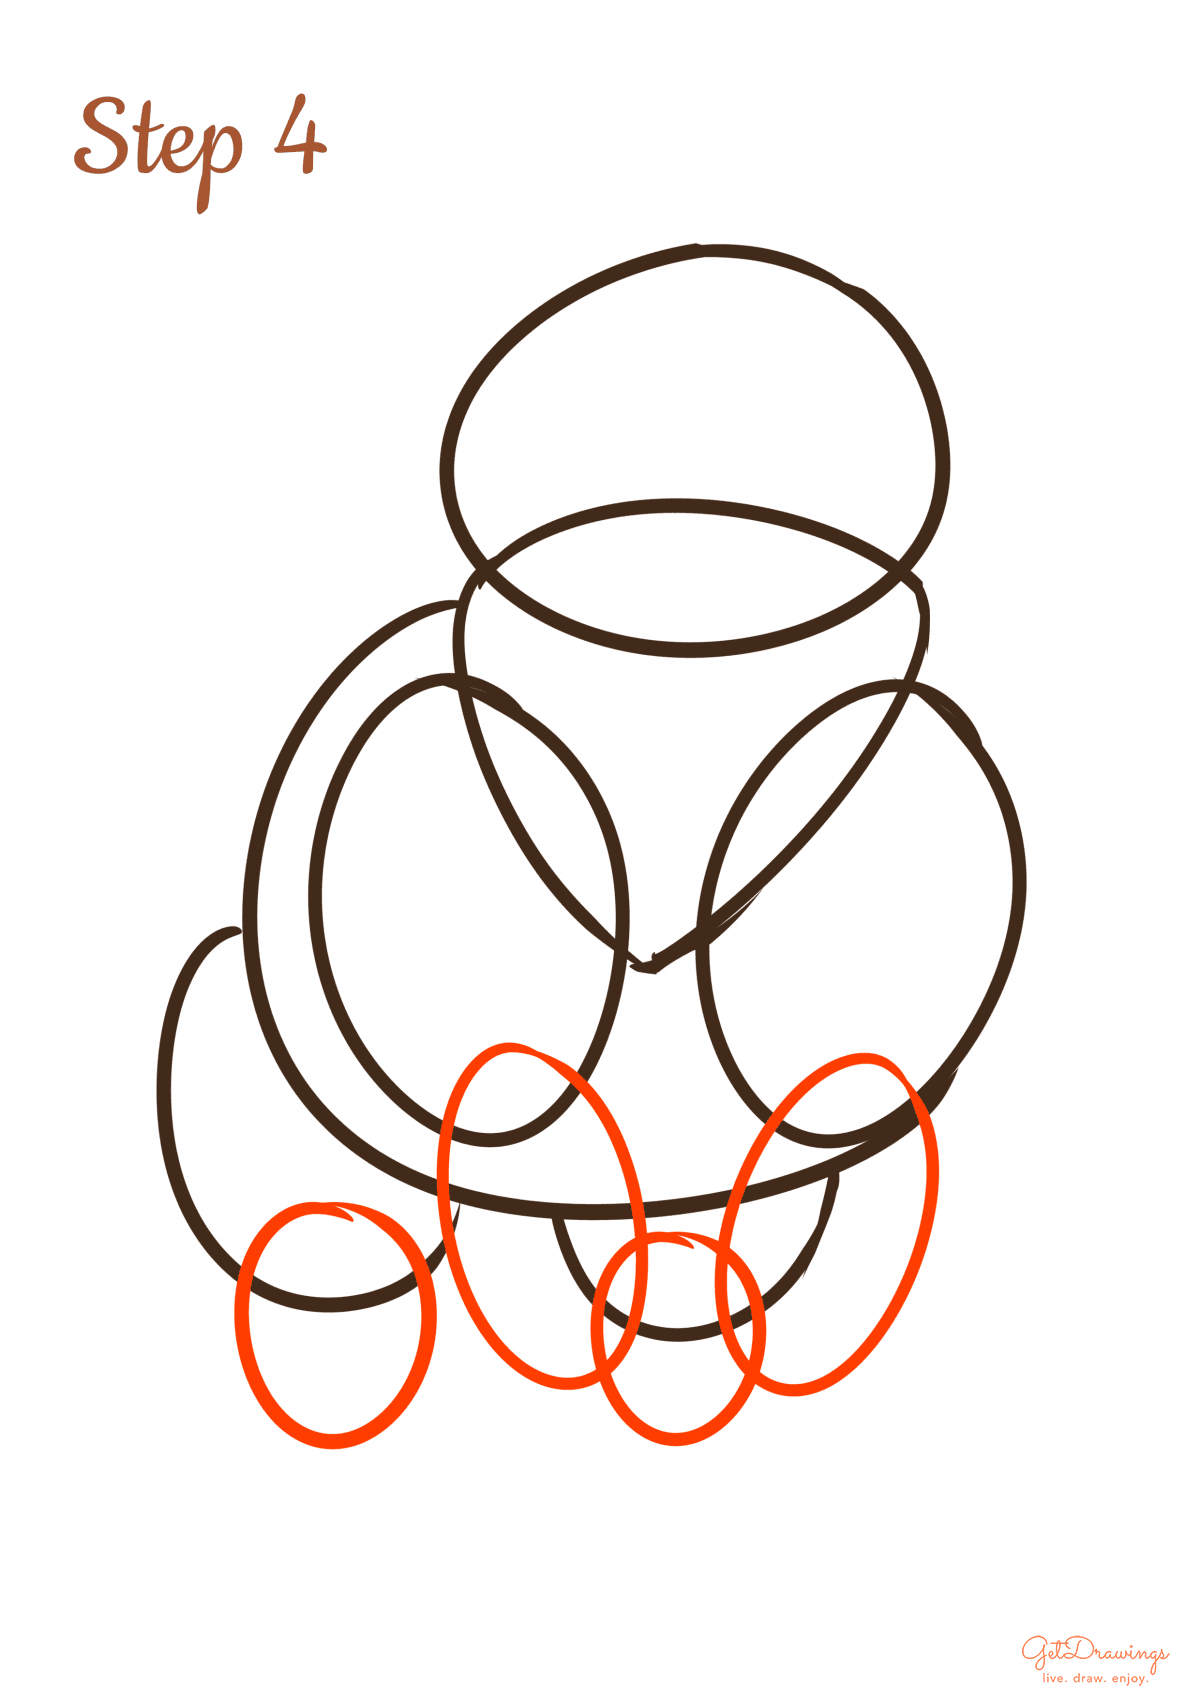
Step 4: The guideline of the Bear shoulder with upper arms were already made in the previous step, therefore we’ll continue to draw the forelegs and back legs. Add two narrow ovals for the forelegs on the front. And create another two narrow ovals (see picture) for the back legs.
Step 5: In drawing the bear’s legs, you’ll need to draw its paw. Start drawing a half-circle with curve edge just like a dumpling on each lower leg (see picture to better understand). Thus, you’ll create four paws in total.

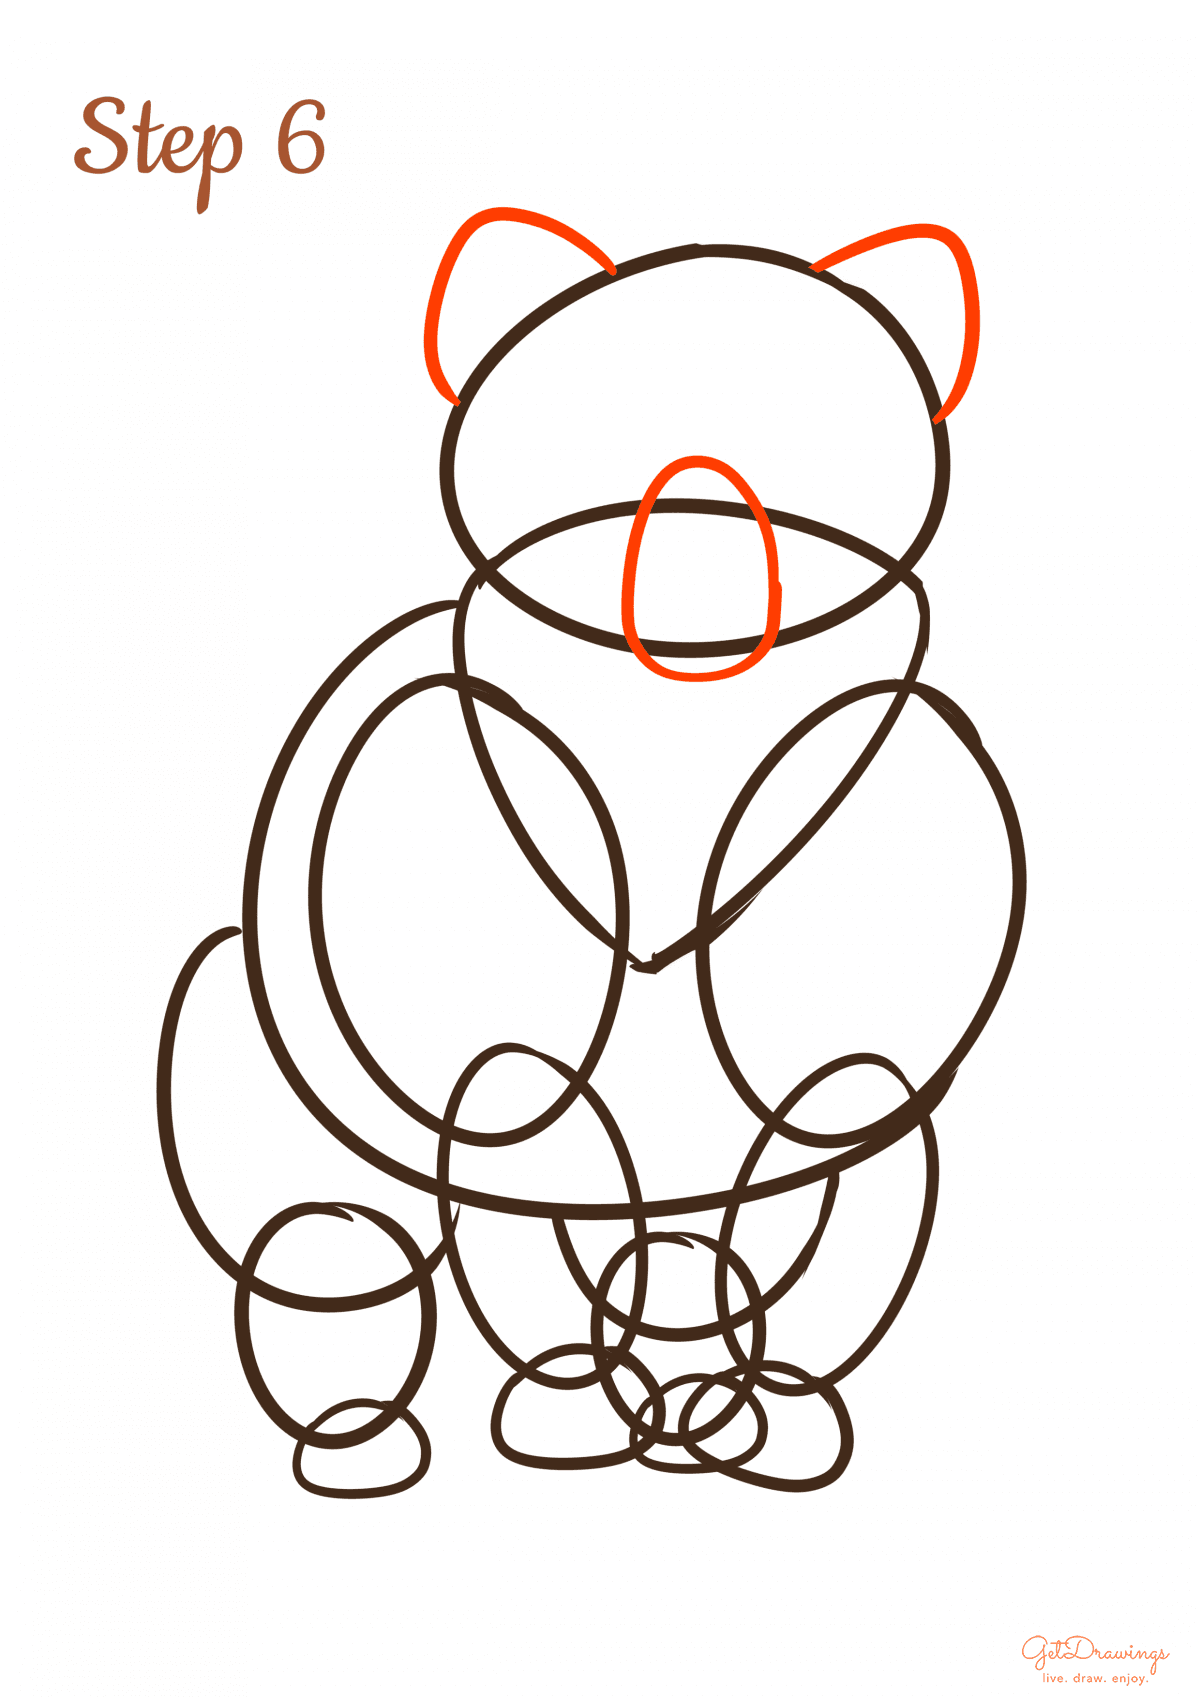
Step 6: Then, we can continue on to the detail of its face by adding its ear and snout. Create a narrow curve on the both side of the head to create its ears. Then, make an uneven oval intersecting the head guideline (see picture) to make the snout.
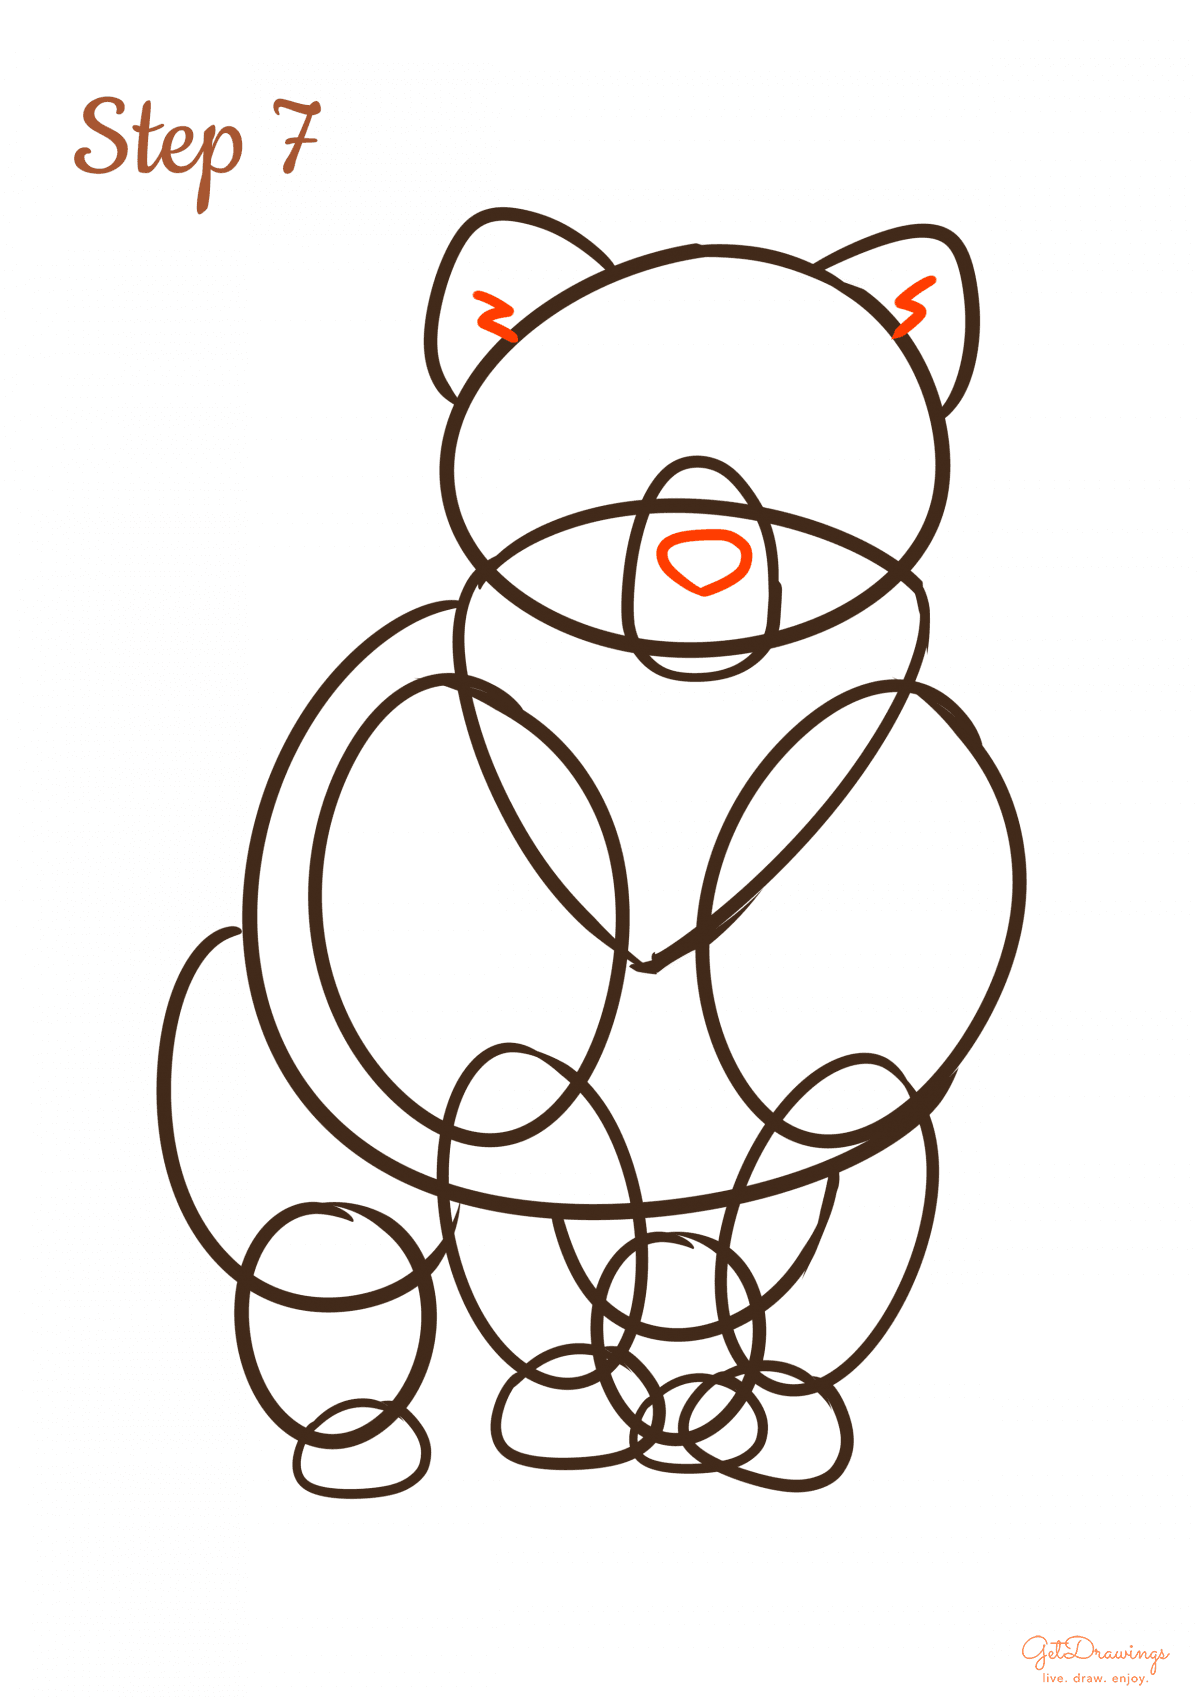
Step 7: After finishing the face guideline, we’ll continue with nose and inner ears detail. For the inner ears, create a thunder-like shaped to create a fuzzy fur inner ears on each side. Next, create the nose by making another but smaller guitar-pick-like shape inside the snout shape.
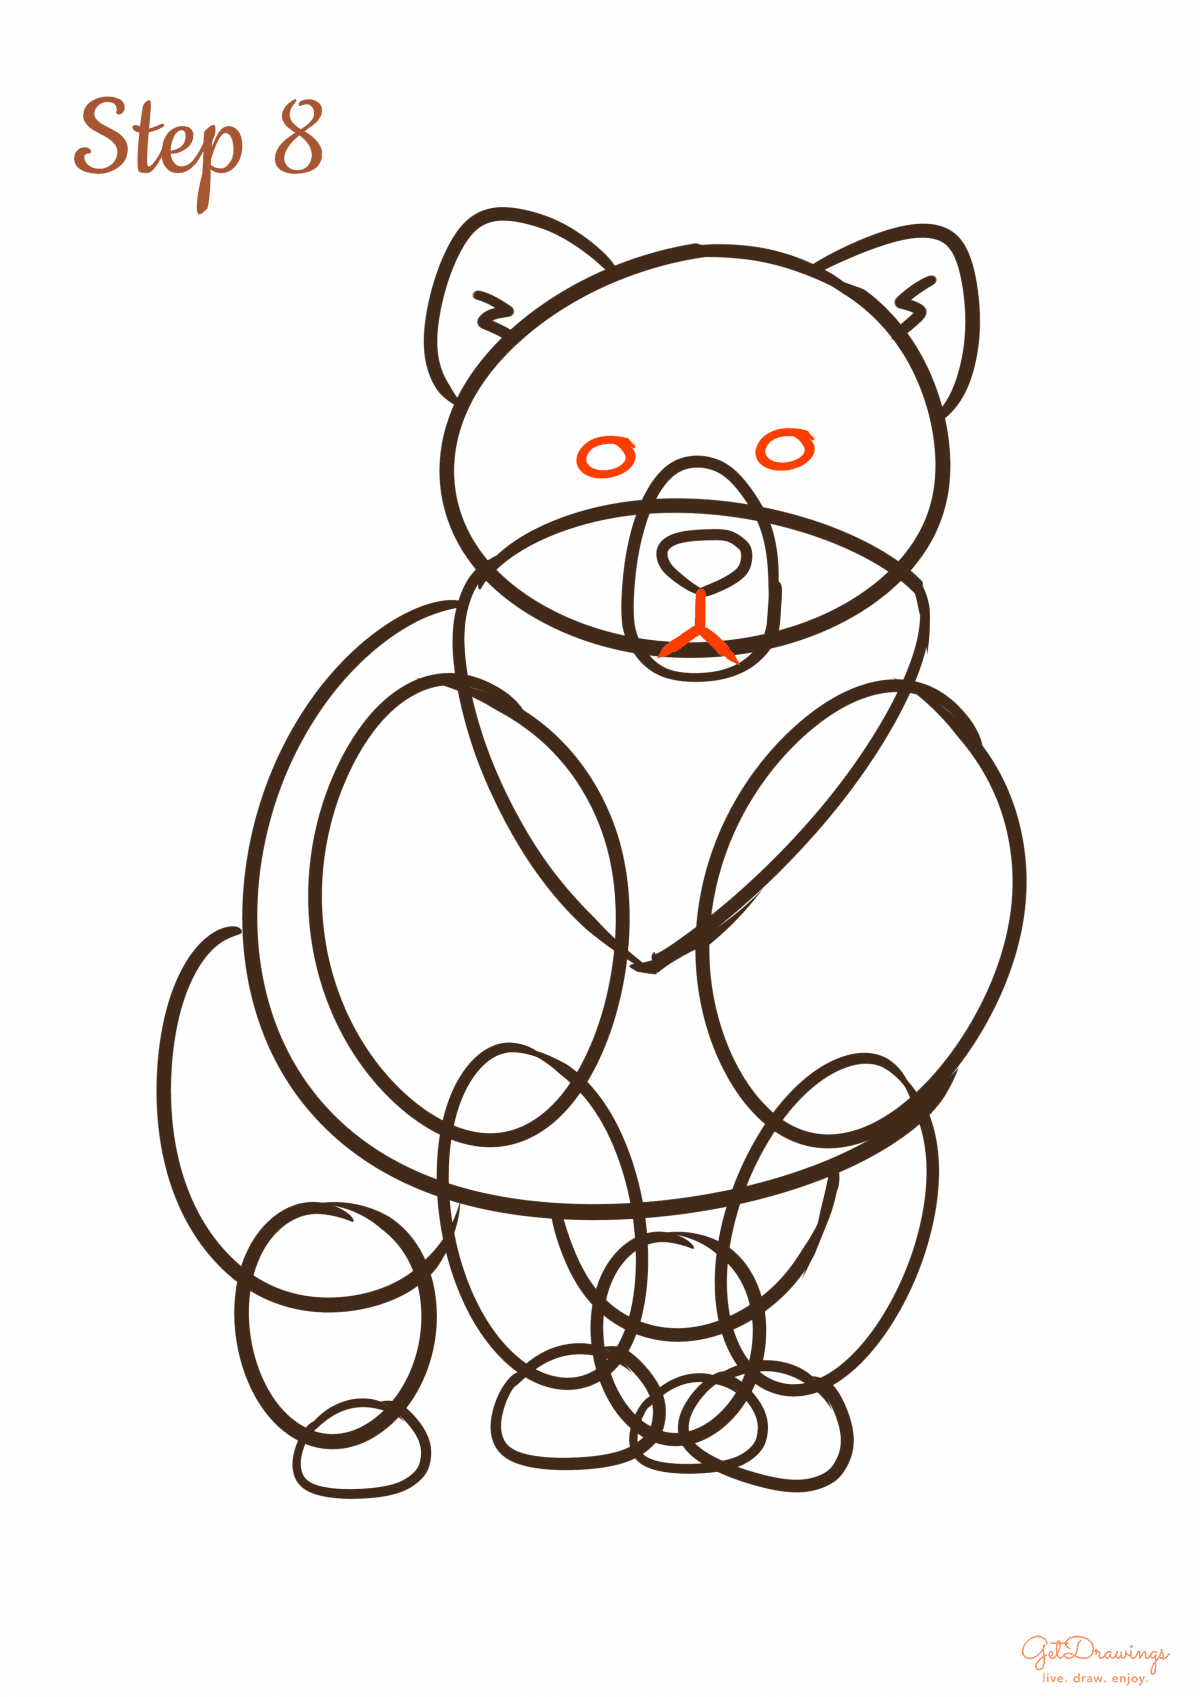
Step 8: Let’s start with the detail! Especially the detail on your Bear’s face. Start by making its eyes and its mouth. You can draw the eyes by making two small circles above the snout. As for the mouth, create an inverted Y shape.
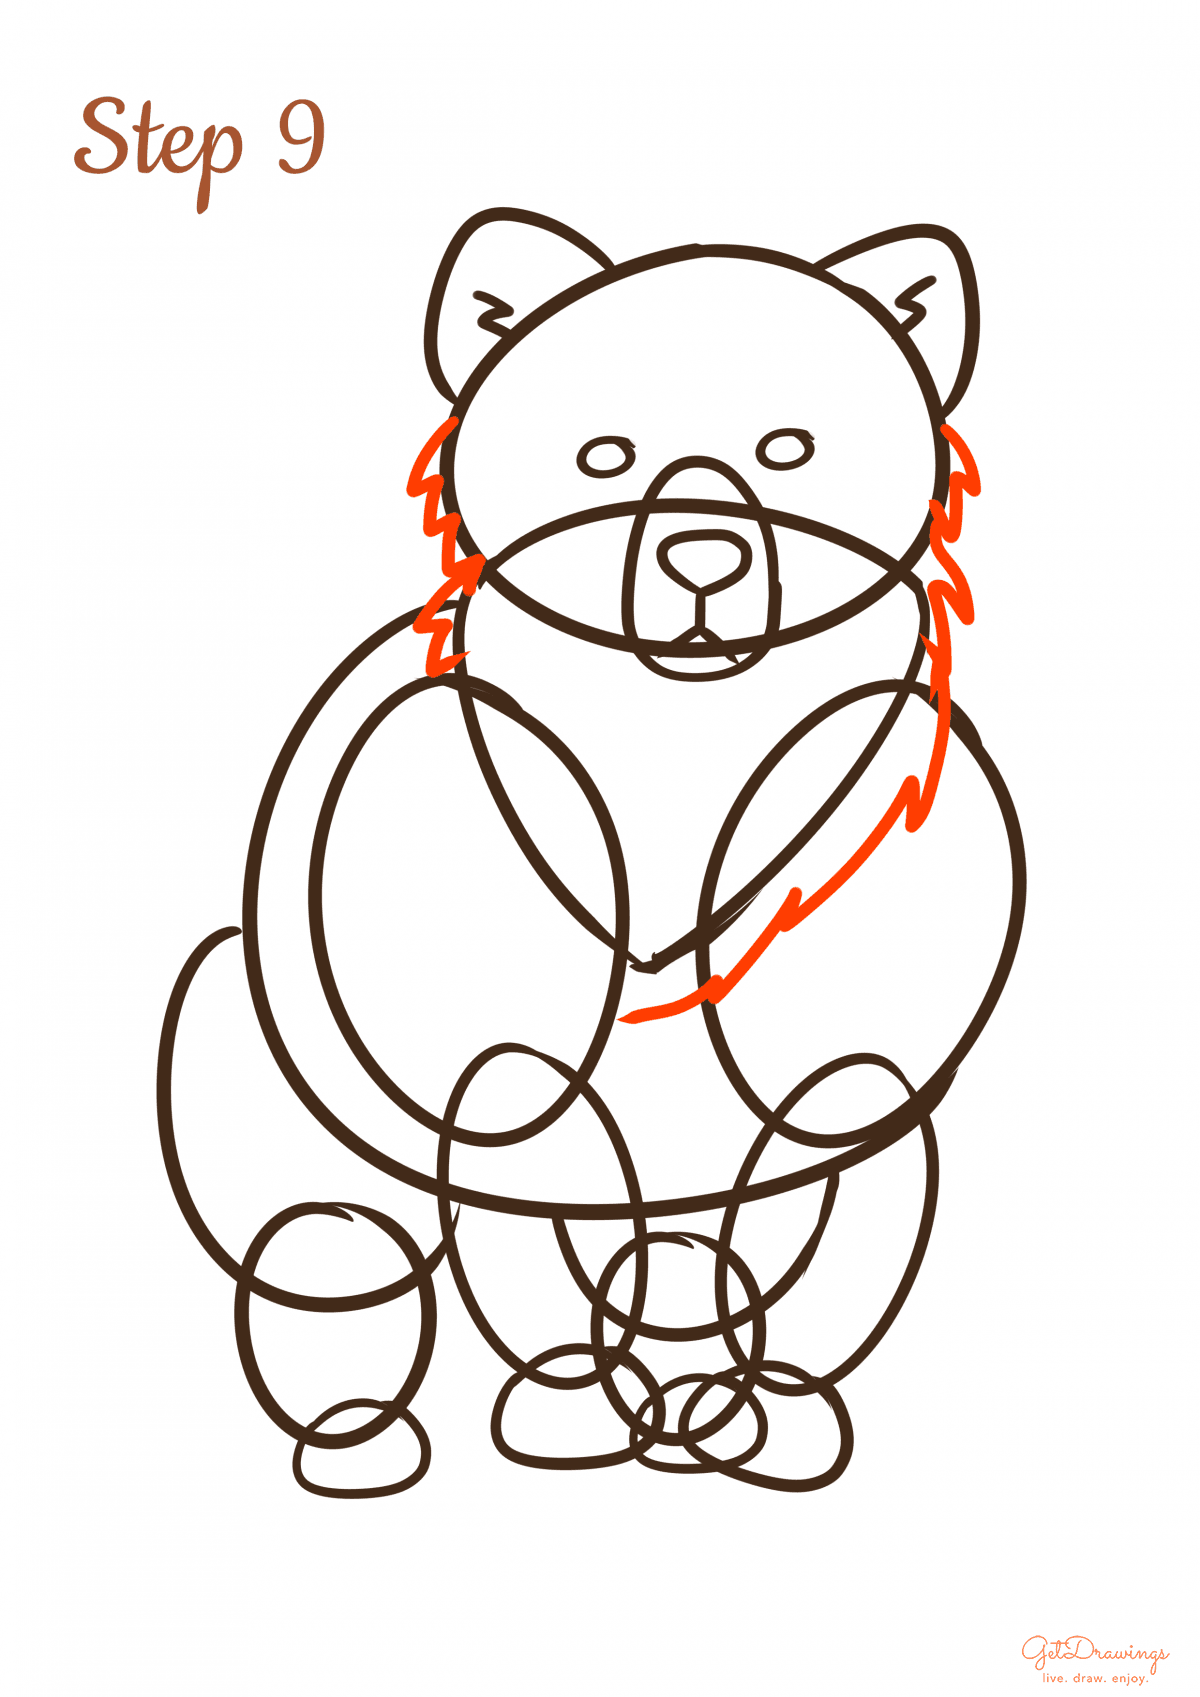
Step 9: Next, we can move on with its fur. Create several spiky curve lines (see picture to better understand) to make the shape of its fur from the side of its head to its chest.
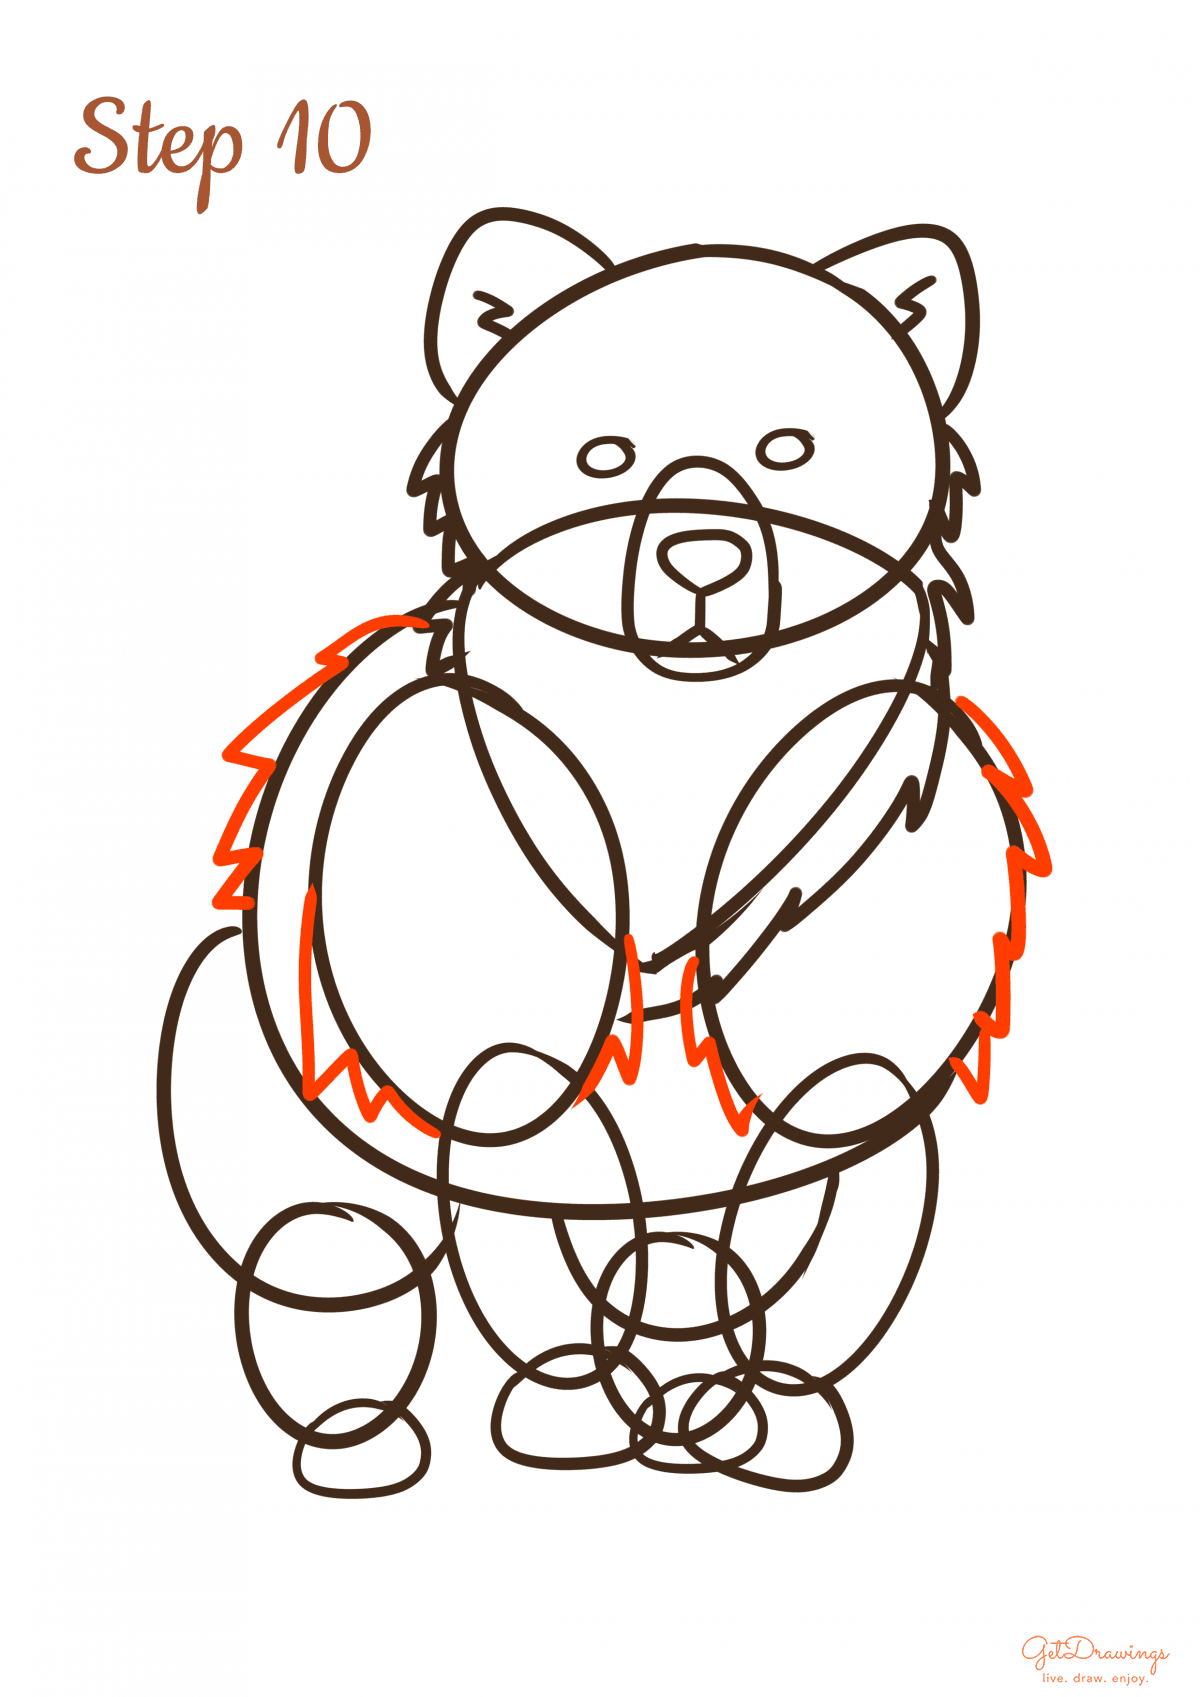
Step 10: Continuing the previous step by adding more fur on the arm and the body (see picture). The step would be the same by making several spiky curve lines on the guideline that you’ve already made.
Step 11: Create another fur for its front legs and you’ll need to make sharp claw for them. Making the fur have the same method as on the previous step. For their claw and fingers, several lines that resemble the shape of hand but with sharp edge on each finger.

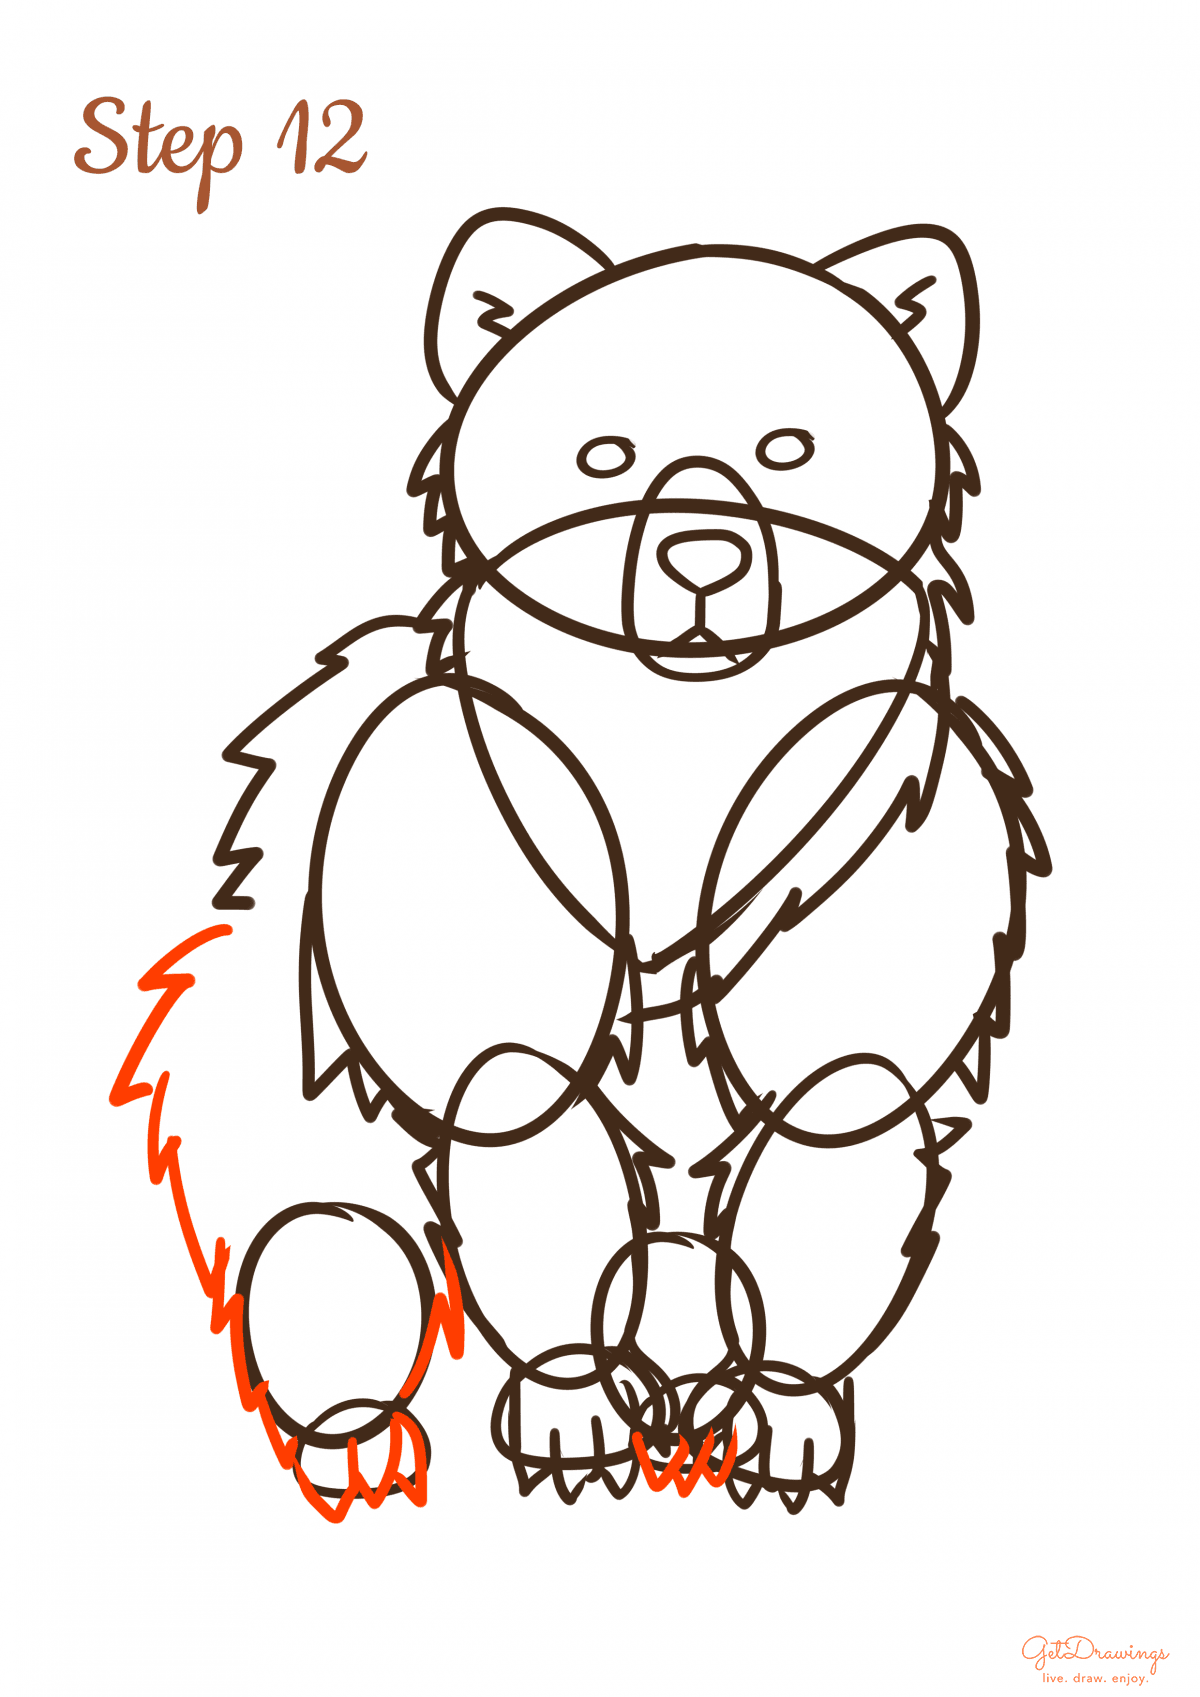
Step 12: Lastly would be another fur that needs to be made on its leg and create the same claw on the backside of its legs. The step would be the same, you’ll need to draw exactly on the guideline.
Step 13: If there’s a line that intersecting each other, this is the time to erase it. To see your Bear, you’ll need clean lines. Voila! You’ve finished drawing a Bear

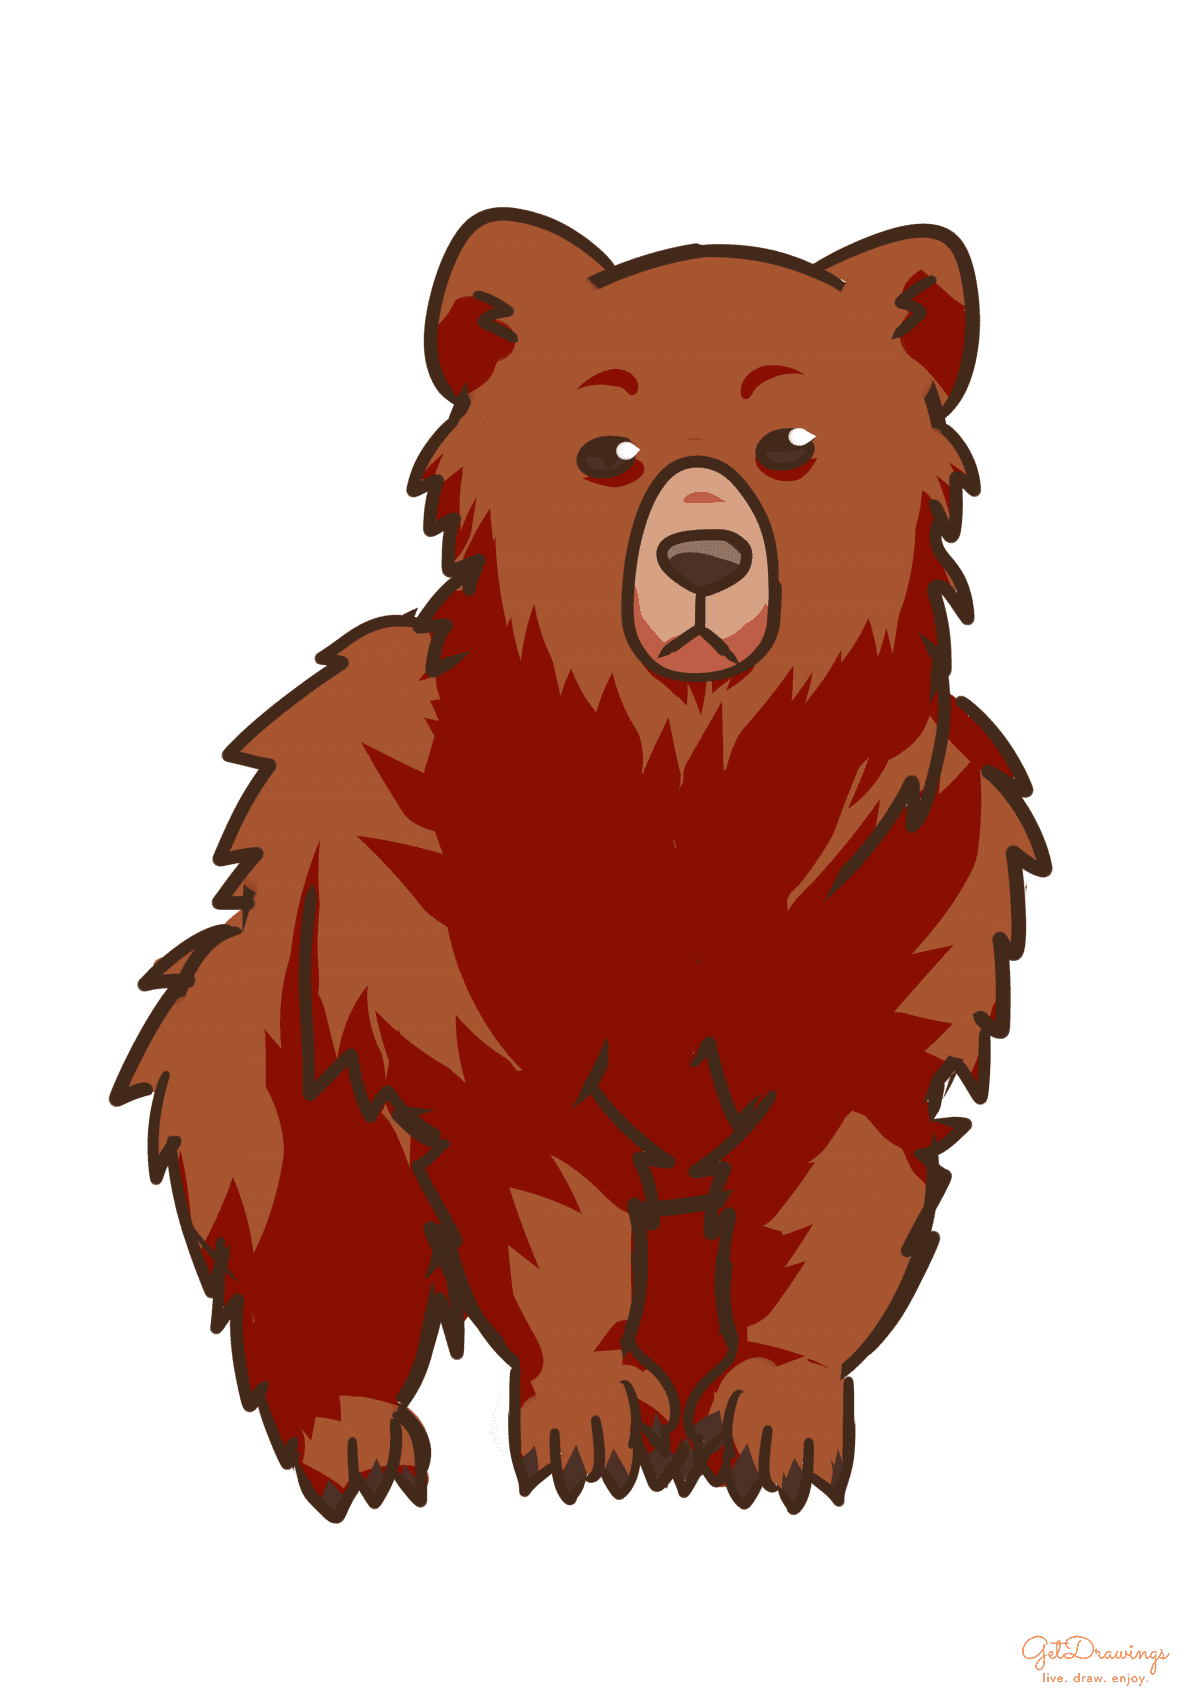
When drawing a bear, the most important part is to look at the reference. How’s the actual shape of its body, the detail, the ears, etc. This is important because living things’ form won’t be smooth or symmetrical. Even if it’s symmetrical, the form will still be uneven. Therefore it’s important, especially drawing the body. You’ll need keen eyes and a lot of practice so you can make your drawing perfect. Good luck!


Drawing hacks
Drawing hacks

How to Start an Artist Instagram Account?

Character Drawing and Character Design Step by Step

Digital Drawing for Beginners
