
How to draw a Tiger
Do you know any animal that has unique pattern on their fur? One of them is a Tiger. It also called as Panthera Tigris and it’s the largest species between the Felidae Family and classified in the genus Panthera. It is also one of carnivore animals that preying on deer and wild boar. Tiger is a territorial and generally a solitary but social predators that require large area habitat. In order to draw Tiger, I suggest you to learn drawing it by following these steps. But first, you’ll have to prepare a paper, a pencil, and an eraser. Now you’re ready to draw!
Steps:
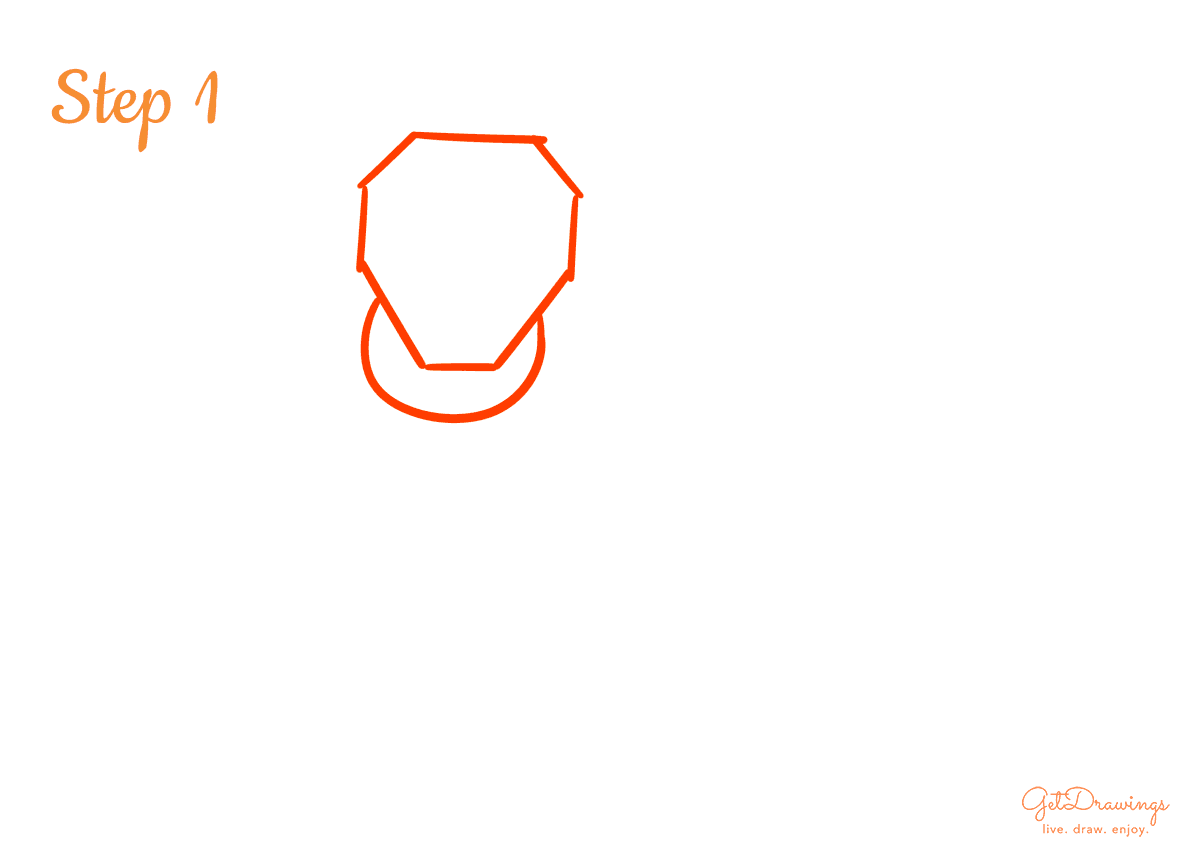
Step 1: Firstly, we’ll start by drawing the guidelines. The purpose of guidelines is to help you estimate the size of the head, body, and to guide you in drawing the rest of the body. Therefore, we’ll draw an uneven octagon that has a tiger head shape on top of your paper to make a guideline for the head of the Tiger. As for its neck, create a curve line below it (see picture to better understand).
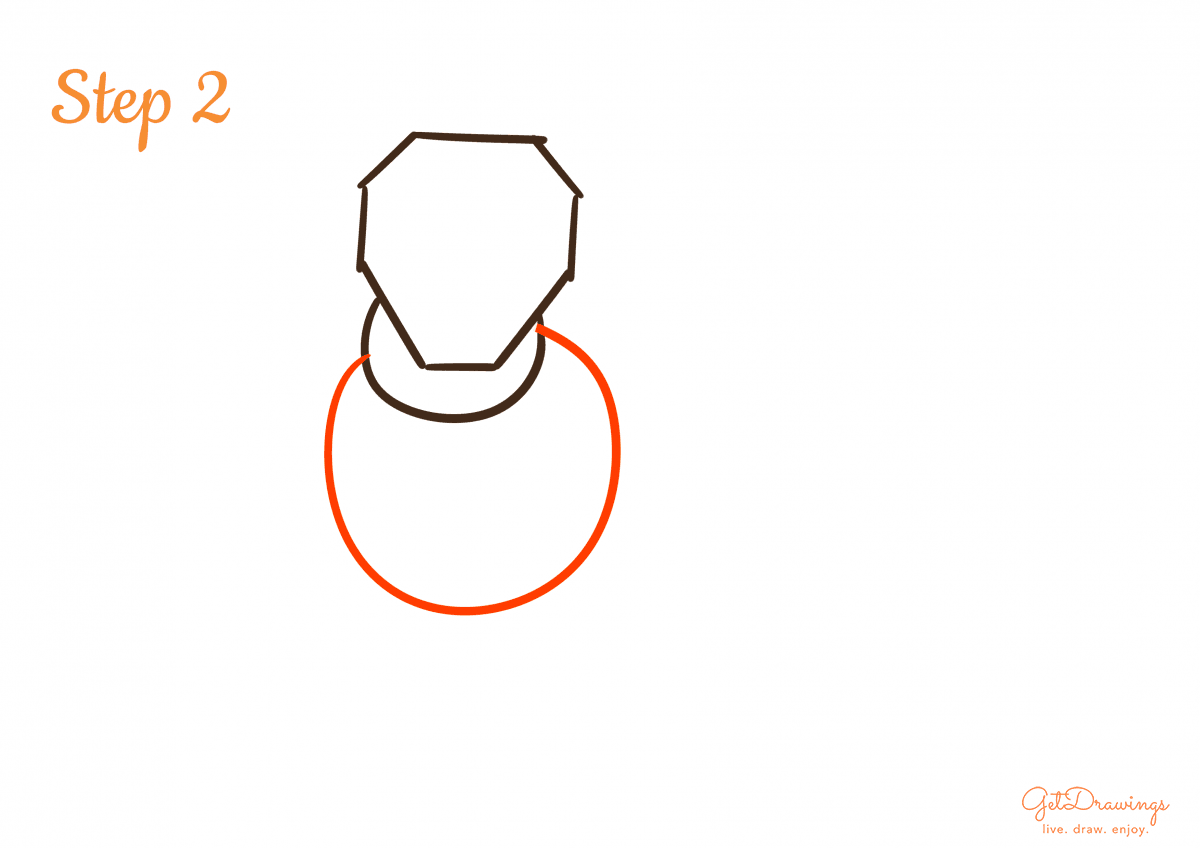
Step 2: Next, let’s start by creating its body guideline. Make a circle that’s below the previous shape and not intersecting it (see picture). This will be the Tiger’s upper body.
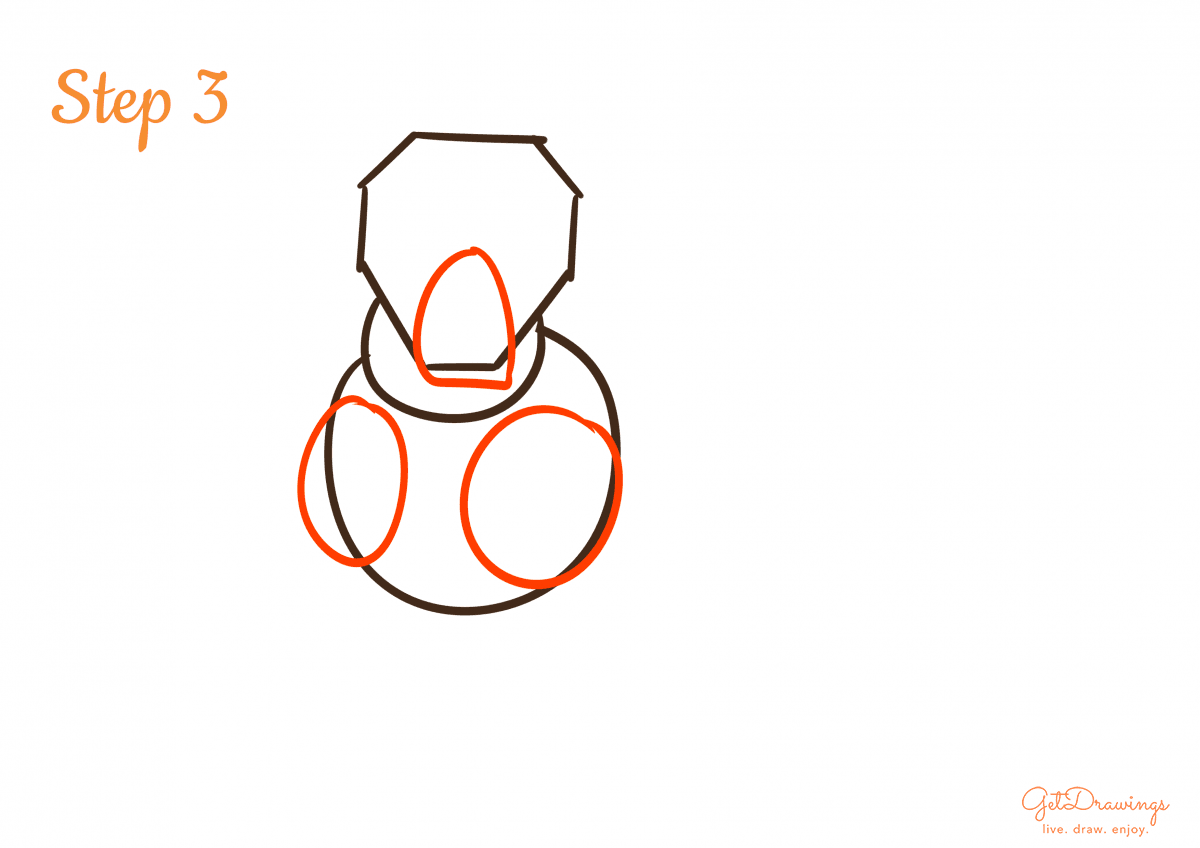
Step 3: We can move on to the snout and upper forelegs. Start with the snout by making a bullet-like shape intersecting the head guideline. Then, create oval shapes intersecting the body guideline. You also need to take a look on the shape of the ovals. Since the left-hand side is covered by the body, create the shape to be narrow than the right-hand side (see picture to better understand).
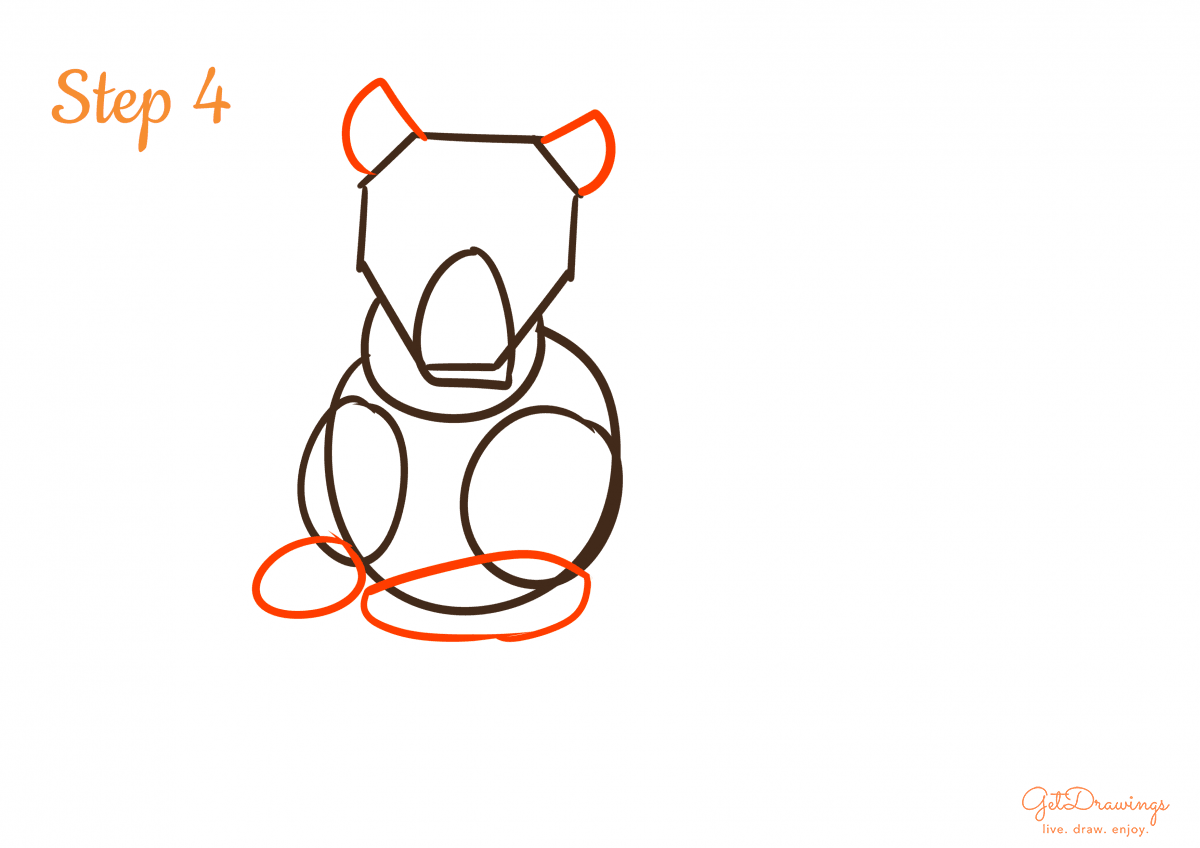
Step 4: After that, we can continue making its ears, lower front leg and its tiger’s paw. Draw a curve on each head sides, and end it with a straight line to create ears for the tiger. After that, create a narrow uneven oval on the right-hand side of the upper foreleg for its lower front leg. Moving on by making a small oval on the left-hand side of the upper foreleg. This will be its paw because the upper foreleg is covered by the other leg.
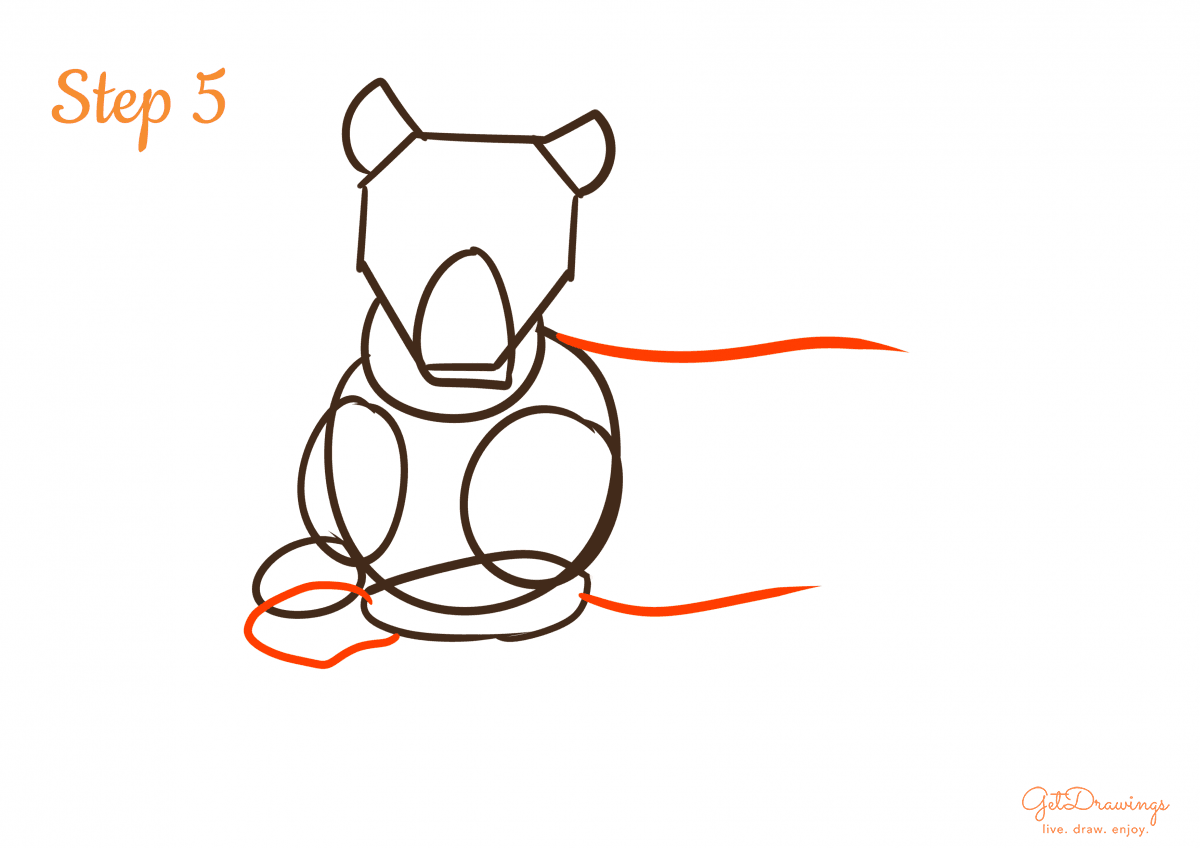
Step 5: Now we can continue with the last part of the paw by making an uneven shape that resemble a paw from the side (see picture). Next, add two curve line on top and bottom next to the body guideline. This will be its body shape.
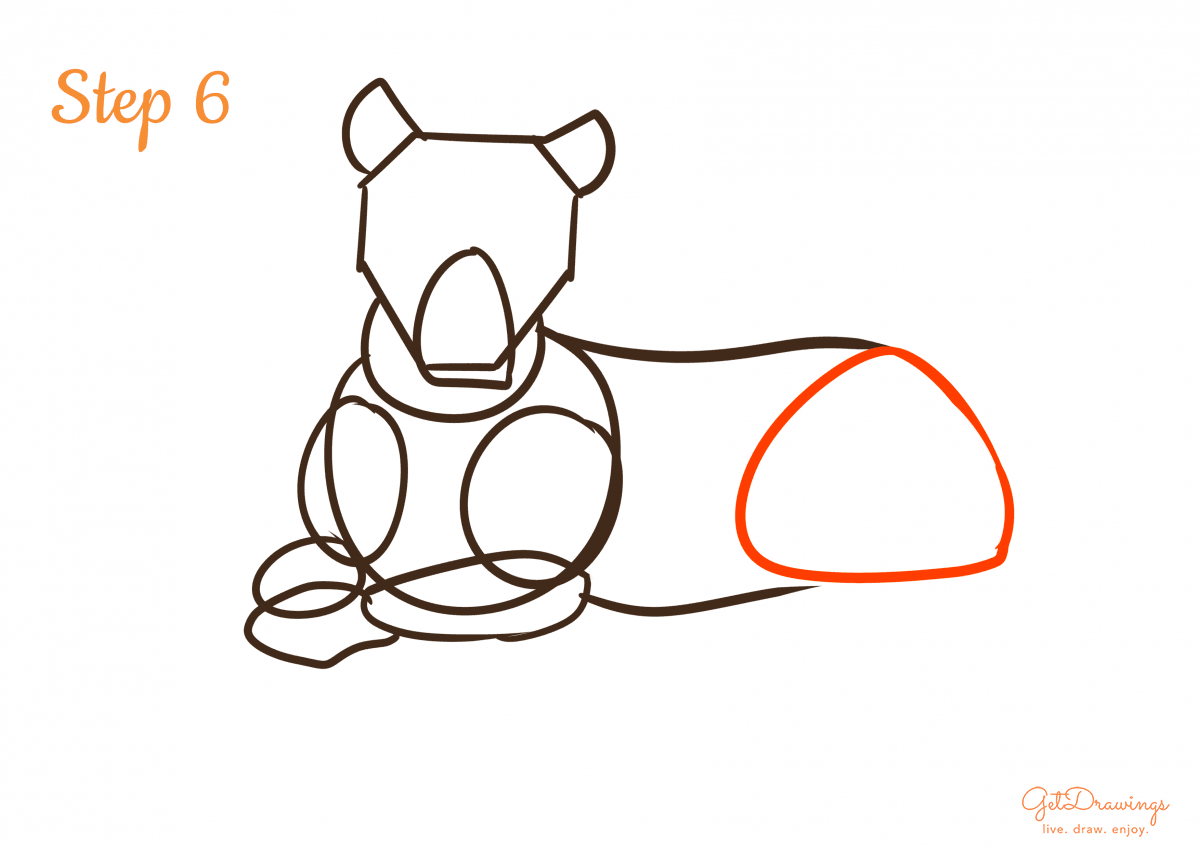
Step 6: Then, create a curvy triangle on the end of the previous step. This will be the back legs thigh.
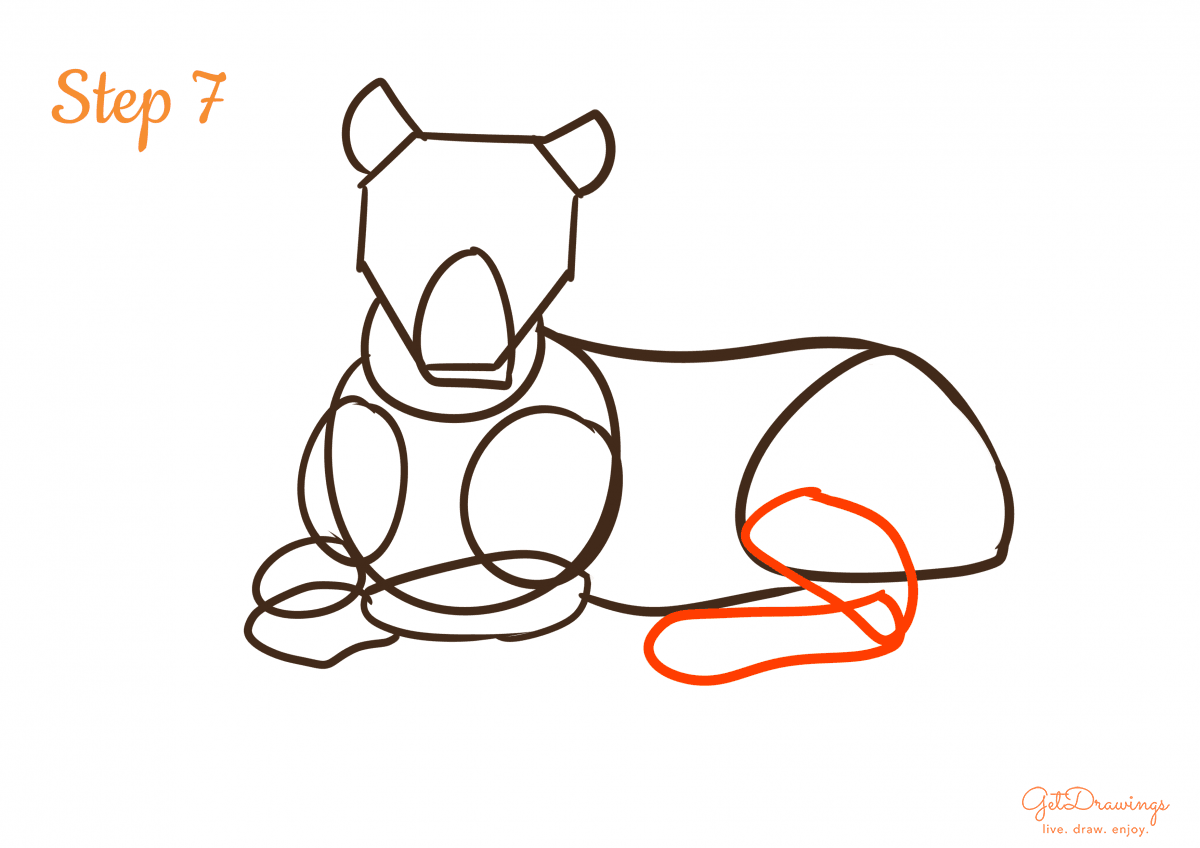
Step 7: Finally, we can start drawing its back legs. Start by making a chicken-breast-like shape intersecting the previous step. Also, add another narrow chicken drum stick-like shape for its back legs’ paw.
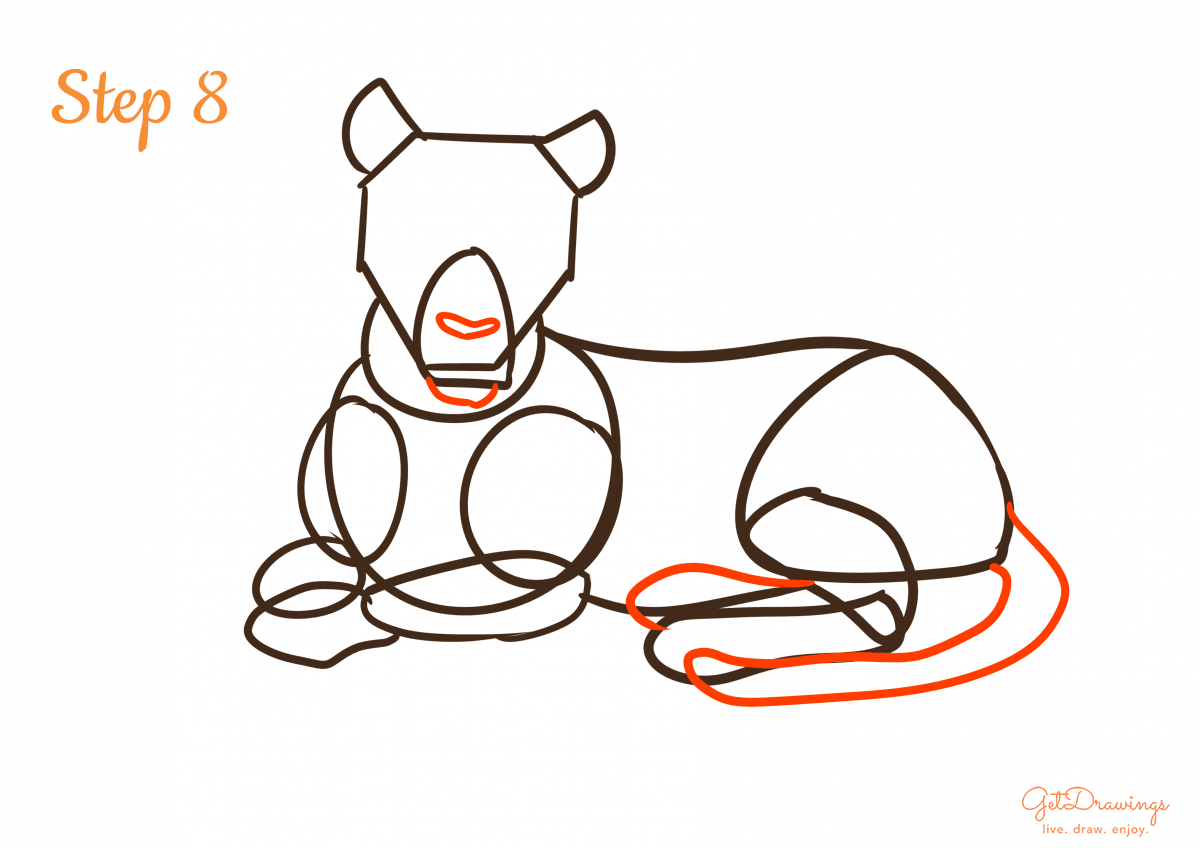
Step 8: After that, continue making Tiger’s back legs. Draw another curve above the previous step to create a back legs’ paw that is covered by the previous step. Moving on, add a narrow heart shape to create its nose and make another curve to create its jaw. Lastly, add a curve that resemble a tiger’s tail.
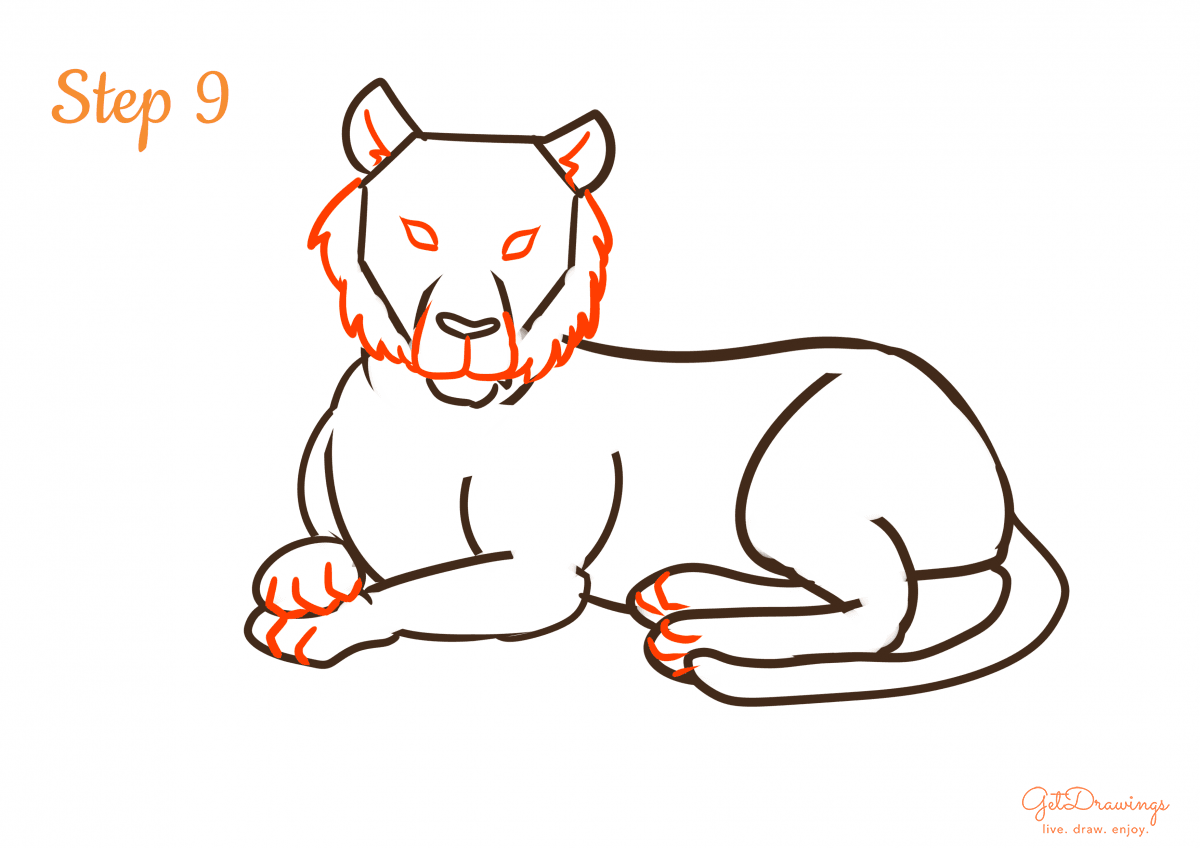
Step 9: If there’s a line that intersecting each other, this is the time to erase it. To see your Tiger clearly, you’ll need clean lines. This time, we can add details such as the detail on the inner ear, snout, fur, paws and eyes. As for the inner ear, create several curve lines that slightly create a spiky line (see picture to better understand). Then, for the detail on the snout would be adding a “W”-like shape but a lot curvy below its nose. Next would be adding additional fur around its head by making several curve lines around the sides. Now, add the details for the paws on each leg (see picture). Lastly add the eyes by making two small leaf-like shapes above the snout.
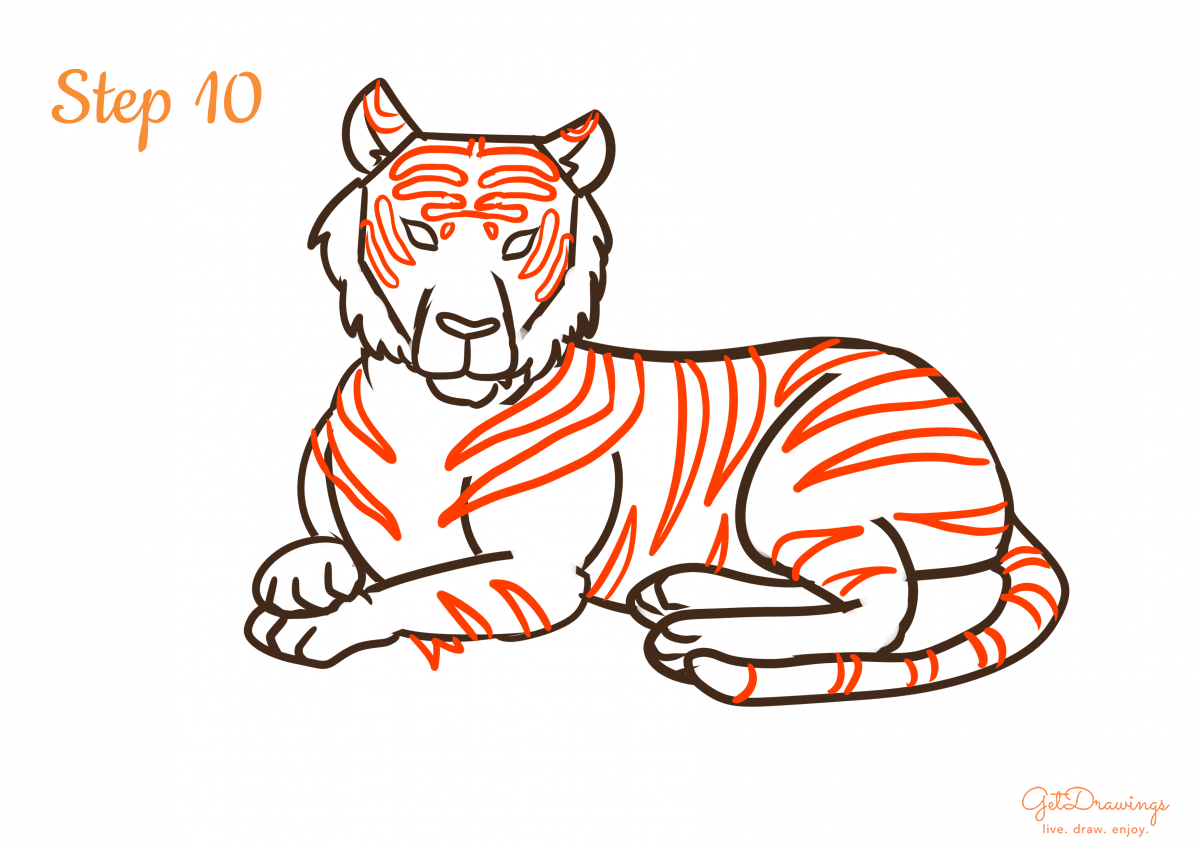
Step 10: Lastly, giving the detail for the body and face. Since Tiger has a special pattern, you can imitate the reference above on where the pattern would be. You can draw it on its ears, head, body, legs, and even tails.
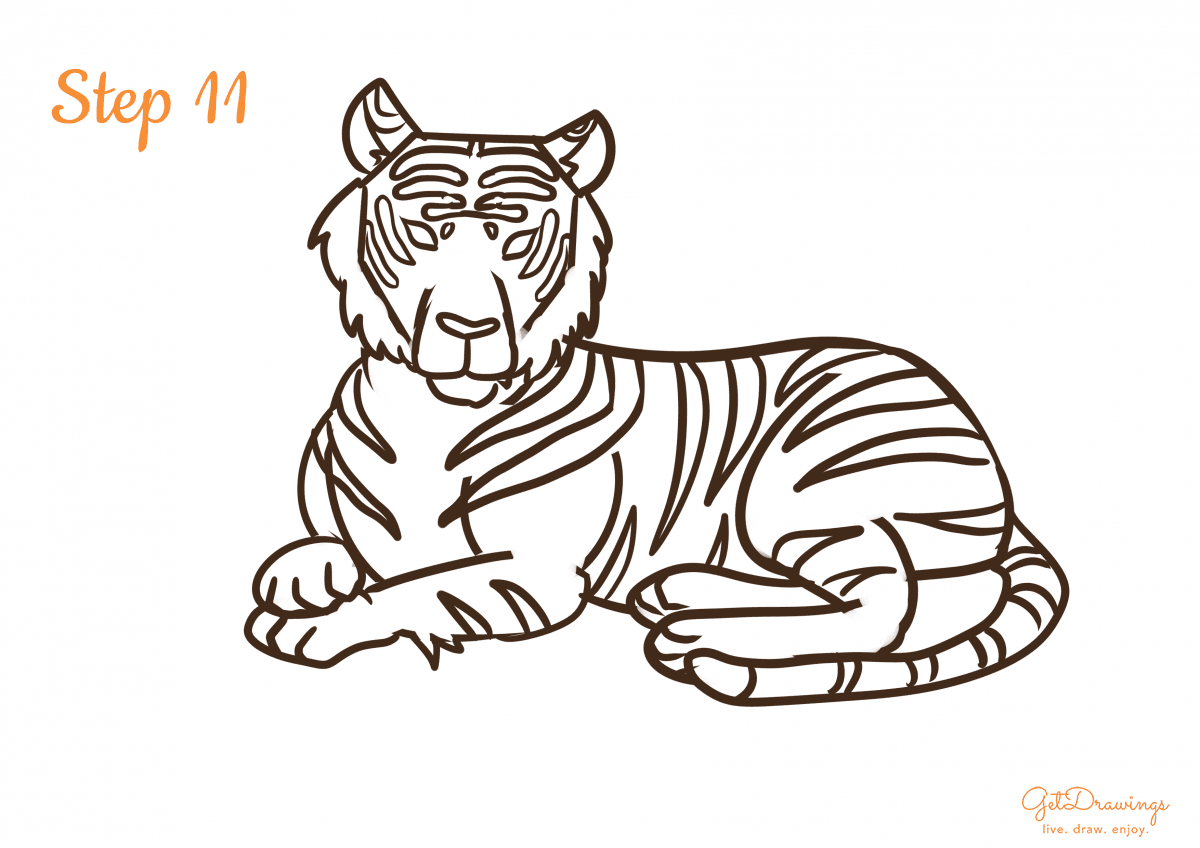
Step 11: If there’s a line that intersecting each other, this is the time to erase it. To see your Tiger, you’ll need clean lines. Voila! You’ve finished drawing a Tiger
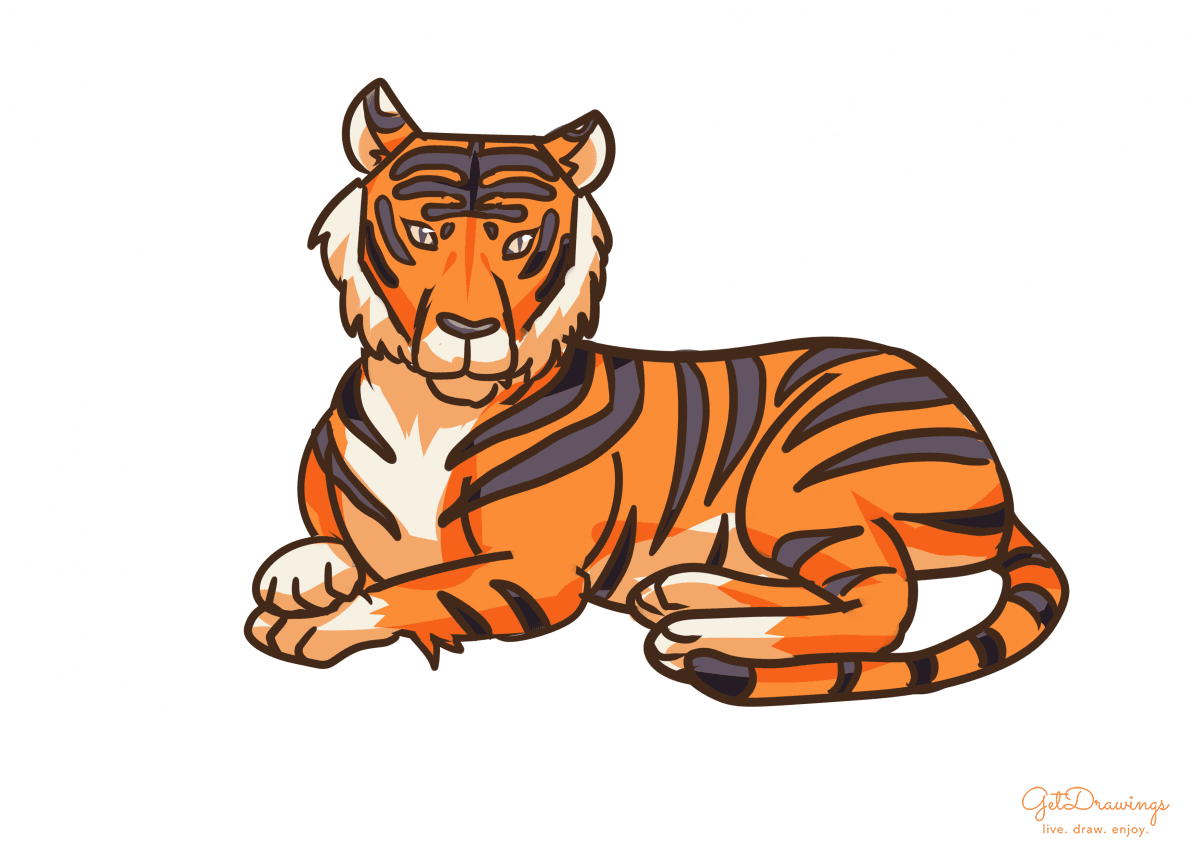
Since you’re drawing a Tiger, you need to look at the actual reference of what you’re going to draw. It is important because living things’ form won’t be smooth or symmetrical. Even if it’s symmetrical, the form will still be uneven. You’ll need keen eyes and a lot of practice so you can make your drawing perfect. Good luck!


Drawing hacks
Drawing hacks

Watercolor painting for beginners

The Must Have Drawing Materials and Art Supplies

Making Quick Sketches to Improve Your Skills - Everything You Need to Know About Rapid Drawing
