How to draw a Christmas tree on a graphic tablet?
What is the name of the green beauty that appears in every house in the new year. It is decorated with toys and garlands, and with the advent of the new year kids find gifts under it left by Santa Claus. Did you find out what it is? The symbol of the new year - a Christmas tree. Its long sharp needles do not interfere for the festive round dance. Christmas trees are not only alive, but also artificial. Their height varies from a few centimeters to several meters. And we learn how to draw a Christmas tree in its original form - without bright ornaments. Even such a "not elegant" look raises a cheerful mood.
Tools and materials:
1. Graphic tablet (used Wacom Intos Draw, but any analogy is suitable).
2. USB connection to a computer or laptop.
3. Adobe Photoshop.
You can also use a simple pencil, an eraser and a piece of paper.
Steps of the work:
Step 1. In Adobe Photoshop, we create a new surface with the following dimensions: 850 px. to 595 pixels. A white sheet will appear, the width of which is greater than the height. Adjust the brush with the main diameter of 5.
Step 2. We draw a long vertical line, which will serve as the basis for building a Christmas tree. Its height will determine the height of our beauty, so at the ends we place the notches:

Step 3. We outline the general shape of the Christmas tree, which will be sharpened from above, and expanded from bottom. The lower part will extend beyond the center line, because its long branches will cover the trunk of the tree:

Step 4. Use the "magic wand" tool to select a black outline, then draw gray lines to make it light. Over the created " Christmas tree skeleton" we draw the edges of branches. We put them a little carelessly, so that the length and shape is different. Due to this, it will seem more natural and fluffy:

Step 5. With an eraser remove the gray lines. To make it more convenient to do this, take the "selection" tool and right-click to the computer mouse on the surface of the drawing and select the gray color, click OK and erase the entire gray color. Now you can draw branches in the inner part of the tree:

Step 6. Change the diameter of the brush to 3. We need to draw a shadow between the branches of the tree. We apply the dots slightly at an angle:

Step 7. From the top of the Christmas tree, we elaborate the shadow between the branches, gradually descending. The strokes are applied from different angles:

Step 8. We continue to draw a shadow, this is a rather time consuming process:

Step 9. Shadow applied uniformly over the whole surface, so that the top and bottom of the Christmas tree do not differ in tone:

Step 10. Slightly increase the diameter of the brush and draw the shadows (inside) even more. Thus, we increase the contrast of the illustration:

Step 11. To align the hue of the picture, adjusting the contrast and brightness of the picture click to - Image - Correction - Brightness / Contrast:

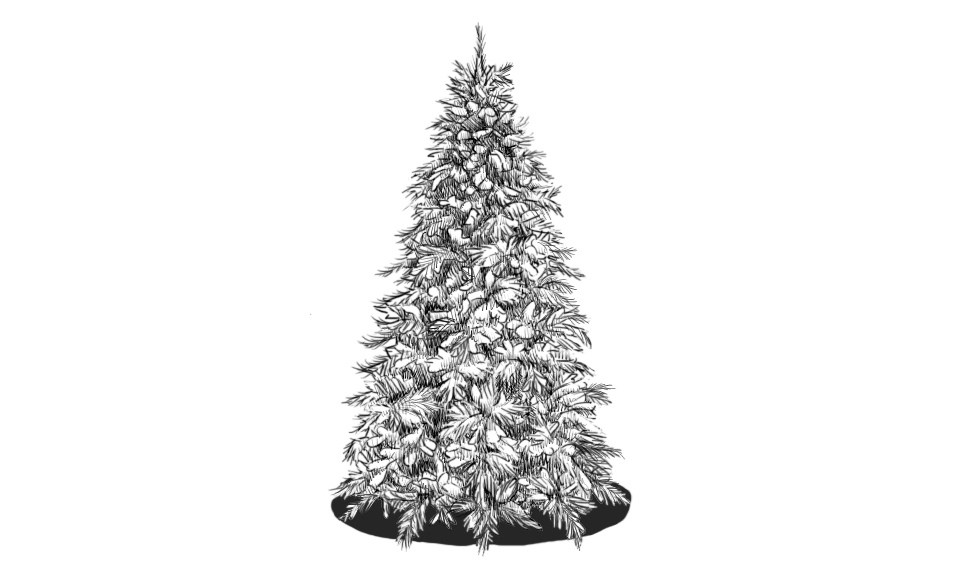
Step 12. The last thing that remains is to add a falling shadow from the Christmas tree. It is better not to use black, but a dark gray color. We arrange it in the form of a horizontal elongated oval. We study in detail the needles on the tree:

We save the picture on the computer in JPEG or PNG format.
So we got such a fluffy New Year's beauty with us. We learned how to draw a Christmas tree on a graphic tablet or pencil. Ready work can be printed and hung on the wall in honor of the holiday, and maybe decorate it with the surface of the gift wrapping.


