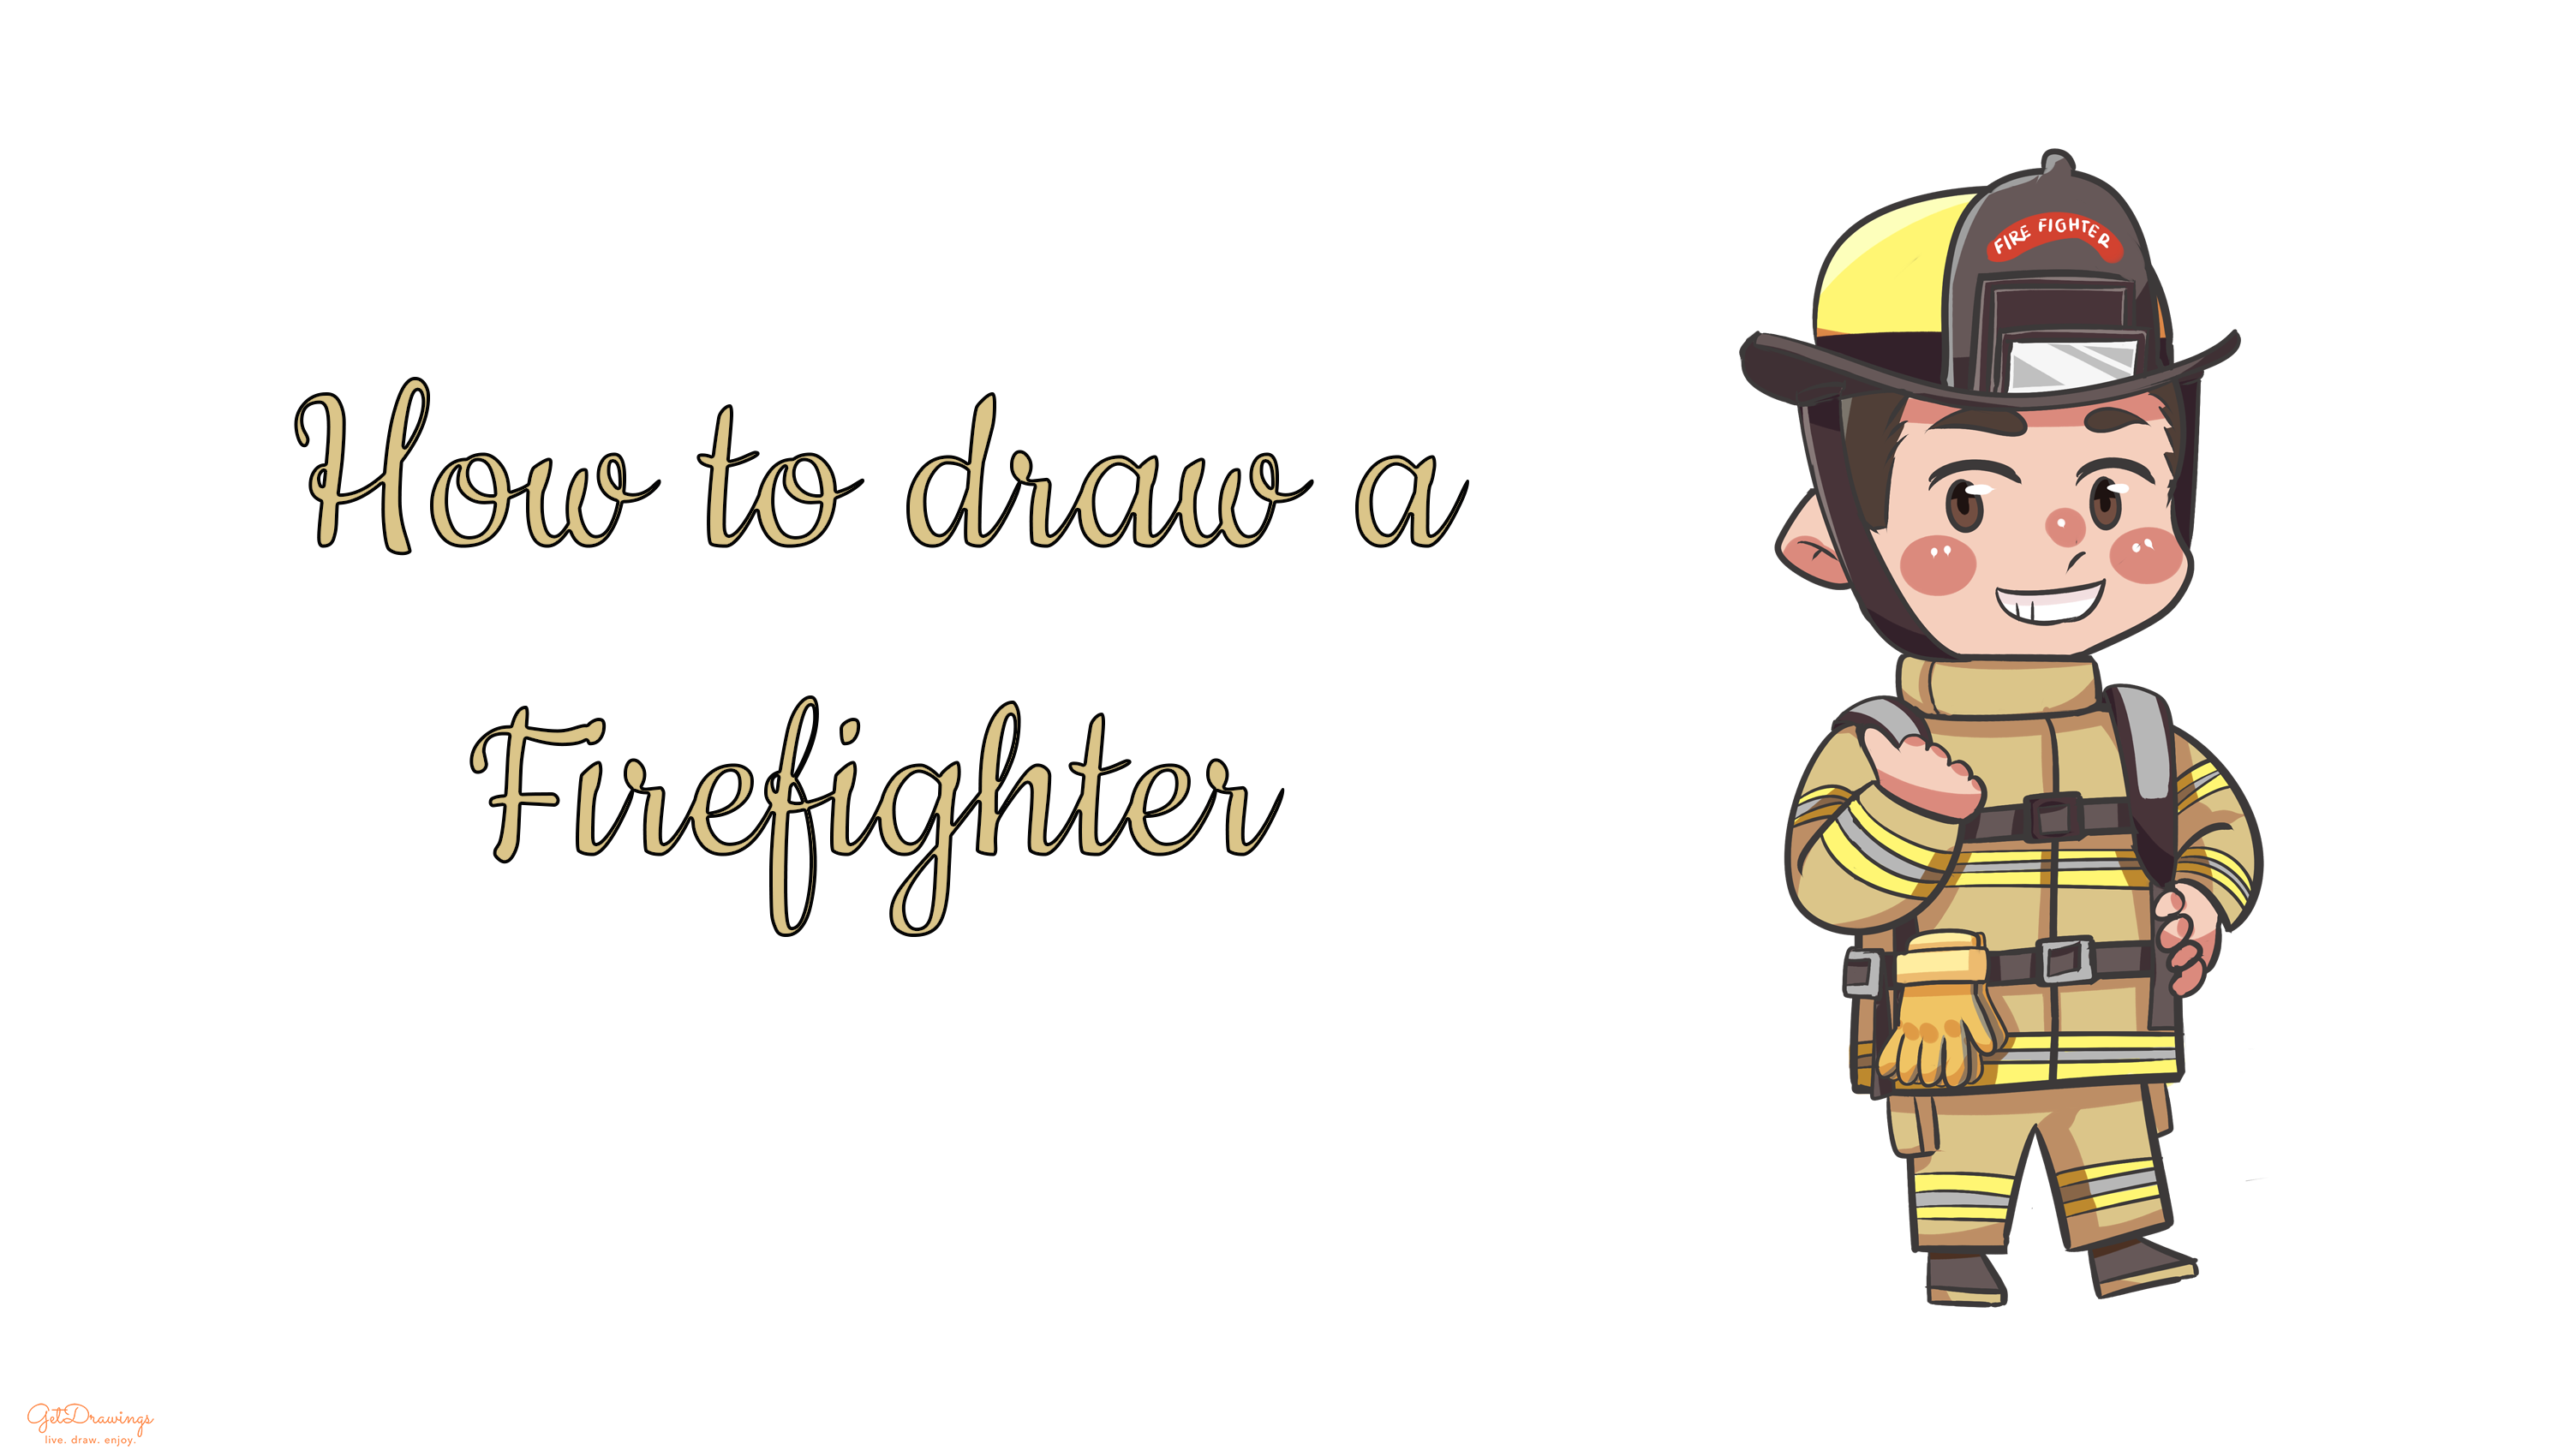
How to draw a Firefighter?
When we were a child, there’s a lot of professions that we want to be. We’re looking up to someone that we admire at that time. Whether because they contribute big time in our life, or either we consider them cool. One of the professions that people admire is a firefighter. A job where someone saves a life fighting and extinguish the hazardous fire. Therefore, if you aspire to be or admiring a firefighter we can draw them with these steps. But before we start, let us prepare a paper, an eraser and a pencil. Now we can start!
Steps:
Step 1 First of all, we’re going to start from top to bottom. Starting from its head, you can draw a circle at first. Then, add two lines consist of a curvy and straight line that crossed each other inside the circle. This would be the head guideline for your firefighter. Please keep in mind to leave a big space below it to reserve space for its body.

Step 2 Next, continue the head guideline by adding several curves starting from the right straight line (See picture) to add cheeks and chin.

Step 3 Then, moving on from the previous step, add a curve and add two lines inside it (See picture for better understand) to create its ear with the depth.

Step 4 Continue to another feature on its head by creating the eyes. Draw two curve lines right on top of the straight guideline and add two ovals below it.

Step 5 After that, create two leaf-like shapes on top of the previous step for its eyebrow. Also, don’t forget to add a small curve line below the center of the eyes for its nose.

Step 6 Now we can do the last feature on its face, which is its mouth. Add a crescent-like shape below the nose and draw two lines inside of the shape (See picture). Now you can see the firefighter grinning.

Step 7 After we finish its face, we can start to draw its helmet. Firstly, add two inverted curves and close the line (See picture for better understand).

Step 8 Then we can add a curve on the left-hand side of the previous step that ends on top of the ear. We’re also going to create a half circle on top the curved line from the 7th step. Now your helmet base is done. Don’t forget add sideburns by drawing several short straight line next to the ears (see picture).

Step 9 Add another curve line on top of the 7th Step to create the first detail on top of the helmet. Don’t forget to add the straps on both the left-hand side and vice versa (See picture).

Step 10 Then add a small curve on top of the first detail from the previous step. Then add two rectangles with another rectangle inside each of it. This will be the last detail of the helmet.

Step 11 Moving on to its collar, draw a long rectangle with a curved edge and a curve line inside of it (See picture to better understand).

Step 12 Now, we can start to add a body guideline by adding a rectangle shape below the collar.
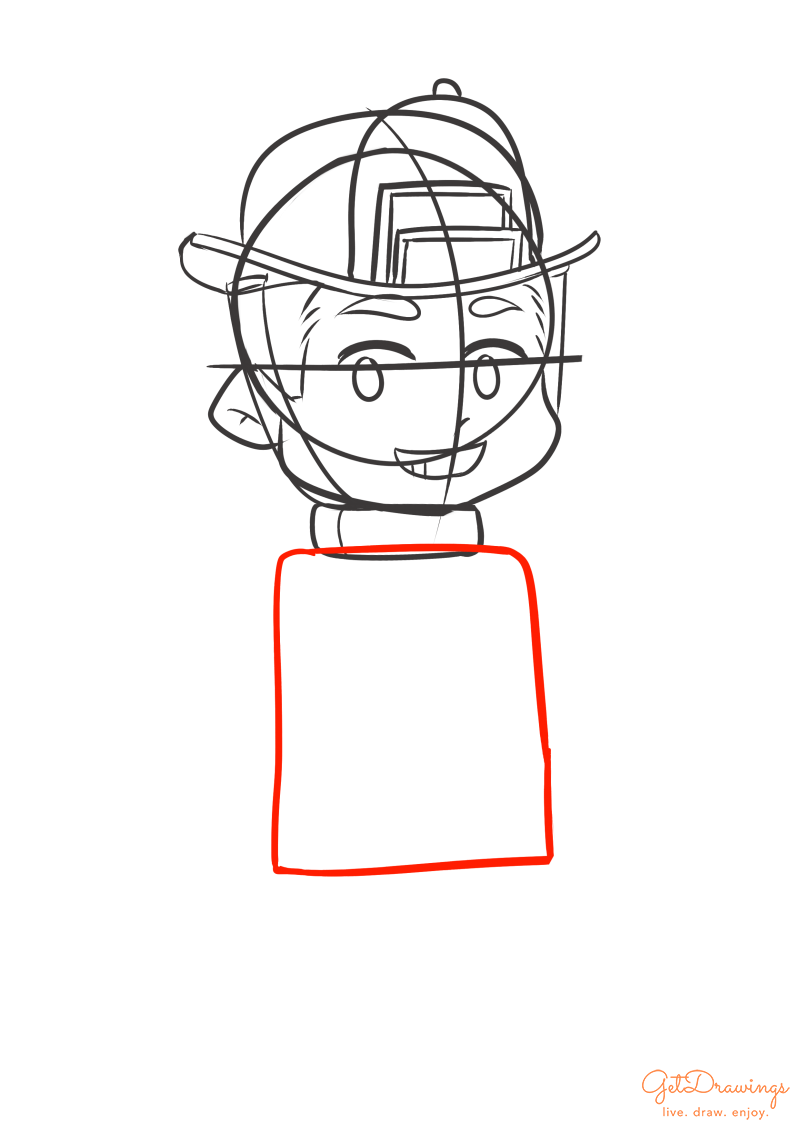
Step 13 After that, we can continue with the arms. Starting from the left-hand side of the arm, add two curve lines, consist of the longer one and the shorter one. Also, add a short straight line in between it. As for the right-hand side, just do the same but see the picture for better understand.

Step 14 Next, add several curve lines on each side for its fingers. On the left-hand side, make the firefighter giving a thumb. Then on the right-hand side add several ovals and a curve as if he was holding hip.

Step 15 We can now continue to the pants part by adding several lines below its body (See picture).

Step 16 Now, we can draw the shoes by adding two trapezium-like shapes below the pants. Also, add lines on the lower part of the shoes to give detail to it.

Step 17 Moving on to the detail of the suit, we can add a vertical line from the collar on the torso, then add four lines each on the upper and lower part of the torso, arms and lastly on the pant.

Step 18 After that we can add details on the torso by adding several lines and rectangle for the body straps (See picture for better understand). Also, add the pockets on the pants by adding vertical rectangles on each side.
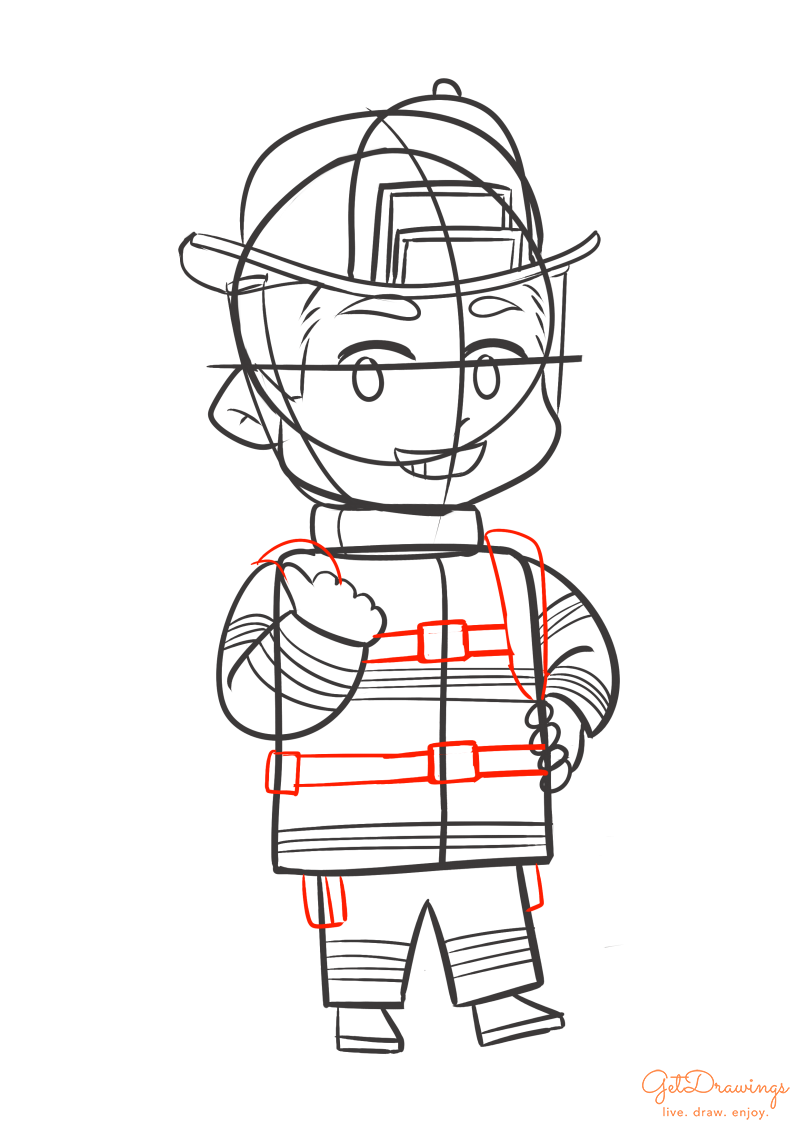
Step 19 Since it requires details, add more lines and rectangle for more details on the straps.

Step 20 Lastly we can create the glove by adding several curve lines that resemble hand since usually, firefighter put their gloves on the body straps (see picture).
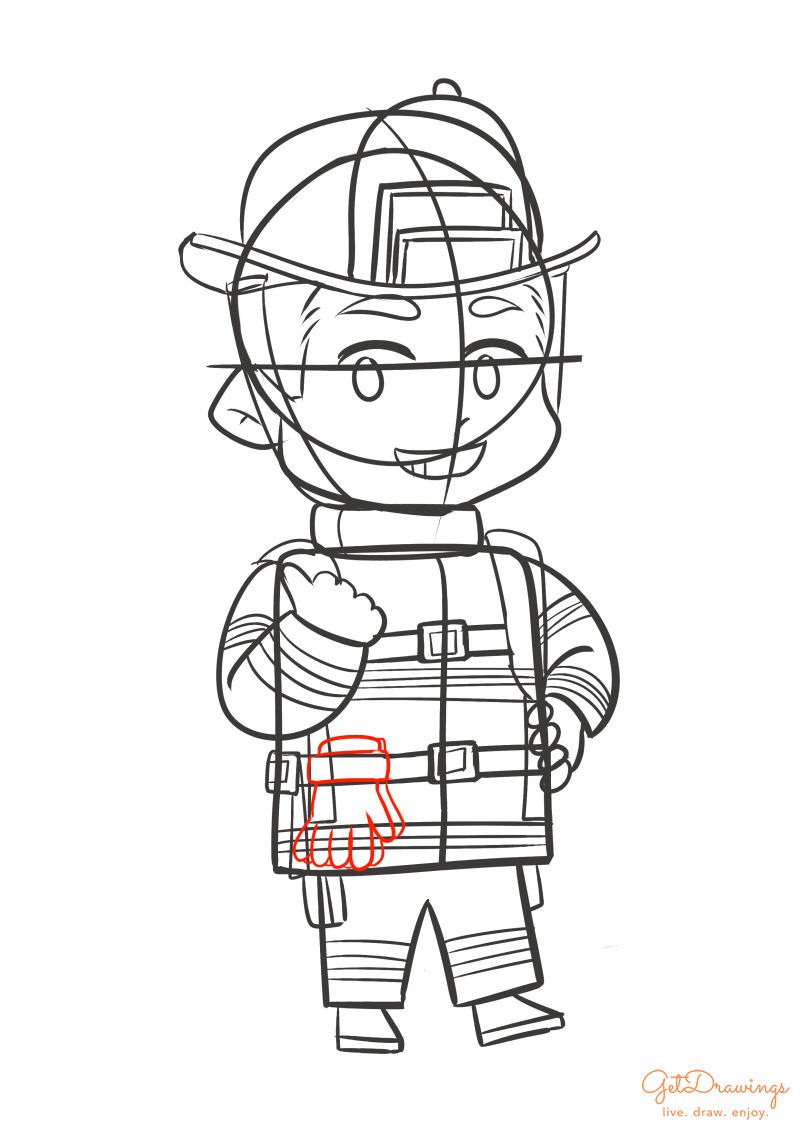
Step 21 Don’t forget to erase the guidelines and Voila! You’ve finished drawing a firefighter!

In drawing firefighter, the hard part would be drawing each detail of the costume. Therefore, drawing guideline at first is an important step. It is going to be hard at first if you’re not used to drawing. Since no one can be a good artist at their first attempt. But as long as you keep practicing in drawing, you’ll be good in no time.
