How to Draw a Reindeer
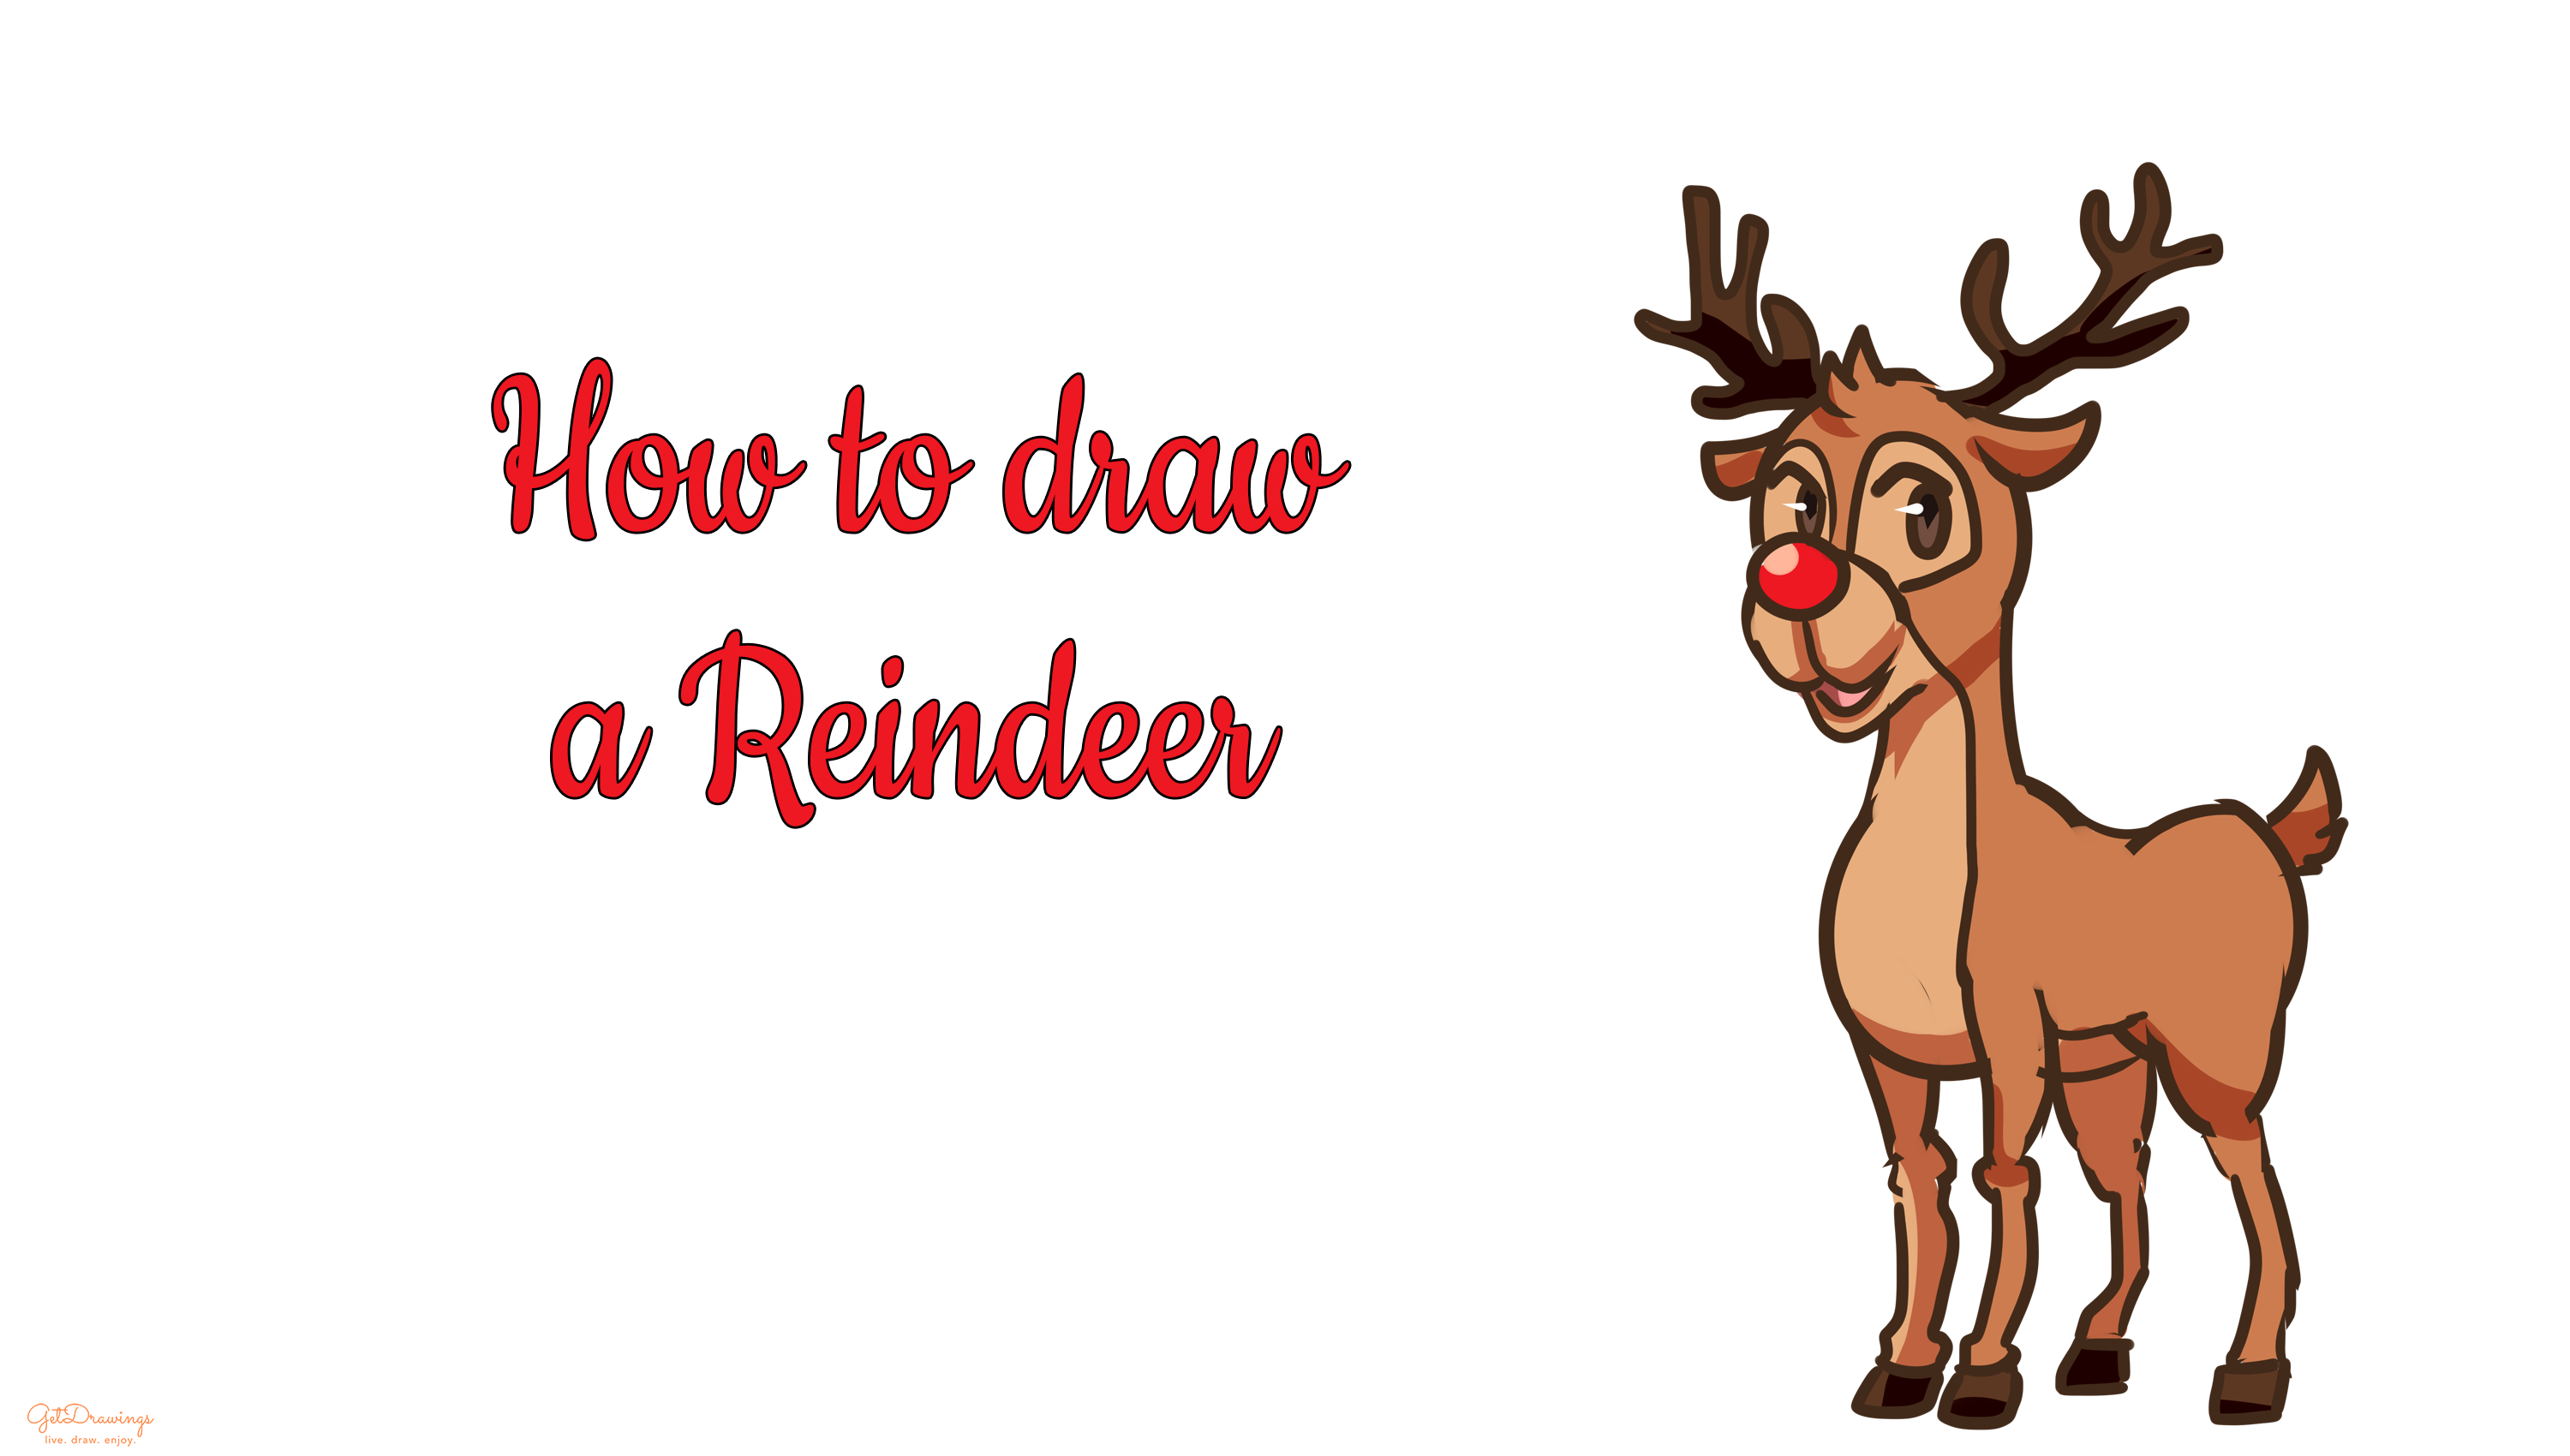
There’s another creature that usually appear with Santa Claus during Christmas. It’s none other than Santa Claus’ Reindeer. One of the known reindeers is Rudolph the Red-Nosed Reindeer. It is depicted as the ninth and youngest of Santa’s Reindeer with its red nose to lead the reindeer team and guide Santa’s sleigh on Christmas eve. Therefore, if you want to draw a Reindeer, you can follow my instructions. Prepare a paper, a pencil, and an eraser. Now we’re ready to draw!
Steps:
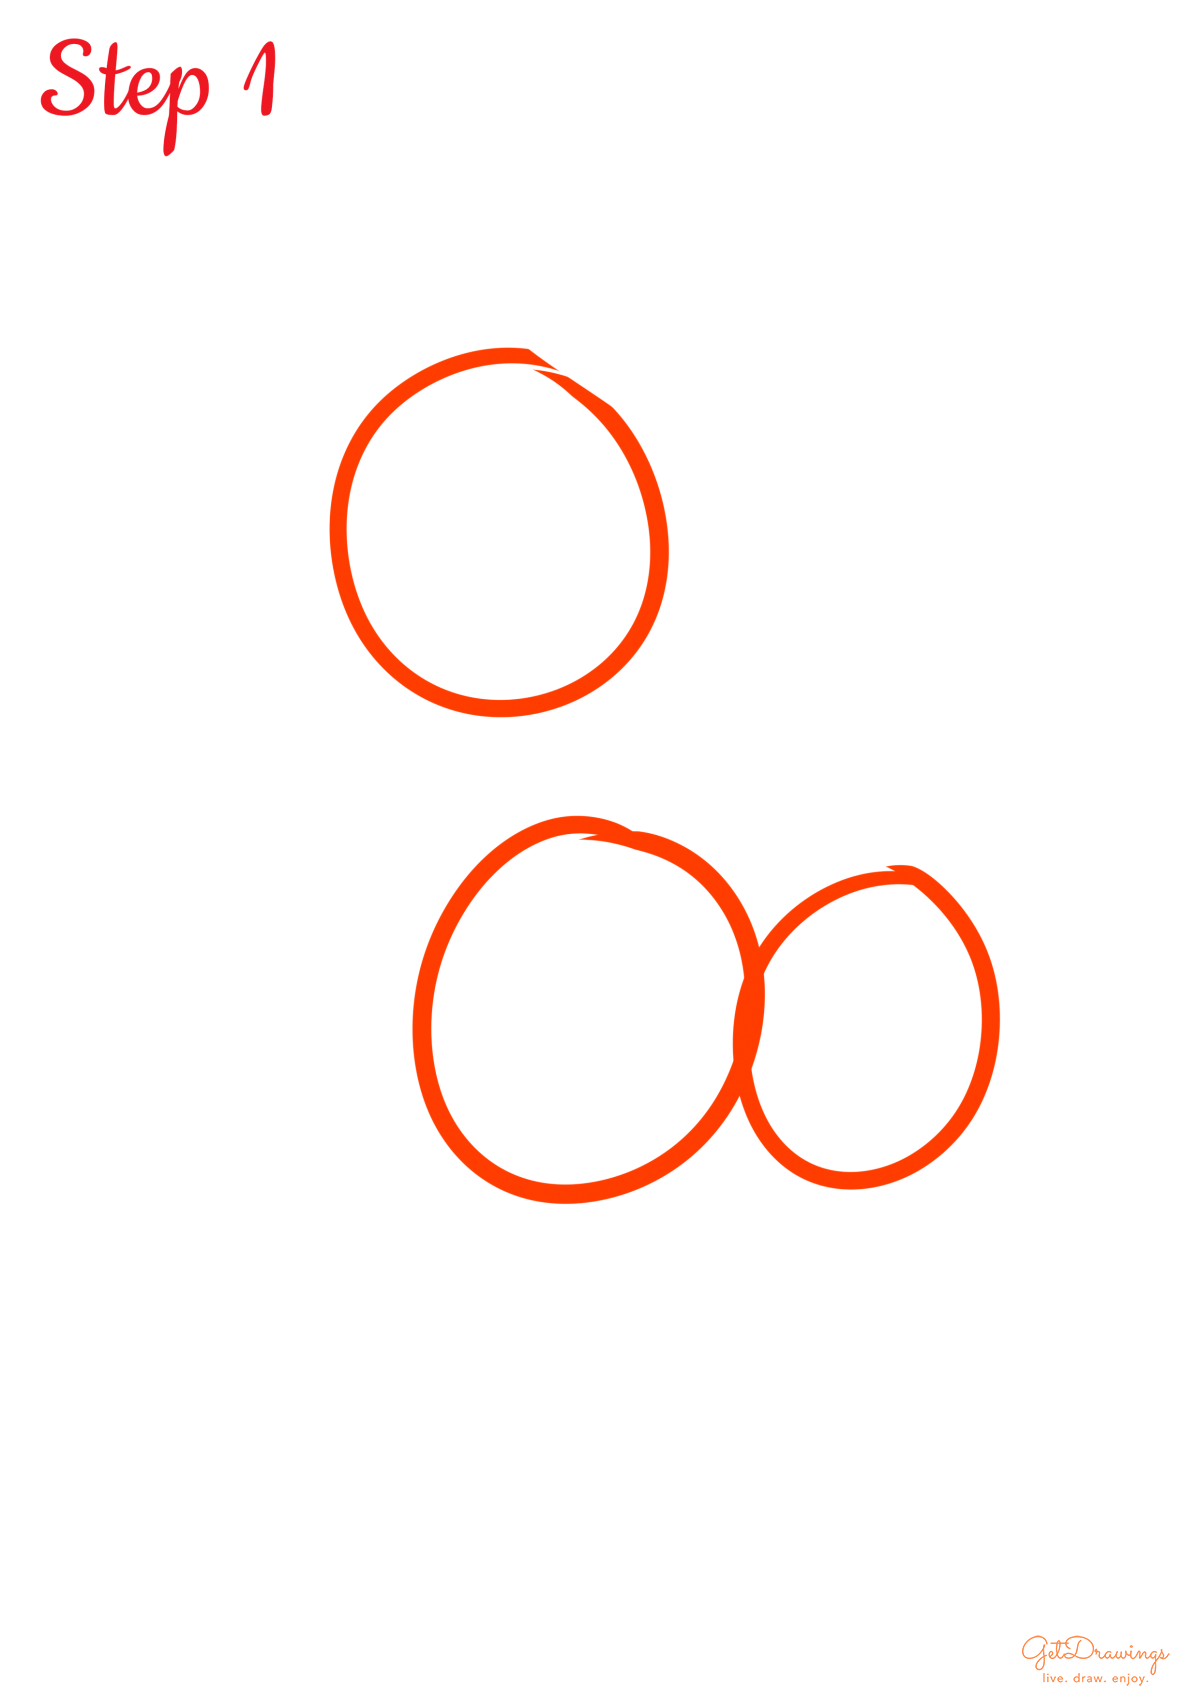
Step 1: First of all, we’ll start by drawing the guidelines. The purpose of guidelines is to help you estimate the size and to guide you in drawing the rest. Therefore, we’re going to draw from top to bottom. Therefore, we need to start drawing three circles at first that consist of one circle above two circles below. The circles on the lower part crossed each other to resemble the body guidelines.
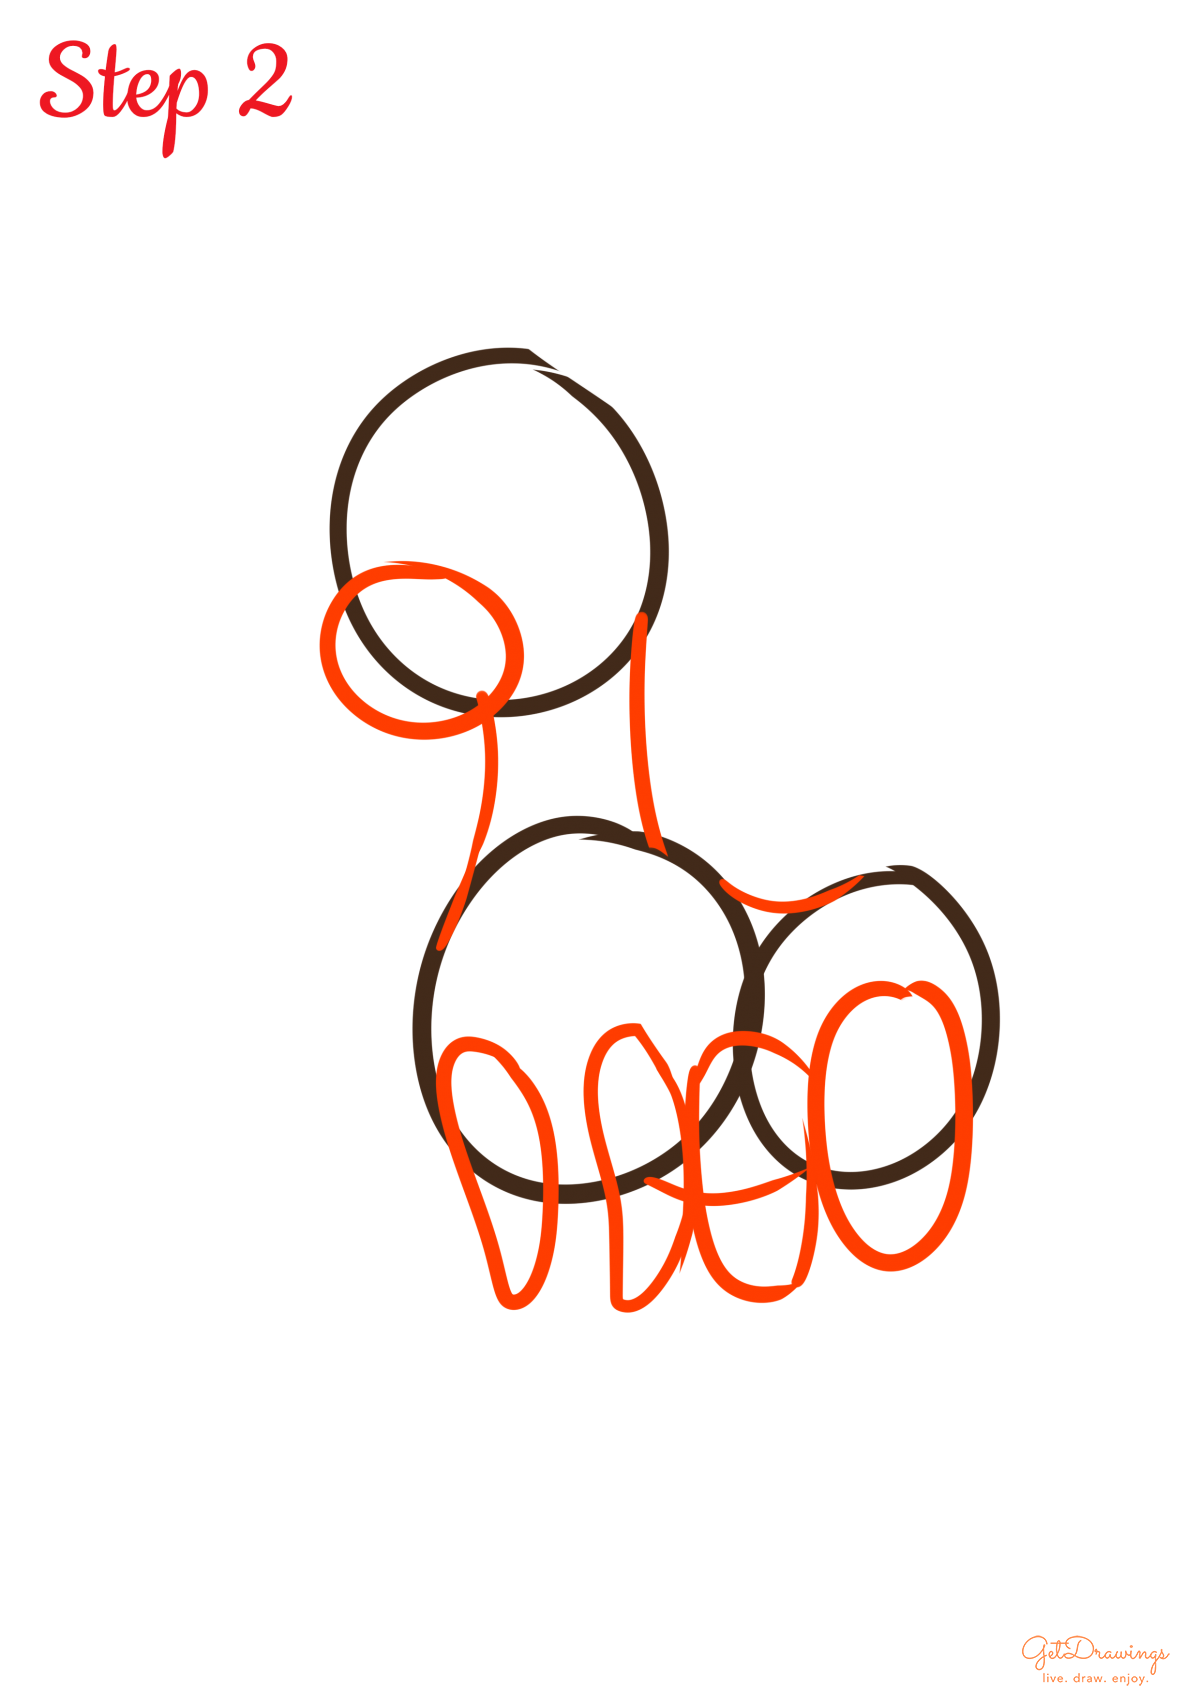
Step 2: Moving on to the next step. To make the snout, neck, body, and the legs, you can start from the snout by drawing a small circle on the lower part of the head guideline. Then, moving on to the neck by adding two uneven lines below the head. Continue with the body that needs to be connected, add a horizontal curve on top of two circles for the body guidelines. After that, draw the front legs by creating two narrow chicken-breast-like shape on the left-hand side of the two circles below. Then, lastly add two narrow ovals next to the previous step to create back legs.
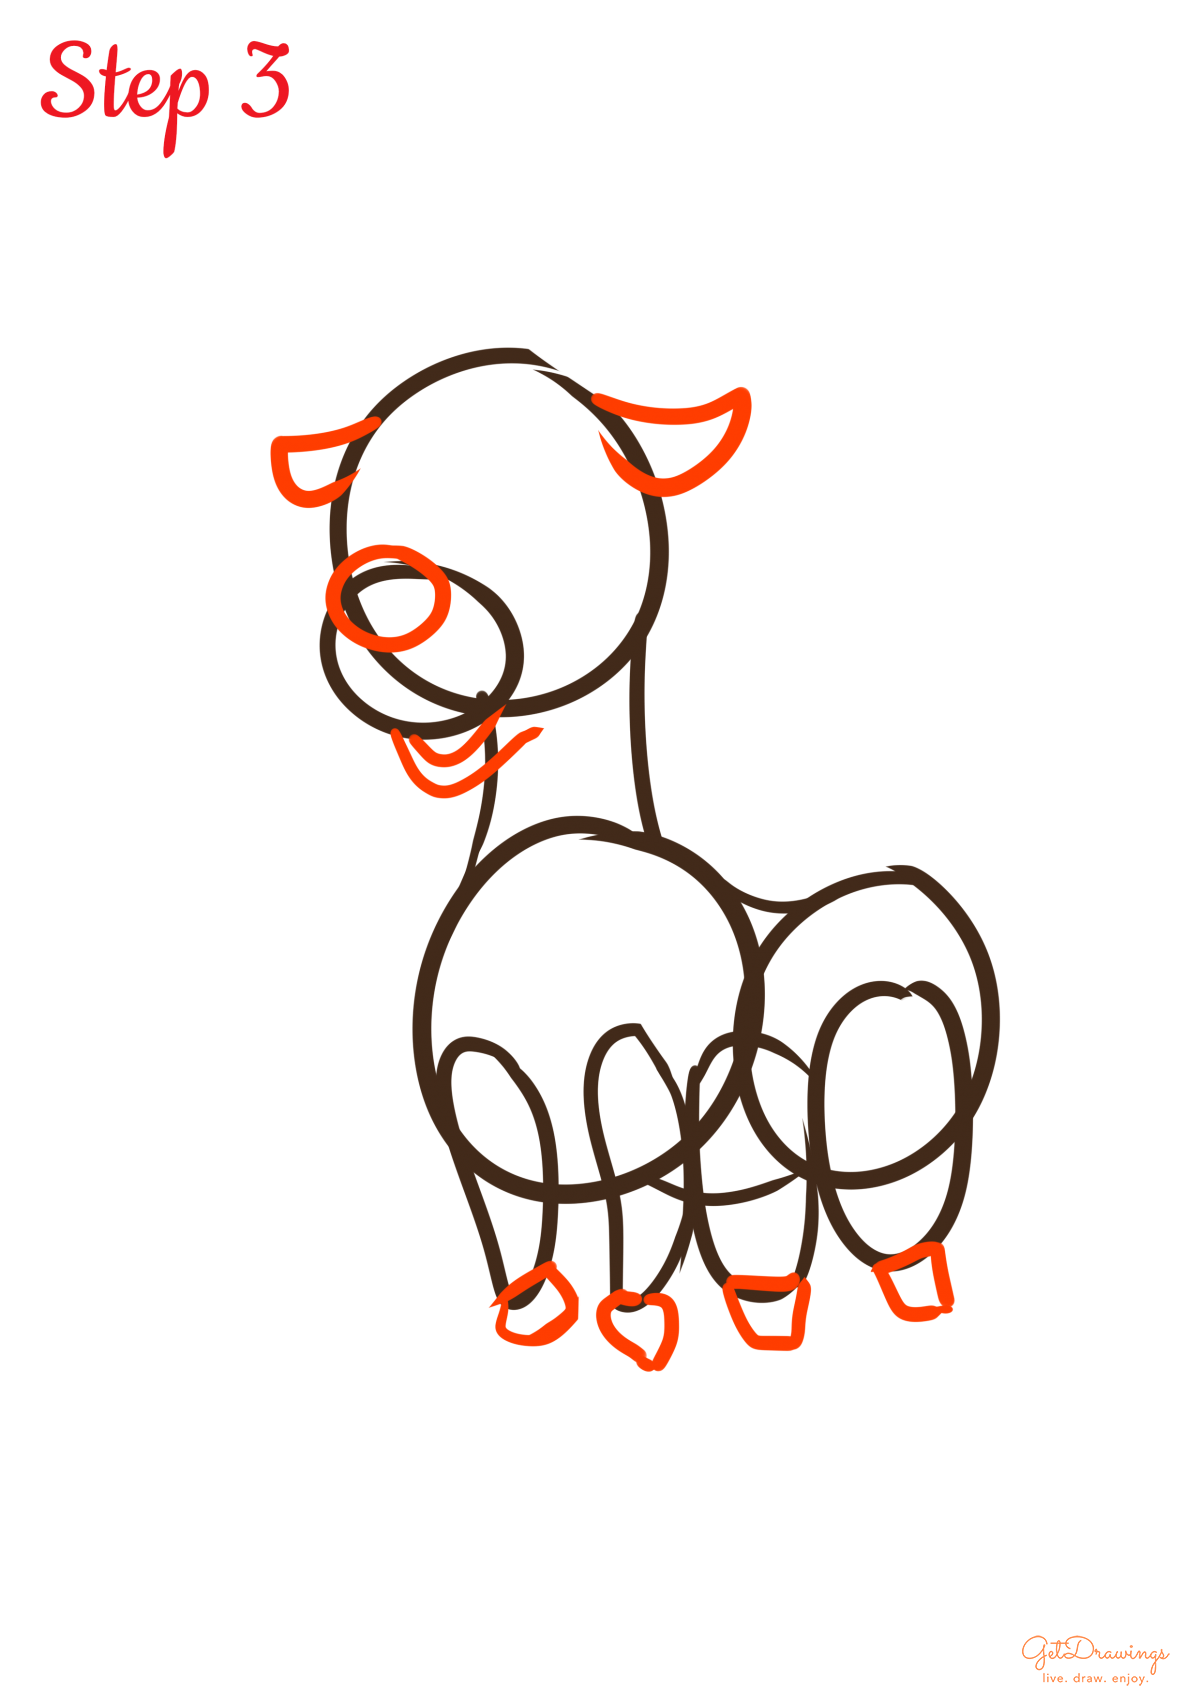
Step 3: After the previous step, we’ll continue drawing the detail of the head and continuing a bit of the legs. Now create its ears by adding two small leaf like on the head guidelines. Next, add the nose by adding more smaller circle on the snout and add the mouth with two curved lines below it. Then, draw small uneven shapes (see picture to better understand) below the previous legs guideline to create the Reindeer’s joints.
Step 4: After that, we can start drawing the eyes, several pointed furs and legs again. Start by the pointed furs on top of the head by creating several curved lines, making the fur pointed out. Then, add the tail by also creating the same shape as the previous one. For the eyes, you can create two arches on top of the snout and add the cornea by adding two narrow ovals below it. Create uneven lines (see picture) for the legs because reindeer tend to have skinny legs on the lower part.

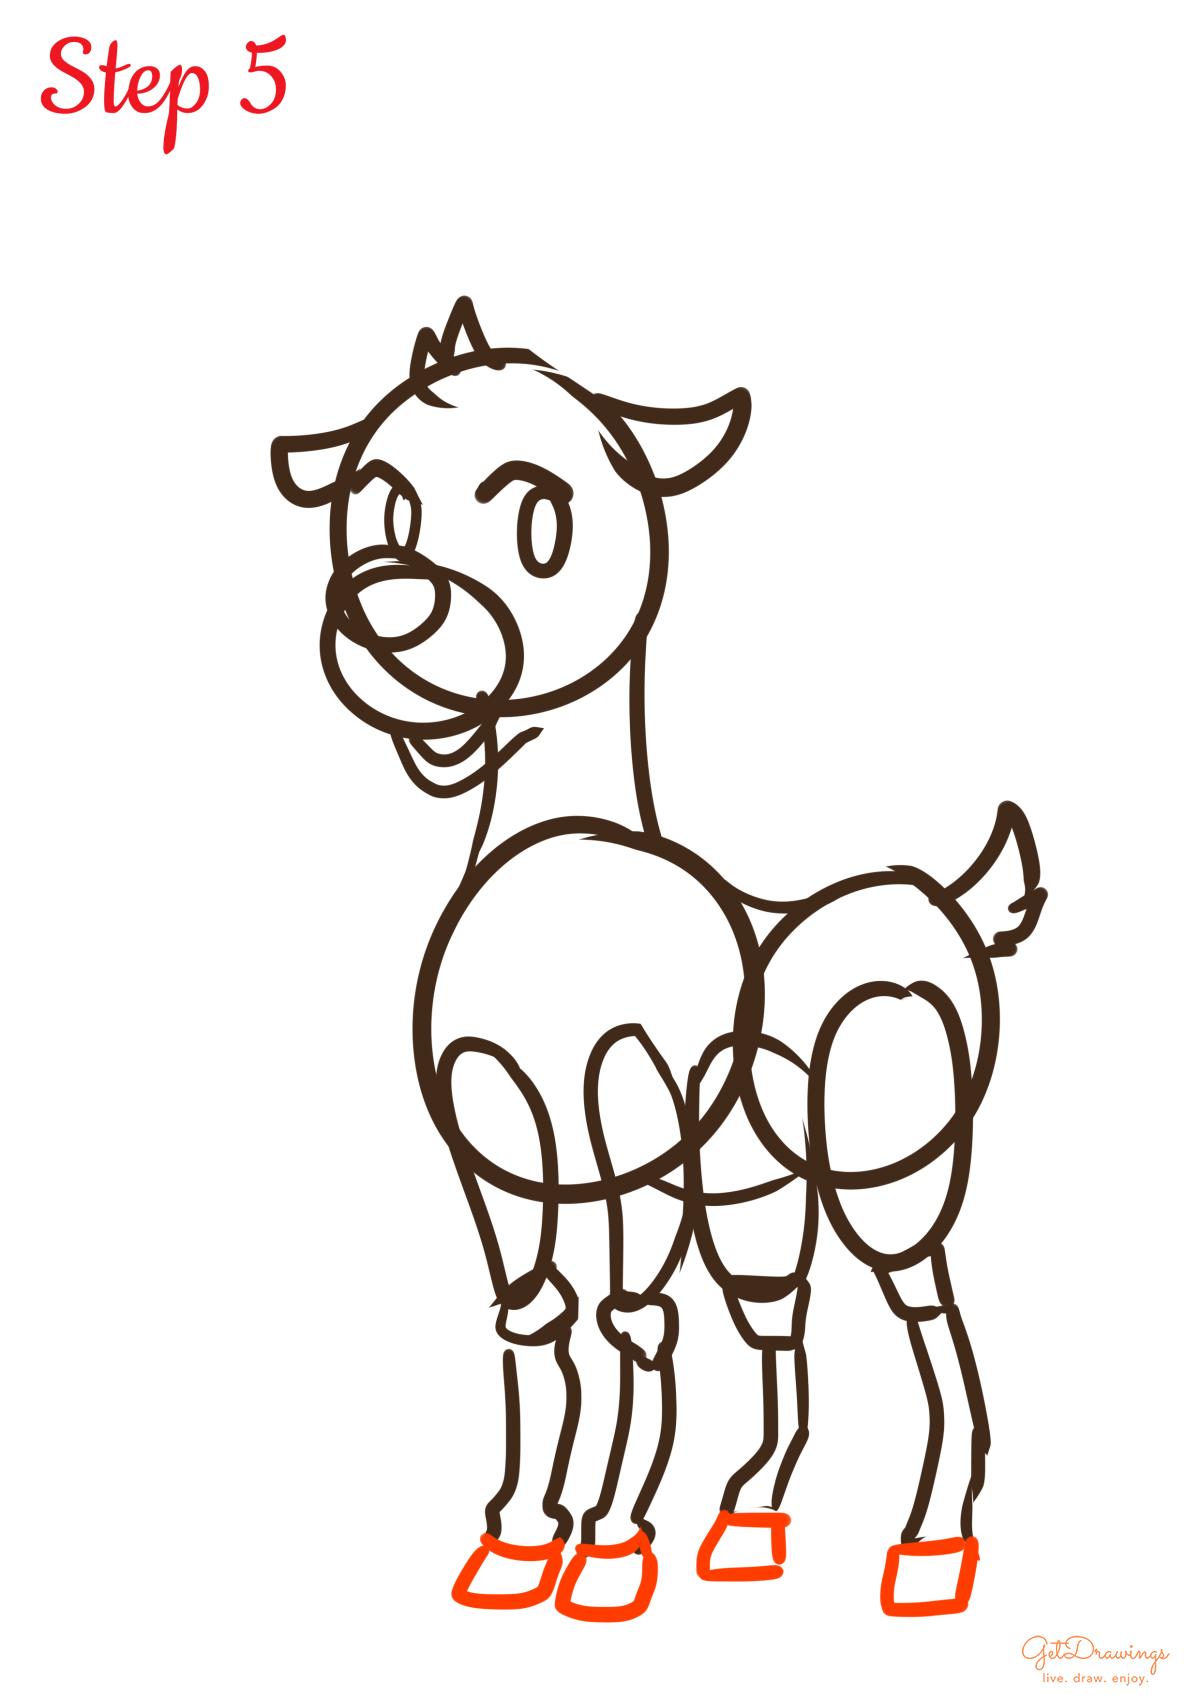
Step 5: Now we can continue with the previous part, which is the hooves by adding uneven rectangles below the leg and we’re finished with the legs!
Step 6: Then, we can continue to create the reindeer’s horn by creating uneven lines that resemble tree branches and create two for each sides of the head. Moving on, complete the snout by adding two curved lines on the snout (see picture to better understand).

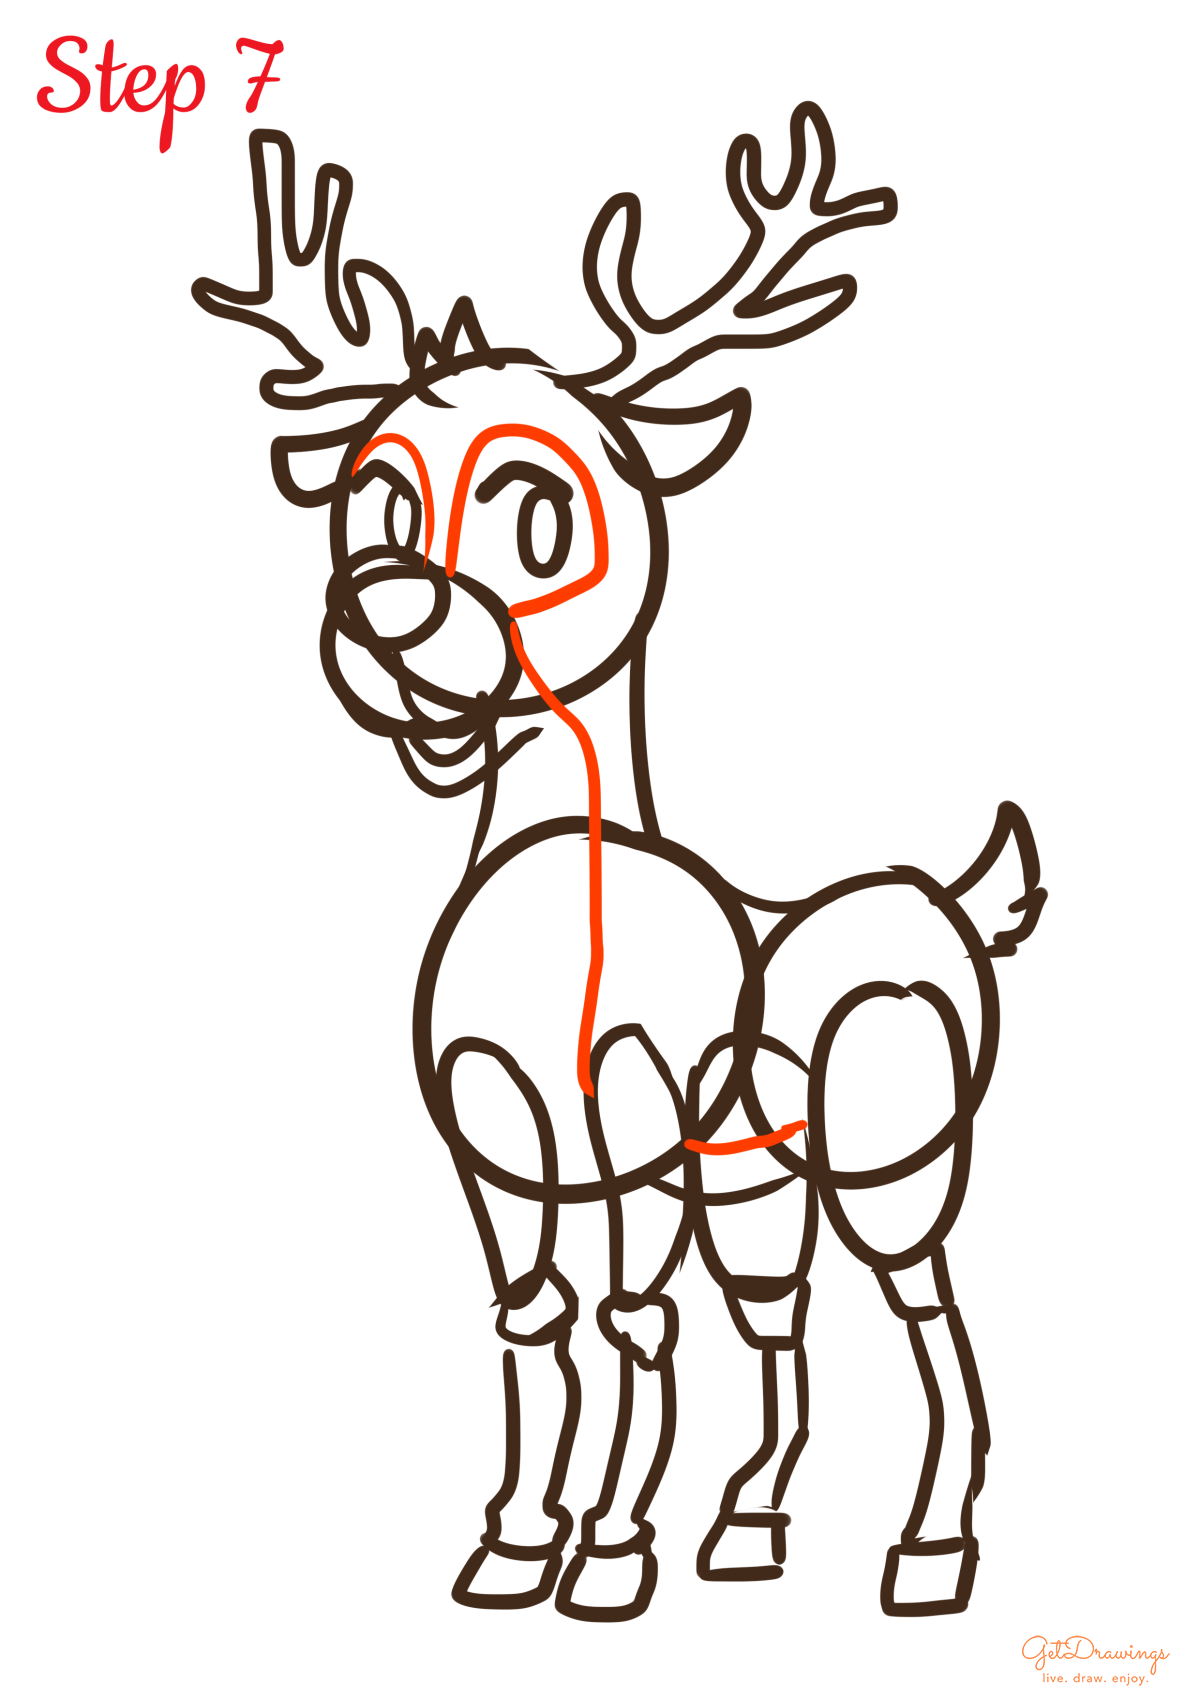
Step 7: Finally, we can start drawing the details. Start from the face, create two curved lines to set a line between two color of Reindeer fur. Then, continue the line from the neck until the body (see picture).
Step 8: Lastly, If there’s a line that intersecting each other, this is the time to erase it. To see your Reindeer clearly, you’ll need clean lines. Voila! You’ve finished drawing a Reindeer!
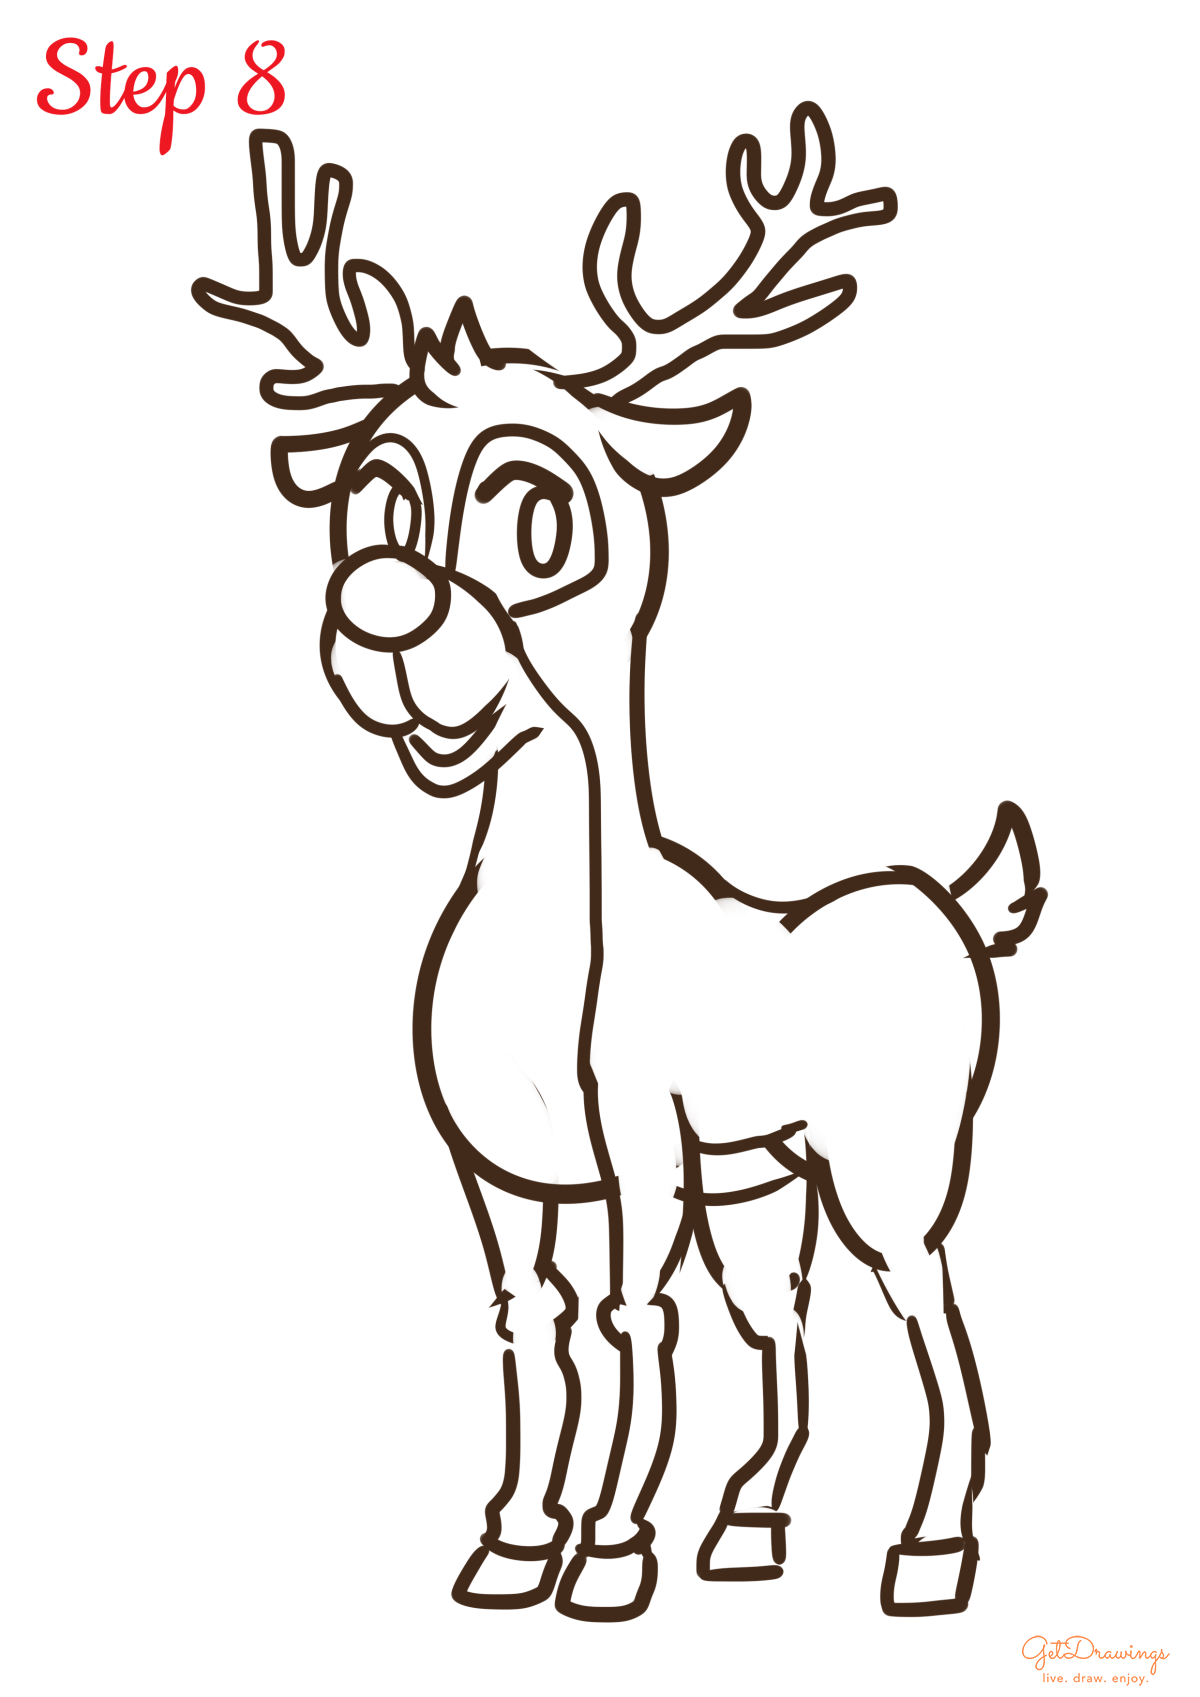

Since you’re drawing a Reindeer, you need to look at the actual reference of what you’re going to draw. It is important because drawing animal’s form won’t be smooth or symmetrical. Even if it’s symmetrical, the form will still be uneven. You’ll need keen eyes and a lot of practice so you can make your drawing perfect. Good luck!
